crwdns2915892:0crwdne2915892:0
Curious about the inner workings of your food steamer? Want to identify a problem with your device? Start here, with a disassembly guide for the Oster CKSTSTMD5-W Double Tiered Food Steamer.
It highlights the disassembly of the electrical heating components of the steamer. For this guide, you will need a phillips screwdriver, scissors, and a ratchet with a 7mm socket. We recommend using the iFixit screwdriver with the J1 tip.
This guide is not difficult and can be accomplished by all experience levels. Make sure the device is unplugged from the wall and has not been in use for several hours before disassembling - this will ensure there are no hazards to your body and face.
crwdns2942213:0crwdne2942213:0
-
-
Remove the plastic steamer tiers and make sure the device is unplugged.
-
-
-
Flip the device upside down so that the sticker is facing upwards.
-
Using your hands, carefully pry out the four rubber feet from each of the corners.
-
-
-
Using the JIS #1 screwdriver, remove four 12 mm screws from the four holes.
-
-
-
Once the four screws are removed, lift the bottom of the device off of the frame.
-
-
-
Use a pair of scissors to cut the zip tie binding the blue and brown wires together.
-
-
-
Using a socket wrench with a 7 mm bit, unscrew the nut from the center of the metal ring.
-
-
-
Remove the nut and the two washers from the center bolt.
-
-
-
Lift off the metal brace from the bolt in the center of the device.
-
-
-
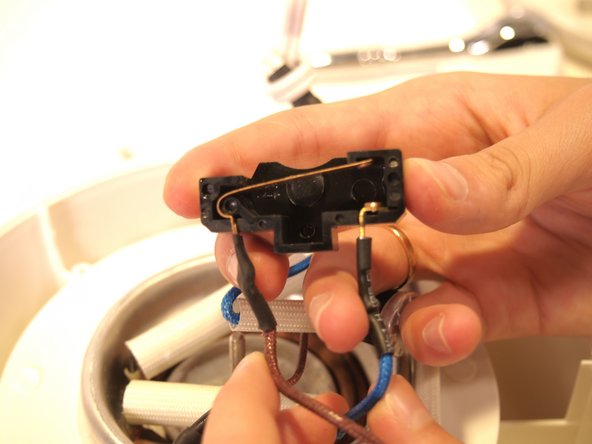
From the center of the device, carefully grab the blue wire and lift the thermal fuse from its socket.
-
-
-
Using your hands, carefully lift the wires over the center bolt so that they are out of the way.
-
-
-
-
Using your index finger, carefully pry the metal sheeting out from under the wires.
-
-
-
Using the JIS #1 screwdriver, remove the two 12 mm screws from the left side of the device.
-
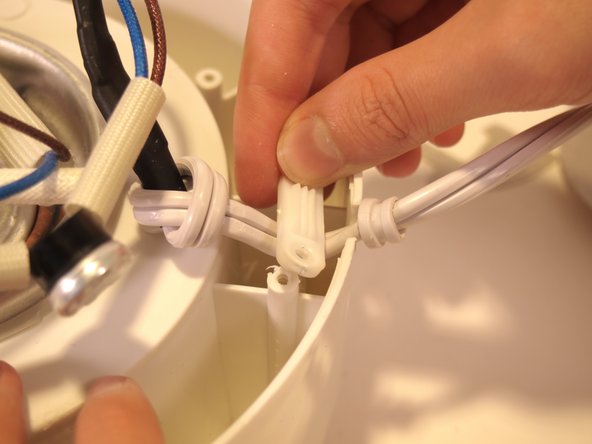
Lift off the white plastic brace.
-
-
-
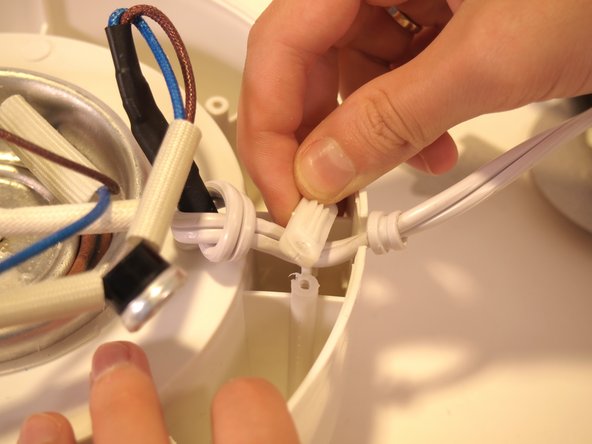
Lift the white power cord out of its socket.
-
-
-
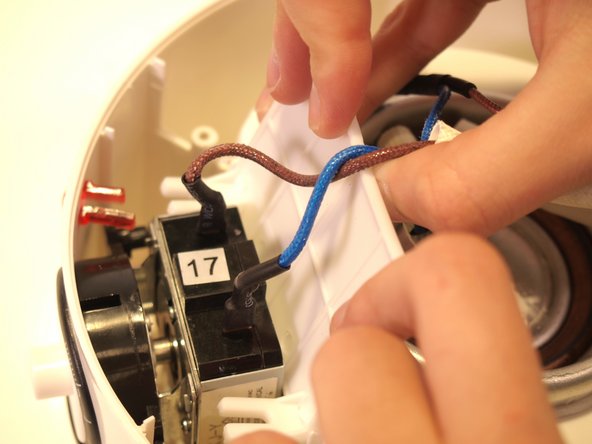
On the left-hand side of the device, carefully remove the indicator light from its place next to the timer by pulling on the heat protector covering the brown wire.
-
-
-
Using the JIS #1 screwdriver, remove the two 12 mm screws attached on each side of the timer.
-
-
-
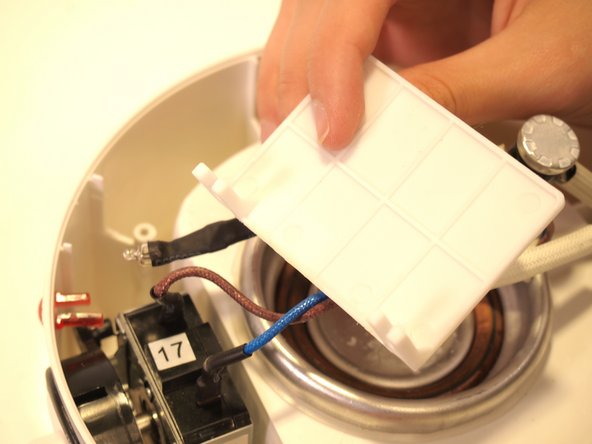
Using your hands, carefully lift the white plastic barrier out of the device from the right side of the timer.
-
-
-
Rotate the device so that the dial faces you.
-
Using the plastic opening tool, pry the white dial out of the timer socket.
-
-
-
Pull the white dial the rest of the way out of the socket.
-
-
-
Using the JIS #1 screwdriver, remove the two 12 mm screws from the top and bottom of the timer socket.
-
-
-
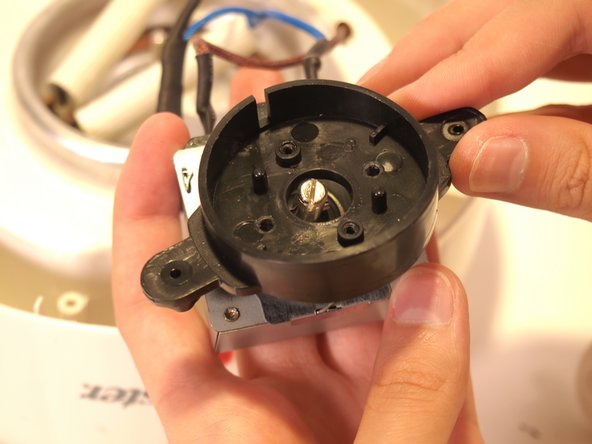
Using your fingers, pry out the black timer socket from the front hole.
-
-
-
Using your hands, carefully lift the timer out of the socket and away from the device.
-
-
-
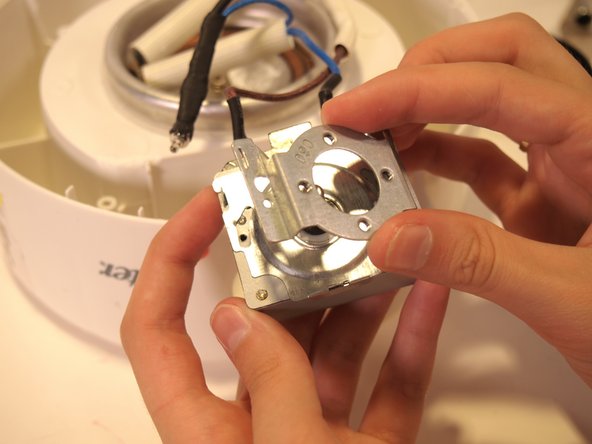
Using the JIS #1 screwdriver, remove the two 4.3 mm screws from the right and left side of the timer.
-
Using your hands, lift off the black plastic cover.
-
-
-
Using the JIS #1 screwdriver, remove the two 4.3 mm screws from the right and left side of the timer.
-
-
-
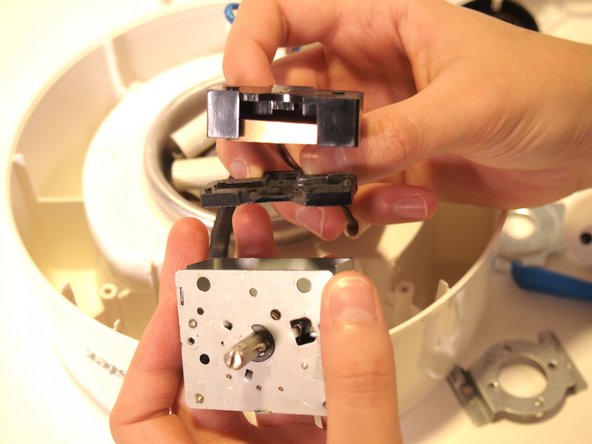
Using the plastic opening tool, bend the 3 metal braces towards the outside of the timer so that the metal fits through the slots.
-
-
-
Lift the silver cover off of the timer.
-
-
-
Lift the metal silver plate off of the timer.
-
-
-
Using the JIS #1 screwdriver, remove the single 4.3mm screw from the top center of the timer.
-
-
-
Lift the black plastic casing out from in between the front and back of the timer.
-
-
-
Rotate the timer 90 degrees to the left so that you can see it from the side.
-
Lift the silver back casing off of the timer.
-


To reassemble your device, follow these instructions in reverse order.
crwdns2935103:0crwdne2935103:0
crwdns2935287:0crwdne2935287:0

Tufts University School of Engineering, Team 1-6, Bell Fall 2021 crwdns2935289:0Tufts University School of Engineering, Team 1-6, Bell Fall 2021crwdne2935289:0
TUFTS-BELL-F21S1G6
crwdns2931471:02crwdne2931471:0
crwdns2935297:02crwdne2935297:0