crwdns2933423:0crwdne2933423:0
crwdns2947577:0crwdnd2947577:0crwdne2947577:0

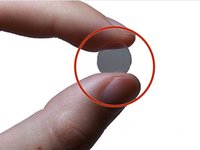
Oregon Scientific RM318PA Lens Replacement

crwdns2942213:0crwdne2942213:0

    1. Oregon Scientific RM318PA Lens Replacement, A/C Adapter: crwdns2935265:01crwdnd2935265:01crwdnd2935265:03crwdne2935265:0 Oregon Scientific RM318PA Lens Replacement, A/C Adapter: crwdns2935265:01crwdnd2935265:02crwdnd2935265:03crwdne2935265:0 Oregon Scientific RM318PA Lens Replacement, A/C Adapter: crwdns2935265:01crwdnd2935265:03crwdnd2935265:03crwdne2935265:0
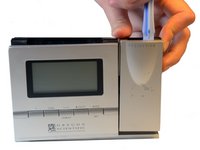
      • Hold clock so the screen is facing away from you.

      • Using your thumbs, push up on battery cover to remove.

      • With your other hand, pull down on the A/C Adapter jack to remove.

      crwdns2952109:0crwdne2952109:0

      crwdns2917038:0crwdne2917038:0

    2. Oregon Scientific RM318PA Lens Replacement, Batteries: crwdns2935265:02crwdnd2935265:01crwdnd2935265:01crwdne2935265:0
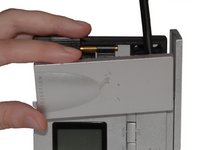
      • Remove batteries by pushing a battery toward the spring.

      • Lift battery out at an angle. Repeat with second battery.

      crwdns2952109:0crwdne2952109:0

      crwdns2917038:0crwdne2917038:0

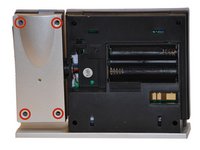
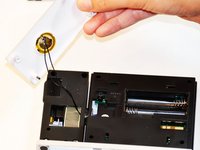
    3. Oregon Scientific RM318PA Lens Replacement, Projection Arm: crwdns2935265:03crwdnd2935265:01crwdnd2935265:02crwdne2935265:0 Oregon Scientific RM318PA Lens Replacement, Projection Arm: crwdns2935265:03crwdnd2935265:02crwdnd2935265:02crwdne2935265:0
      • Use a Phillips #00 Screwdriver to remove the four (4) screws from the back of the projection arm.

      • Once screws are removed, lift the back up and off of the projection arm.

      crwdns2952109:0crwdne2952109:0

      crwdns2917038:0crwdne2917038:0

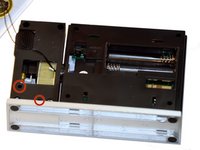
    4. Oregon Scientific RM318PA Lens Replacement, Screws Projection Arm: crwdns2935265:04crwdnd2935265:01crwdnd2935265:02crwdne2935265:0 Oregon Scientific RM318PA Lens Replacement, Screws Projection Arm: crwdns2935265:04crwdnd2935265:02crwdnd2935265:02crwdne2935265:0
      • Use a Phillips #00 Screwdriver to remove two (2) screws from back of projection arm.

      crwdns2952109:0crwdne2952109:0

      crwdns2917038:0crwdne2917038:0

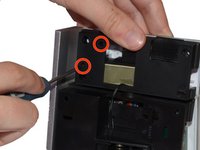
    5. Oregon Scientific RM318PA Lens Replacement, Front of the Projection Arm: crwdns2935265:05crwdnd2935265:01crwdnd2935265:02crwdne2935265:0 Oregon Scientific RM318PA Lens Replacement, Front of the Projection Arm: crwdns2935265:05crwdnd2935265:02crwdnd2935265:02crwdne2935265:0
      • Use a Plastic Opening Tool to pry open the front of the projection arm casing. Start at the top of the projection arm.

      • Once top is partially open, use a Spudger to pry at the side of the projection arm.

      crwdns2952109:0crwdne2952109:0

      crwdns2917038:0crwdne2917038:0

    6. Oregon Scientific RM318PA Lens Replacement, Projection Beam: crwdns2935265:06crwdnd2935265:01crwdnd2935265:03crwdne2935265:0 Oregon Scientific RM318PA Lens Replacement, Projection Beam: crwdns2935265:06crwdnd2935265:02crwdnd2935265:03crwdne2935265:0 Oregon Scientific RM318PA Lens Replacement, Projection Beam: crwdns2935265:06crwdnd2935265:03crwdnd2935265:03crwdne2935265:0
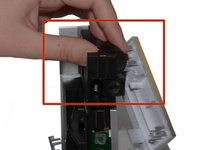
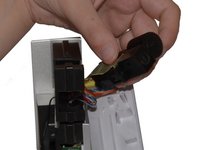
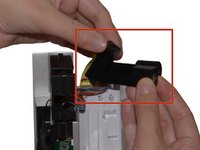
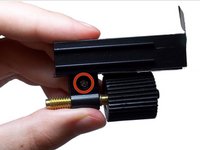
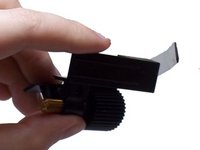
      • Turn the clock on its side. Slide the focus wheel forward with your thumb.

      • The Projection Beam and Focus Wheel Component should now be free of Projection Arm.

      • Hold the Component in one hand and lift the Projection Beam up and away from the Focus Wheel.

      crwdns2952109:0crwdne2952109:0

      crwdns2917038:0crwdne2917038:0

    7. Oregon Scientific RM318PA Lens Replacement, The Lens: crwdns2935265:07crwdnd2935265:01crwdnd2935265:01crwdne2935265:0
      • The Lens is attached to the Focus Knob and is now accessible for replacement purposes.

      crwdns2952109:0crwdne2952109:0

      crwdns2917038:0crwdne2917038:0

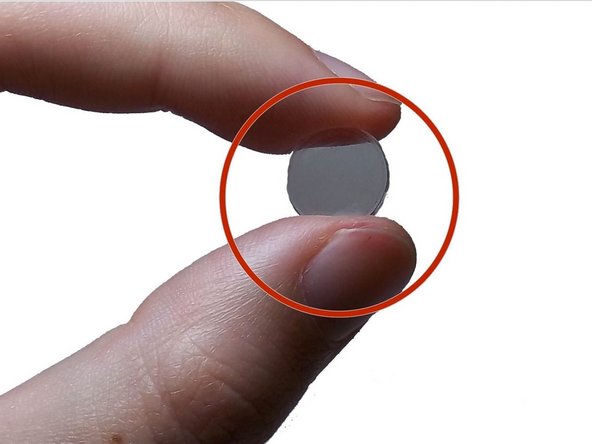
    8. Oregon Scientific RM318PA Lens Replacement, Tape: crwdns2935265:08crwdnd2935265:01crwdnd2935265:01crwdne2935265:0
      • Apply tape to the lens for safe removal and prevention of injury.

      crwdns2952109:0crwdne2952109:0

      crwdns2917038:0crwdne2917038:0

    9. Oregon Scientific RM318PA Lens Replacement, Focus Knob: crwdns2935265:09crwdnd2935265:01crwdnd2935265:02crwdne2935265:0 Oregon Scientific RM318PA Lens Replacement, Focus Knob: crwdns2935265:09crwdnd2935265:02crwdnd2935265:02crwdne2935265:0
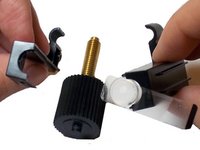
      • Detach the focus knob from the internal casing of the lens by removing the screw from the base of the focus knob grip.

      • Pry apart the pieces of casing holding the focus knob in place and remove the knob.

      crwdns2952109:0crwdne2952109:0

      crwdns2917038:0crwdne2917038:0

    10. Oregon Scientific RM318PA Lens Replacement, Internal Casing: crwdns2935265:010crwdnd2935265:01crwdnd2935265:03crwdne2935265:0 Oregon Scientific RM318PA Lens Replacement, Internal Casing: crwdns2935265:010crwdnd2935265:02crwdnd2935265:03crwdne2935265:0 Oregon Scientific RM318PA Lens Replacement, Internal Casing: crwdns2935265:010crwdnd2935265:03crwdnd2935265:03crwdne2935265:0
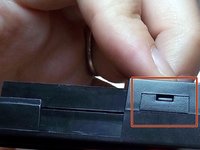
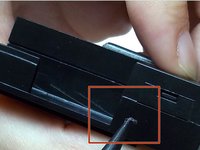
      • Insert the spudger into the opening above the hinge on the side of the casing.

      • Press down firmly until the case opens.

      crwdns2952109:0crwdne2952109:0

      crwdns2917038:0crwdne2917038:0

    11. Oregon Scientific RM318PA Lens Replacement, Lens Removal: crwdns2935265:011crwdnd2935265:01crwdnd2935265:02crwdne2935265:0 Oregon Scientific RM318PA Lens Replacement, Lens Removal: crwdns2935265:011crwdnd2935265:02crwdnd2935265:02crwdne2935265:0
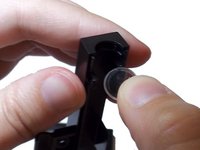
      • Pull apart the casing and gently slide lens from pocket.

      • Be sure to replace with a concave lens.

      crwdns2952109:0crwdne2952109:0

      crwdns2917038:0crwdne2917038:0

crwdns2915888:0crwdne2915888:0

To reassemble your device, follow these instructions in reverse order.

crwdns2935221:0crwdne2935221:0

crwdns2935227:0crwdne2935227:0

Maxine Holden

crwdns2935283:010/27/14crwdne2935283:0

500 crwdns2915208:0crwdne2915208:0

crwdns2935297:04crwdne2935297:0

crwdns2947410:01crwdne2947410:0

Hi, I’ve this alarm clock with missing piezo/speaker, can anyone take a picture of the main board showing the pads for it?

Mastto geppetto - crwdns2934203:0crwdne2934203:0 crwdns2950251:0crwdne2950251:0

crwdns2917038:0crwdne2917038:0

crwdns2936625:0crwdne2936625:0:

crwdns2936751:024crwdne2936751:0 5

crwdns2936753:07crwdne2936753:0 31

crwdns2936753:030crwdne2936753:0 118

crwdns2942667:0crwdne2942667:0 3,340