crwdns2915892:0crwdne2915892:0
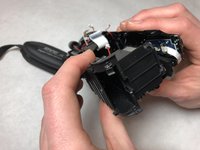
This guide would be useful in the event of a broken, scratched, or cracked lens.
crwdns2942213:0crwdne2942213:0
-
-
Pull the slider labeled open, on the bottom right, to unlock the battery.
-
-
-
Remove the three screws (length 7.7 mm) from the bottom of the outer case using a JIS000 screwdriver.
-
-
-
-
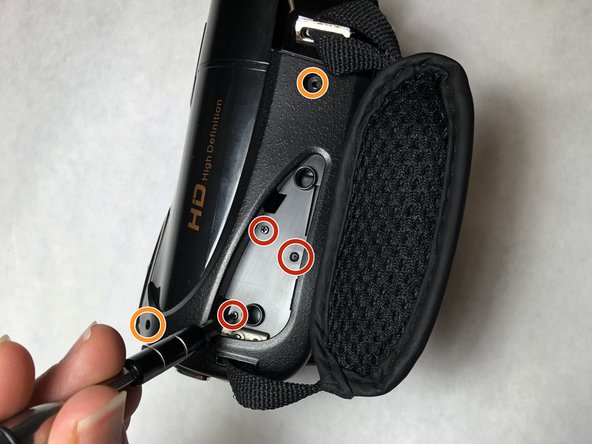
Remove plastic casing hiding screws from the strap side of the casing.
-
Unscrew the three screws (length 4.75 mm) using a PH000 screwdriver.
-
Unscrew the two screws (length 6.4 mm) using a JIS000 screwdriver.
-
-
-
Unscrew the four screws (2.9 mm length) from the screen side of the casing using a JIS000 screwdriver.
-
-
-
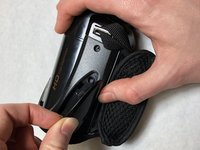
Remove both side casings by gripping the sides with your hands and pulling gently.
-
-
-
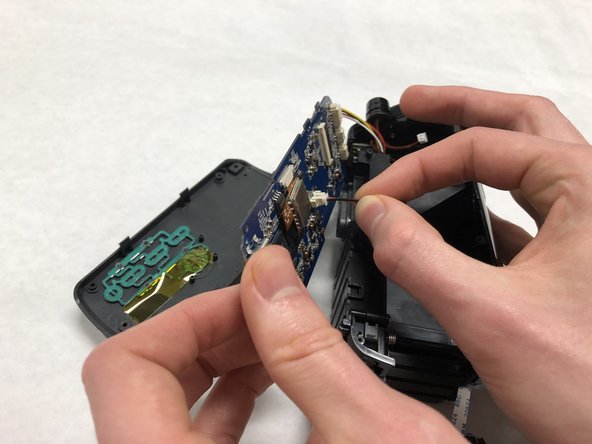
Unscrew the seven screws (length 4.22 mm) from the motherboard using a PH000 screwdriver.
-
Pull out or desolder all connected cords from motherboard.
-
-
-
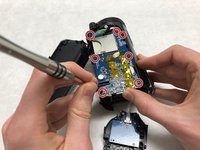
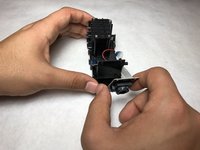
Remove top of the casing to reveal the screws on lens.
-
Unscrew the four screws (size 4.90 mm) using a PH00 screwdriver.
-
-
-
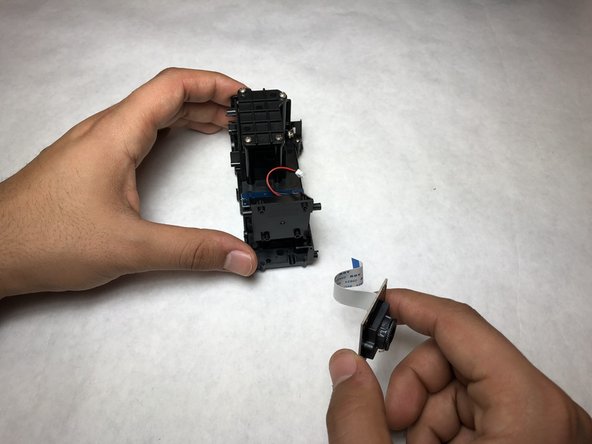
Pull out lens.
-
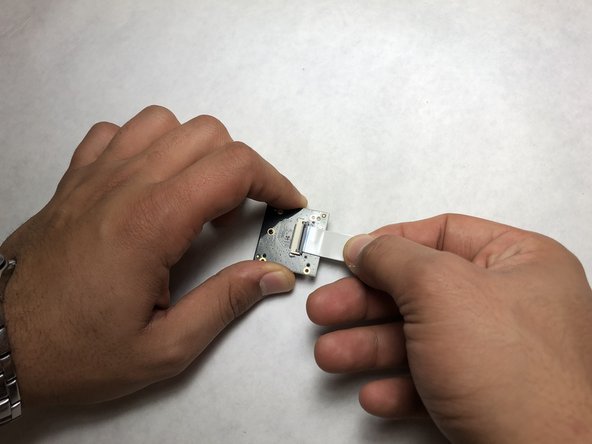
Remove cord from lens.
-


To reassemble your device, follow these instructions in reverse order.
crwdns2935287:0crwdne2935287:0

IUPUI, Team S1-G3, Baechle Fall 2018 crwdns2935289:0IUPUI, Team S1-G3, Baechle Fall 2018crwdne2935289:0
IUPUI-BAECHLE-F18S1G3
crwdns2931471:03crwdne2931471:0
crwdns2935297:03crwdne2935297:0