crwdns2915892:0crwdne2915892:0
This guide will show you how to replace a faulty screen on the Oppo A55s.
-
-
Remove the back cover with heat, if you don't have a heat mat to hand, a hair dryer will do. The device should be hot to the touch.
-
-
-
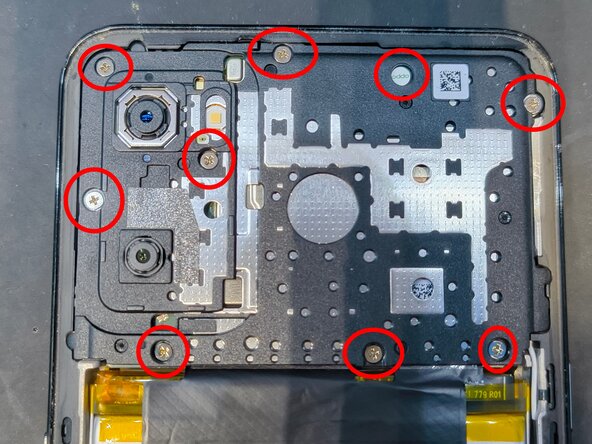
9 Philips head screws cover the main board cover. Remove these and gently remove the main board cover to expose the board connections.
-
-
-
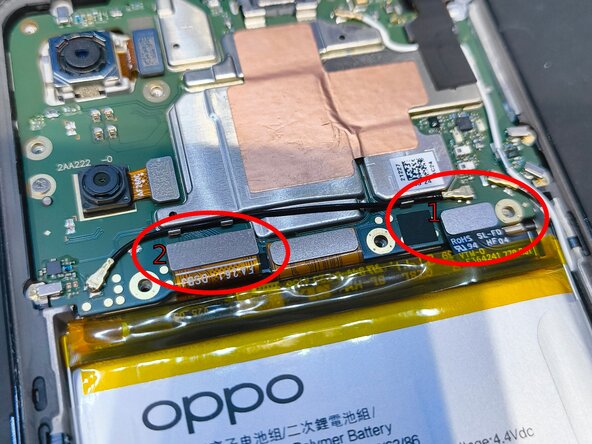
As with all repairs, disconnect the battery (right side) from the main board to avoid any shorting. You can gently bend it away to prevent it reconnecting during repair.
-
Disconnect the screen (left side)
-
Now is a good time to test your replacement screen works.
-
-
-
-
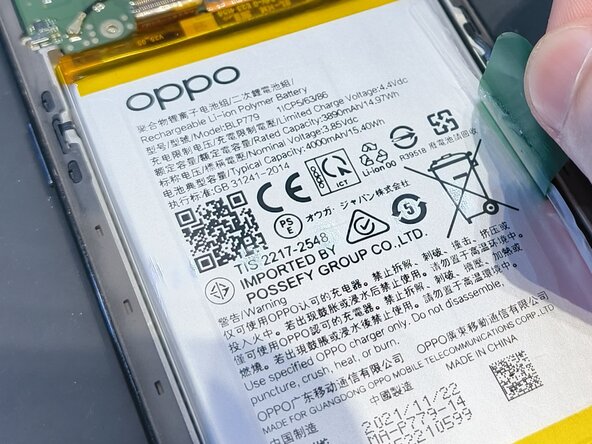
Pull up on the green tape on the battery with your hand to release it from the battery jacket.
-
If you're experiencing difficulty, feel free to heat the device up from the screen side. This will loosen the battery adhesive.
-
Take out the battery jacket and place it on the battery once again.
-
-
-
Heat the screen well to soften the adhesive.
-
Use a suction cup, or insert a thin metal tool or razor blade in between the screen and the housing, gently pry up to release the screen, taking care of any glass that falls out.
-
-
-
Clean off any remaining glass or adhesive on the screen side of the housing.
-
Apply B7000 or some other electronic glue, or a pre-cut adhesive if you have it, to the screen side housing.
-
Place the new screen into the housing, ensuring the screen cable threads properly through the opening where the battery once sat.
-
If using glue, hold the frame and screen together with clamps or rubber bands for at least 30 minutes and allow the glue to cure.
-
-
-
Test the phone to make sure all the functions work.
-
Replace the battery, main frame cover, screws.
-
Remove excess adhesive from the back cover and apply double sided tape or pre-cut adhesive.
-
Re-apply the back cover to the frame.
-
To reassemble your device, follow these instructions in reverse order.
To reassemble your device, follow these instructions in reverse order.


