crwdns2933423:0crwdne2933423:0

Open the housing

crwdns2942213:0crwdne2942213:0

  1. Open the housing, Housing: crwdns2935265:01crwdnd2935265:01crwdnd2935265:02crwdne2935265:0 Open the housing, Housing: crwdns2935265:01crwdnd2935265:02crwdnd2935265:02crwdne2935265:0
    • Never forget: Unplug the machine!

    • Remove all attachments such as the water tank, brewing unit, bean compartment lid, and drip tray. Remove all coffee beans.

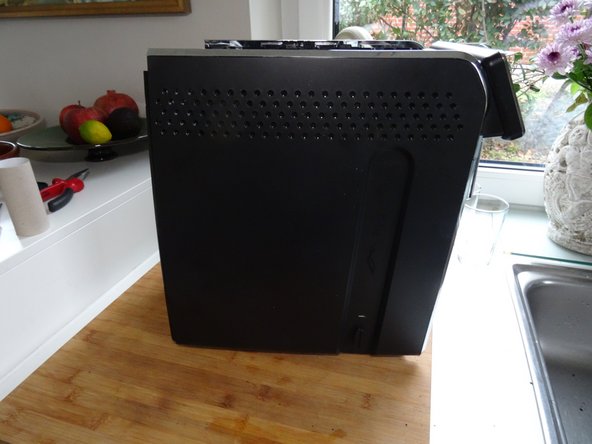
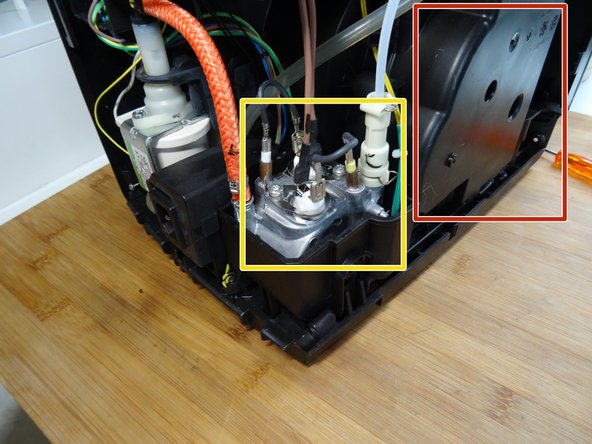
    • Turn the machine over so that the back is facing you. Remove the two Torx T10 screws at the bottom. Pull the back out slightly at the bottom and lift it down.

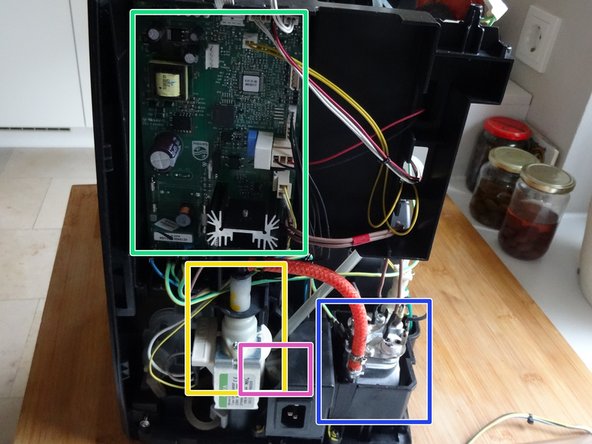
    • Important components are immediately visible:

    • The main circuit board

    • The pump

    • The flow meter

    • The boiler

  2. Open the housing: crwdns2935265:02crwdnd2935265:01crwdnd2935265:02crwdne2935265:0 Open the housing: crwdns2935265:02crwdnd2935265:02crwdnd2935265:02crwdne2935265:0
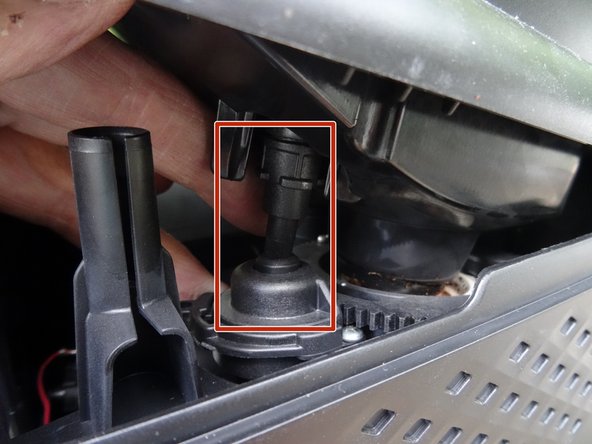
    • Unscrew the Torx T10 screw on the finger guard in the coffee bean compartment.

    • Lift out the finger guard.

    • The screw is especially long.

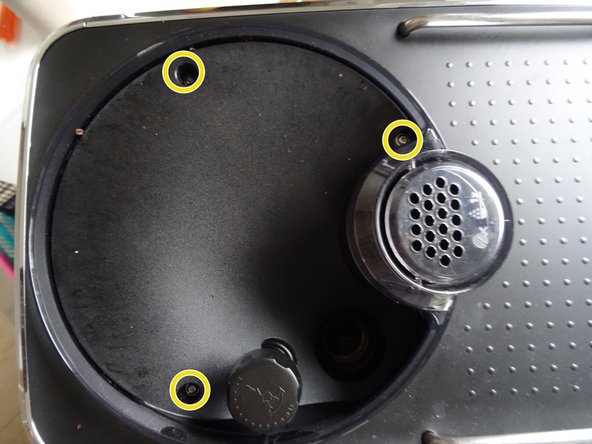
    • Unscrew the three Torx T10 screws in the coffee bean compartment.

  3. Open the housing: crwdns2935265:03crwdnd2935265:01crwdnd2935265:03crwdne2935265:0 Open the housing: crwdns2935265:03crwdnd2935265:02crwdnd2935265:03crwdne2935265:0 Open the housing: crwdns2935265:03crwdnd2935265:03crwdnd2935265:03crwdne2935265:0
    • Lift the upper cover slightly at the rear edge.

    • Then lift the cover completely off.

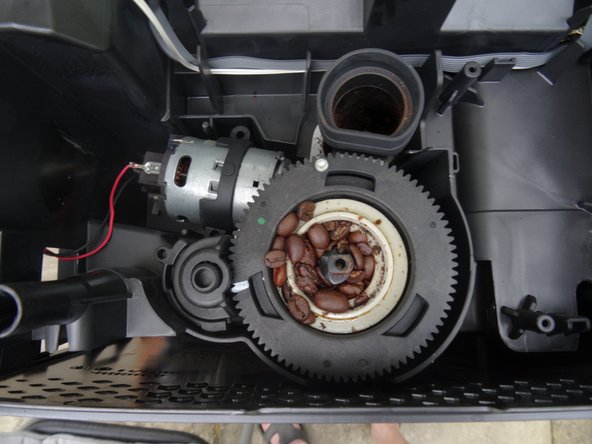
    • When reassembling, make sure that the grinder adjustment is correctly positioned.

    • Figure 3 shows the grinding mechanism, which can now easily be removed.

  4. Open the housing: crwdns2935265:04crwdnd2935265:01crwdnd2935265:03crwdne2935265:0 Open the housing: crwdns2935265:04crwdnd2935265:02crwdnd2935265:03crwdne2935265:0 Open the housing: crwdns2935265:04crwdnd2935265:03crwdnd2935265:03crwdne2935265:0
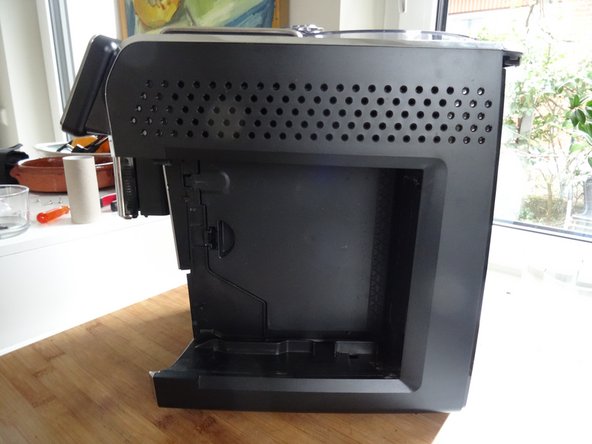
    • Unscrew the two Torx T10 screws at the bottom of the front.

    • Slide the right side panel back slightly and remove it.

    • Slide the left side panel back slightly and remove it.

  5. Open the housing: crwdns2935265:05crwdnd2935265:01crwdnd2935265:02crwdne2935265:0 Open the housing: crwdns2935265:05crwdnd2935265:02crwdnd2935265:02crwdne2935265:0
    • Hier weitere wichtige Bauteile:

    • The boiler

    • Valve block, consisting of four solenoid valves

    • Grinder

    • Drive

crwdns2915888:0crwdne2915888:0

Follow the steps in reverse order to reassemble your device.

crwdns2934873:0crwdne2934873:0

de en

100%

crwdns2934883:0oldturkey03crwdne2934883:0 crwdns2934875:0crwdne2934875:0
crwdns2934877:0crwdne2934877:0 ›

VauWeh

crwdns2935283:010/19/15crwdne2935283:0

261,817 crwdns2915208:0crwdne2915208:0

crwdns2935297:0297crwdne2935297:0

crwdns2915084:0crwdne2915084:0

Repair is War on Entropy crwdns2935289:0Repair is War on Entropycrwdne2935289:0

Community

crwdns2931471:030crwdne2931471:0

crwdns2935297:01,813crwdne2935297:0

crwdns2947412:00crwdne2947412:0

crwdns2917038:0crwdne2917038:0

crwdns2936625:0crwdne2936625:0:

crwdns2936751:024crwdne2936751:0 7

crwdns2936753:07crwdne2936753:0 31

crwdns2936753:030crwdne2936753:0 142

crwdns2942667:0crwdne2942667:0 597