crwdns2915892:0crwdne2915892:0
If you're experiencing issues with your motherboard, use this guide to replace it. Be careful not to damage any connectors or wires in the process of opening up your phone.
crwdns2942213:0crwdne2942213:0
-
-
Remove the SIM tray.
-
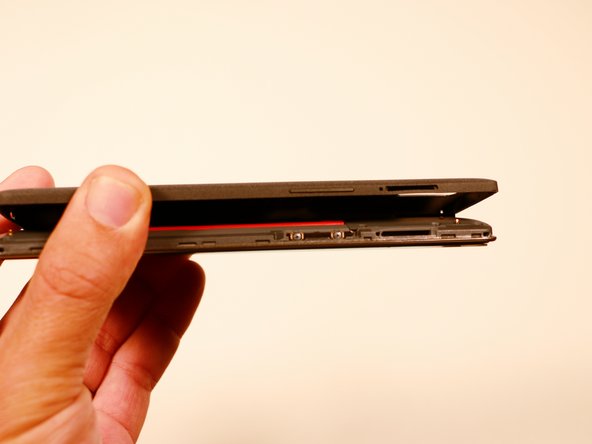
Using a plastic opening tool, carefully separate the back panel from the main body assembly of the phone. Be extra careful around the SIM slot or other weak areas.
-
You may encounter some resistance due to hidden locking clips around the inside edge of the phone. Not to worry; just move in one consistent direction around the phone as opposed to jumping from spot to spot!
-
Top to bottom, left to right, clockwise or counter clockwise, once we make it about half way around the device, the panel is easily removable by hand.
-
-
crwdns2935267:0crwdne2935267:0Tweezers$4.99
-
Using a pair of tweezers, remove the plastic plugs.
-
Once the hidden screws are revealed, use a PH #00 screwdriver to remove the three 3.175mm screws.
-
Use the PH #00 screwdriver to remove the remaining six 3.175 screws.
-
-
-
Using a plastic opening tool, gently pry up the black plastic cover and remove it from the device.
-
-
-
-
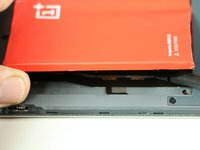
After we have removed the motherboard cover, we notice that the battery is intact and has a black ribbon attached to it, which is mounted on the logic board.
-
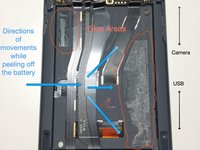
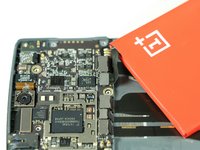
Using the spudger, carefully begin to lift the the battery up from the side opposite the ribbon. Be aware that there is high-grade adhesive holding the battery in its bay, so proceed with caution.
-
-
-
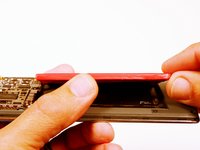
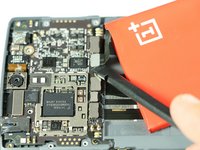
Once the battery has been freed, we use the ever handy black spudger to pry up and free the battery ribbon from its dock.
-
-
-
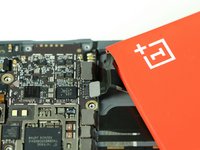
Using a black spudger, disconnect all connectors by lifting up gently.
-
-
crwdns2935267:0crwdne2935267:0Tweezers$4.99
-
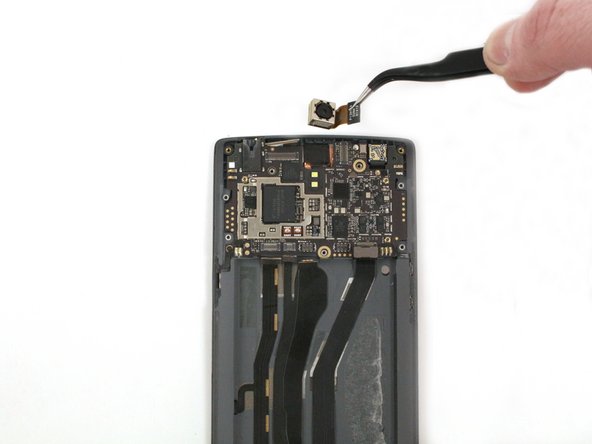
Using a pair of tweezers, gently lift the front facing camera out of the device.
-
-
-
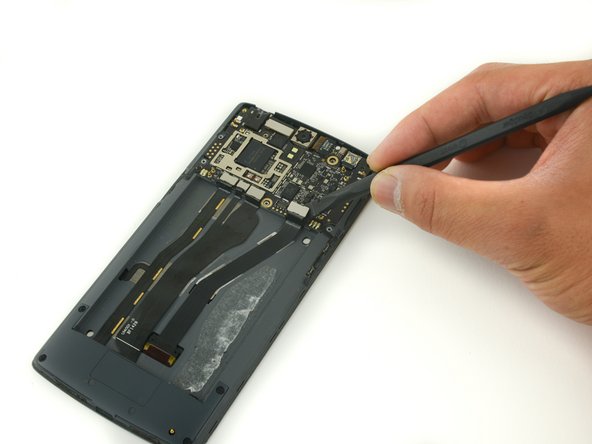
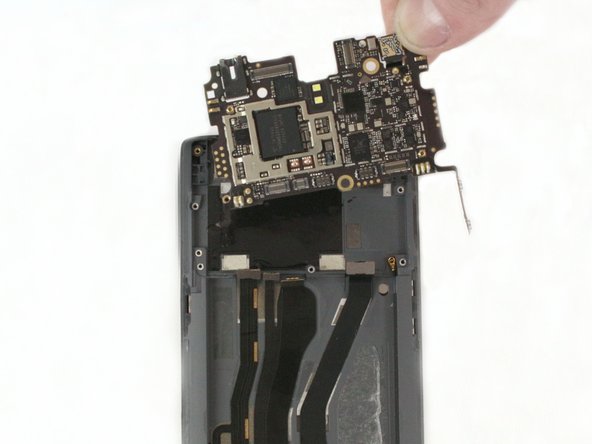
Gently lift the top side of the motherboard and disconnect the antenna to free it from the device.
-


To reassemble your device, follow these instructions in reverse order.
crwdns2935221:0crwdne2935221:0
crwdns2935229:02crwdne2935229:0

crwdns2947412:02crwdne2947412:0
Your post is very meticulous and impressive for me, I hope to get more good posts. powerline io
bearpu1994 - crwdns2934203:0crwdne2934203:0 crwdns2950251:0crwdne2950251:0
I do have an extra metal sheet on top of the motherboard covering the chipsets like a heatsink. How did you remove that?
András Jacsó - crwdns2934203:0crwdne2934203:0 crwdns2950251:0crwdne2950251:0