crwdns2915892:0crwdne2915892:0
Use this guide to replace a broken rear glass on your OnePlus 7T.
You’ll need replacement adhesive to reattach components when reassembling the device.
crwdns2942213:0crwdne2942213:0
-
-
Apply a heated iOpener to the rear glass for two minutes to loosen the adhesive beneath.
-
-
-
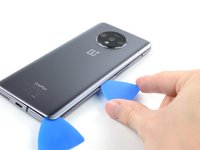
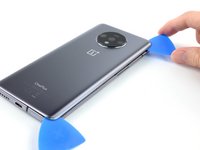
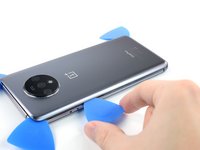
Apply a suction handle to the right edge of the rear glass.
-
Pull on the suction handle to create a gap between the rear glass and the frame.
-
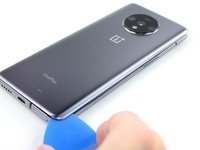
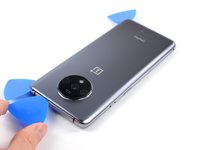
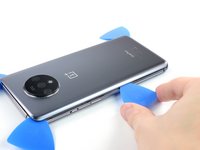
Insert an opening pick into the gap.
-
-
-
Slide the opening pick along the edge to the bottom right corner.
-
Leave the opening pick in the bottom right corner to prevent the adhesive from resealing.
-
-
-
-
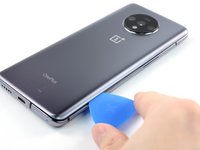
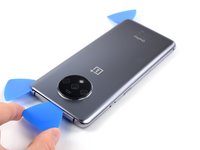
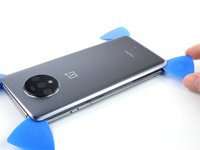
Insert a second opening pick in the gap you just created.
-
Slide the opening pick along the edge to the top right corner.
-
Leave the opening pick in the top right corner to prevent the adhesive from resealing.
-
-
-
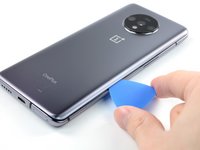
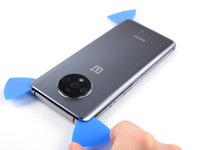
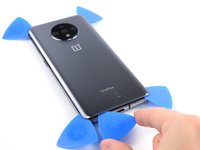
Insert a third opening pick under the top right corner of the rear glass.
-
Slide the opening pick along the edge of the phone to the top left corner to cut the adhesive.
-
Leave the opening pick in the top left corner to prevent the adhesive from resealing.
-
-
-
Insert a fourth opening pick under the top left corner.
-
Slide the opening pick along the edge to the bottom left corner to cut the adhesive.
-
Leave the opening pick in the bottom left corner to prevent the adhesive from resealing.
-
-
-
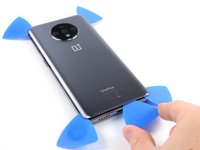
Insert a fifth opening pick under the bottom left corner.
-
Slide it along the the edge to the bottom right corner to cut the remaining adhesive.
-
-
-
Remove the rear glass.
-


To reassemble your device, follow these instructions in reverse order.
Repair didn’t go as planned? Try some basic troubleshooting, or ask our Answers Community for help.
To reassemble your device, follow these instructions in reverse order.
Repair didn’t go as planned? Try some basic troubleshooting, or ask our Answers Community for help.
crwdns2935221:0crwdne2935221:0
crwdns2935229:05crwdne2935229:0
