crwdns2915892:0crwdne2915892:0
With this guide, you can replace the battery of your OnePlus 7 Pro.
crwdns2942213:0crwdne2942213:0
-
-
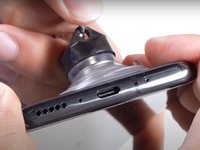
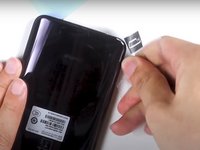
Insert and gently push the SIM card ejector tool (or an unfolded paperclip) into the small hole on the left side of the top edge of the phone.
-
Press gently to eject the SIM tray.
-
Remove the SIM card tray from the device.
-
-
-
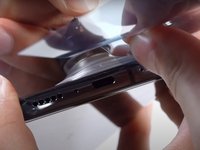
Use a heat gun to lightly heat the edges of the back to soften the adhesive that connects the back cover to the rest of the frame.
-
-
crwdns2935267:0crwdne2935267:0Plastic Cards$2.99
-
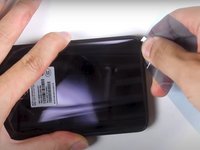
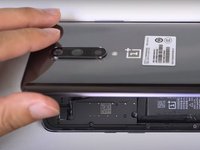
Apply a suction cup to the lower portion of the phone's backing and pull firmly to create a crack between the back cover and the rest of the phone.
-
Insert a Jimmy tool, opening pick, or plastic card under the edge of the back cover.
-
-
-
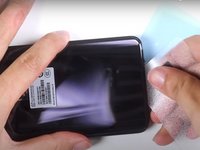
Use a plastic card or Jimmy tool to slice around the phone's seam, cutting through the adhesive.
-
-
-
crwdns2935267:0crwdne2935267:0Tweezers$4.99
-
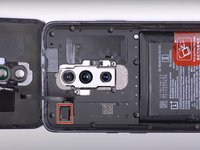
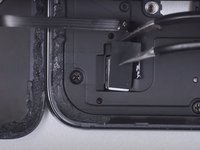
Use a pair of tweezers to lift up the piece of black tape covering the laser autofocus and flash flex cable.
-
Use a pair of tweezers to lift and remove the covering on the laser autofocus and flash flex cable.
-
-
-
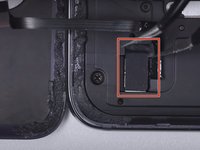
Use the flat end of a spudger to disconnect the laser autofocus and flash flex cable.
-
-
-
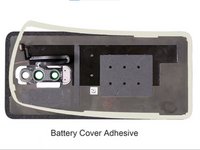
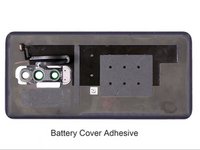
Peel off the adhesive cover for the new battery cover.
-
-
-
Remove all 14 screws of the upper plate.
-
As soon as all screws are removed, you can take it off with a spudger.
-
-
-
Disconnect the battery connector with a spudger.
-
-
-
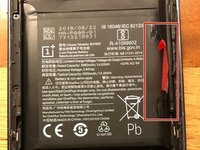
Grab the tab and gently pull the Battery out.
-
-
-
After installing the new battery and reassembling your device, calibration is highly recommended. To calibrate the battery, charge the phone to full and allow it to continue charging uninterrupted for 2 hours, let the battery drain fully, and charge it to full without interruption one last time.
-


To reassemble your device, replace the battery cover and follow these instructions in reverse order.
crwdns2935221:0crwdne2935221:0
crwdns2935229:022crwdne2935229:0
crwdns2934873:0crwdne2934873:0
100%


crwdns2934885:0crwdne2934885:0 crwdns2934875:0crwdne2934875:0
crwdns2934877:0crwdne2934877:0 ›
crwdns2947412:09crwdne2947412:0
It didnt mention how to open the back cover in the first place? Which is the hardest part and the one that require the most skills and specialized tools.
The article links another article talking about the cover. Both do not cover how to apply the new part, specifically, how to install the new battery in this case. I think vitally important. :) @fabianjung
DO NOT use the jimmy tool or anything metal to scrape the glue off!!! You will scratch and remove the paint on the back cover!
5/10 as a guide IMHO.
Why isn't a replacement adhesive gasket part of the requirements (in addition to the replacement battery)??!
The seal will most likely be severely compromised after being opened.
Update: 7/10. Taking the back off went easily/smoothly after lying on a 3D printer bed (@80C) for about 10mins, then using a hot air gun (@90C) and a metal spudger and plastic picks to gently break the adhesive holding the back to the body.
No issue removing the inside cover and pulling out the battery.
Having a replacement adhesive gasket/tape is a good idea when re-assembling though. The original guide didn't mentioned this.