crwdns2933423:0crwdne2933423:0

Olympus Stylus Tough TG-2 iHS Front Case Replacement

crwdns2862623:0crwdne2862623:0
crwdns2942641:0crwdne2942641:0

crwdns2942213:0crwdne2942213:0

  1. Olympus Stylus Tough TG-2 iHS Front Case Replacement, Front Case: crwdns2935265:01crwdnd2935265:01crwdnd2935265:02crwdne2935265:0 Olympus Stylus Tough TG-2 iHS Front Case Replacement, Front Case: crwdns2935265:01crwdnd2935265:02crwdnd2935265:02crwdne2935265:0
    • Remove the red ring surrounding the lens by twisting it counter-clockwise

  2. Olympus Stylus Tough TG-2 iHS Front Case Replacement: crwdns2935265:02crwdnd2935265:01crwdnd2935265:02crwdne2935265:0 Olympus Stylus Tough TG-2 iHS Front Case Replacement: crwdns2935265:02crwdnd2935265:02crwdnd2935265:02crwdne2935265:0
    • Remove the 2 Phillips #00 3.4mm screws that secure the faceplate just reveled by the grip.

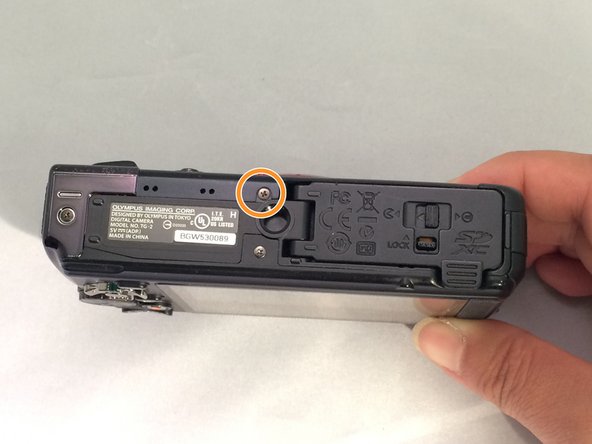
    • On the bottom of the camera, remove the single Phillips #00 3.4mm screw by the tripod socket securing the face plate.

  3. Olympus Stylus Tough TG-2 iHS Front Case Replacement: crwdns2935265:03crwdnd2935265:01crwdnd2935265:03crwdne2935265:0 Olympus Stylus Tough TG-2 iHS Front Case Replacement: crwdns2935265:03crwdnd2935265:02crwdnd2935265:03crwdne2935265:0 Olympus Stylus Tough TG-2 iHS Front Case Replacement: crwdns2935265:03crwdnd2935265:03crwdnd2935265:03crwdne2935265:0
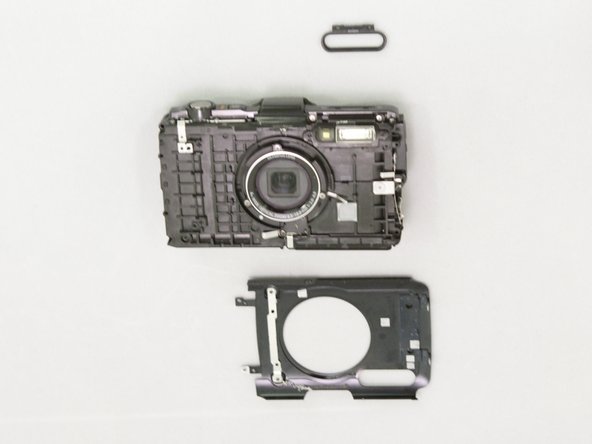
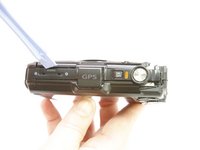
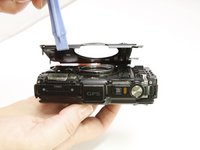
    • Use a plastic prying tool to lift and remove the faceplate .

    • There will be some resistance from a sticker just under the GPS logo.

    • The black plastic ring around the flash may fall as it is no longer secure.

crwdns2915888:0crwdne2915888:0

To reassemble your device, follow these instructions in reverse order.

Amanda

crwdns2935283:007/20/15crwdne2935283:0

933 crwdns2915208:0crwdne2915208:0

crwdns2935297:08crwdne2935297:0

crwdns2947412:00crwdne2947412:0

crwdns2917038:0crwdne2917038:0

crwdns2936625:0crwdne2936625:0:

crwdns2936751:024crwdne2936751:0 0

crwdns2936753:07crwdne2936753:0 1

crwdns2936753:030crwdne2936753:0 2

crwdns2942667:0crwdne2942667:0 77