crwdns2933423:0crwdne2933423:0
crwdns2947577:0crwdnd2947577:0crwdne2947577:0

Oculus Rift DK1 Control Box Buttons Replacement

crwdns2942213:0crwdne2942213:0

    1. Oculus Rift DK1 Control Box Buttons Replacement, Control Box Bottom Cover: crwdns2935265:01crwdnd2935265:01crwdnd2935265:03crwdne2935265:0 Oculus Rift DK1 Control Box Buttons Replacement, Control Box Bottom Cover: crwdns2935265:01crwdnd2935265:02crwdnd2935265:03crwdne2935265:0 Oculus Rift DK1 Control Box Buttons Replacement, Control Box Bottom Cover: crwdns2935265:01crwdnd2935265:03crwdnd2935265:03crwdne2935265:0
      • Use a plastic opening tool to carefully pry off the four rubber feet from the control box.

      • You have now revealed the four 9 mm Phillips #1 screws underneath the rubber feet.

      crwdns2952109:0crwdne2952109:0

      crwdns2917038:0crwdne2917038:0

    2. Oculus Rift DK1 Control Box Buttons Replacement: crwdns2935265:02crwdnd2935265:01crwdnd2935265:03crwdne2935265:0 Oculus Rift DK1 Control Box Buttons Replacement: crwdns2935265:02crwdnd2935265:02crwdnd2935265:03crwdne2935265:0 Oculus Rift DK1 Control Box Buttons Replacement: crwdns2935265:02crwdnd2935265:03crwdnd2935265:03crwdne2935265:0
      • Use a Phillips #1 Screwdriver to unscrew the four 9mm Phillips screws on the bottom of the control box.

      • You can now remove the bottom lid of the control box. It should come apart easily.

      crwdns2952109:0crwdne2952109:0

      crwdns2917038:0crwdne2917038:0

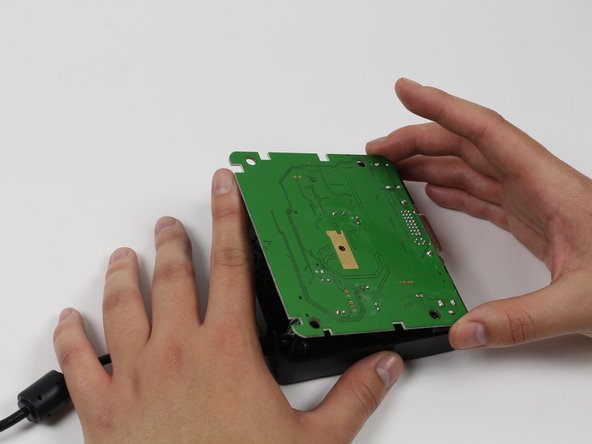
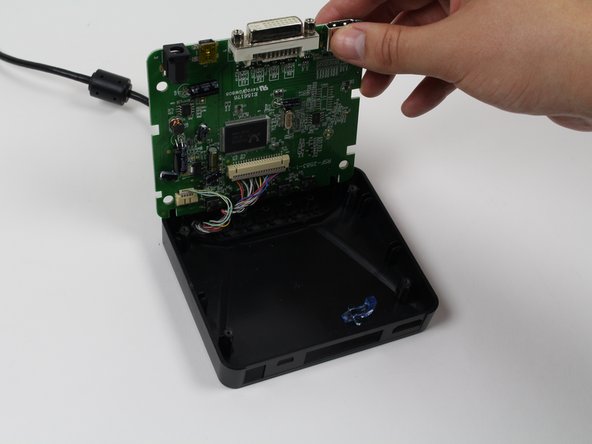
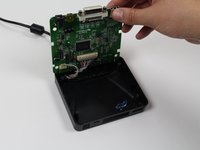
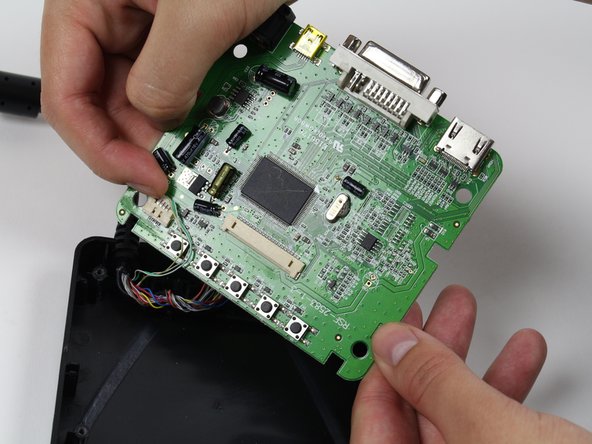
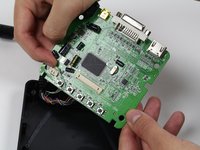
    1. Oculus Rift DK1 Control Box Buttons Replacement, Control Box  Motherboard: crwdns2935265:03crwdnd2935265:01crwdnd2935265:03crwdne2935265:0 Oculus Rift DK1 Control Box Buttons Replacement, Control Box  Motherboard: crwdns2935265:03crwdnd2935265:02crwdnd2935265:03crwdne2935265:0 Oculus Rift DK1 Control Box Buttons Replacement, Control Box  Motherboard: crwdns2935265:03crwdnd2935265:03crwdnd2935265:03crwdne2935265:0
      • Use your finger(s) to start lifting the motherboard from the control box casing. While doing so, use your other hand to push the DVI connector into the control box casing.

      • When the DVI connector has cleared the casing, lift the motherboard.

      • Be careful! There should be two sets of wires still connected to the control box - do not tug on them. Simply flip the motherboard over to access these wires.

      • When reassembling the device, ensure that all of the wires are clear of the buttons.

      crwdns2952109:0crwdne2952109:0

      crwdns2917038:0crwdne2917038:0

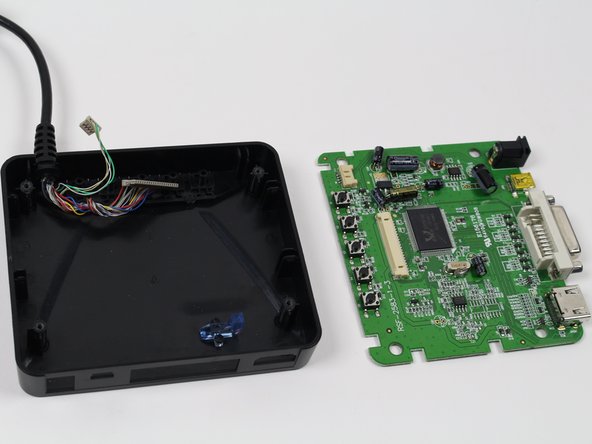
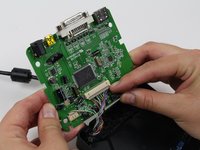
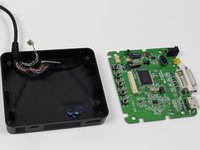
    2. Oculus Rift DK1 Control Box Buttons Replacement: crwdns2935265:04crwdnd2935265:01crwdnd2935265:03crwdne2935265:0 Oculus Rift DK1 Control Box Buttons Replacement: crwdns2935265:04crwdnd2935265:02crwdnd2935265:03crwdne2935265:0 Oculus Rift DK1 Control Box Buttons Replacement: crwdns2935265:04crwdnd2935265:03crwdnd2935265:03crwdne2935265:0
      • Use a plastic opening tool or your fingernails to disconnect the grey wire connectors. To make removal easier, pry the left and right edges to carefully remove the connector.

      • Do so for both of the wires attached to the motherboard.

      • Now fully separate the motherboard from the control box casing.

      crwdns2952109:0crwdne2952109:0

      crwdns2917038:0crwdne2917038:0

    1. Oculus Rift DK1 Control Box Buttons Replacement, Control Box Buttons: crwdns2935265:05crwdnd2935265:01crwdnd2935265:01crwdne2935265:0
      • You now have the motherboard separated from the control box.

      • Identify the buttons that are not working.

      crwdns2952109:0crwdne2952109:0

      crwdns2917038:0crwdne2917038:0

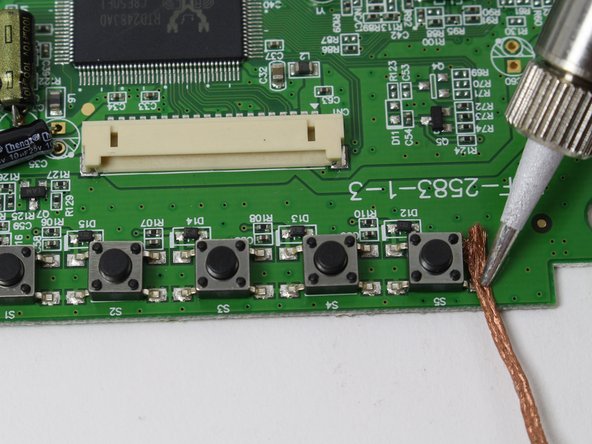
    2. Oculus Rift DK1 Control Box Buttons Replacement, Desoldering Button: crwdns2935265:06crwdnd2935265:01crwdnd2935265:01crwdne2935265:0
      • For each button that needs to be replaced, use a soldering iron and soldering braid to desolder the four metal points.

      • Be careful! Soldering iron is hot.

      crwdns2952109:0crwdne2952109:0

      crwdns2917038:0crwdne2917038:0

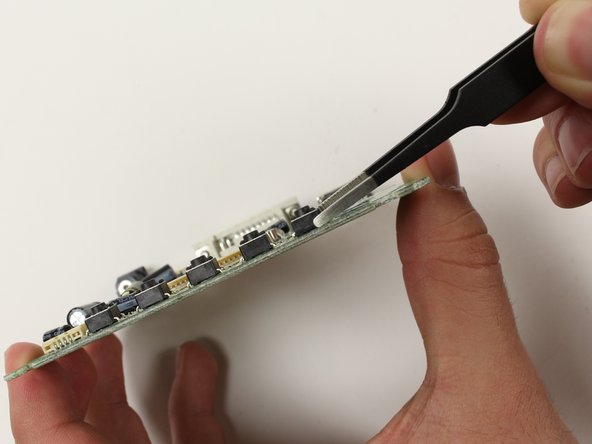
    3. Oculus Rift DK1 Control Box Buttons Replacement, Removing Button: crwdns2935265:07crwdnd2935265:01crwdnd2935265:02crwdne2935265:0 Oculus Rift DK1 Control Box Buttons Replacement, Removing Button: crwdns2935265:07crwdnd2935265:02crwdnd2935265:02crwdne2935265:0
      crwdns2935267:0crwdne2935267:0
      Tweezers
      $4.99
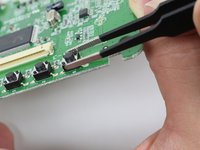
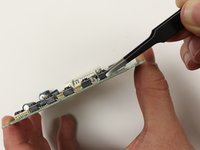
      • Now that each button with issues is desoldered, use tweezers to grab each button and detach from the motherboard.

      • If the button does not come off easily, go back to the previous step and ensure each of the four metal points are properly desoldered.

      crwdns2952109:0crwdne2952109:0

      crwdns2917038:0crwdne2917038:0

crwdns2915888:0crwdne2915888:0

To reassemble your device, follow these instructions in reverse order.

crwdns2935221:0crwdne2935221:0

Ross De Vito

crwdns2935283:001/13/15crwdne2935283:0

246 crwdns2915208:0crwdne2915208:0

crwdns2935297:02crwdne2935297:0

crwdns2935287:0crwdne2935287:0

Cal Poly, Team 70-5, Forte Winter 2015 crwdns2935289:0Cal Poly, Team 70-5, Forte Winter 2015crwdne2935289:0

CPSU-FORTE-W15S70G5

crwdns2931471:04crwdne2931471:0

crwdns2935297:072crwdne2935297:0

crwdns2947412:00crwdne2947412:0

crwdns2917038:0crwdne2917038:0

crwdns2936625:0crwdne2936625:0:

crwdns2936751:024crwdne2936751:0 2

crwdns2936753:07crwdne2936753:0 24

crwdns2936753:030crwdne2936753:0 48

crwdns2942667:0crwdne2942667:0 1,027