crwdns2915892:0crwdne2915892:0
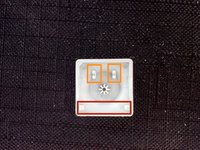
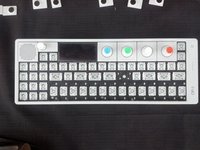
The Op-1 is a killer synthesizer, but suffers from many problems all other synthesizers do. Here we are gonna find out how to take off all the keys/buttons to either clean the key bed or access the other assemblies below. Please remember that performing any work on the op-1 voids its warranty therefore should only be done with extreme caution. Not following this procedure properly can damage its parts or destroy the unit forever. Please wear protective eyewear.
crwdns2942213:0crwdne2942213:0
-
-
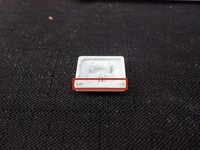
First and foremost. These keys on the OP-1 are delicate, but not cheap. Be careful with them, but do not be afraid to use a little force to remove them.
-
Next we have to make a proper tool to make removing them safe and easy
-
I tried a few different versions, the first ones being plastic and nothing succeeded as well as a classic metal spudger with a slight modification
-
Simply bend the triangular tip in about 75 degrees. This will help get underneath the keys to release the tabs.
-
-
-
I found it best to start by removing the keys starting at the bottom left
-
The first 3 square keys on the bottom will be the hardest to remove. Once you remove them, access to the others will be easier.
-
To access them you must insert the modified tool in the gap between the key and the aluminum case.
-
You then must get the tip of the tool above the key tabs and the key scissor clips that hold it on.
-
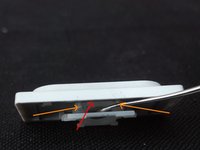
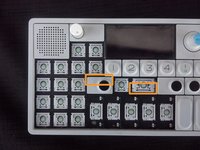
The clips that hold the key are circled in orange. Pull the key back in the direction of the red arrows and slide the key off those back guide tabs. Please look at the next step for video examples of how to remove the keys BEFORE trying to remove them.
-
-
-
One swift gentle but firm motion...:)
-
-
-
-
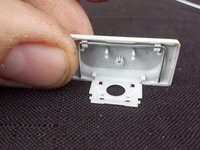
Heres another example. Feel free to look ahead to see a closer look at what the key assembly looks like removed.
-
-
-
The red area is the back of the key and the orange tabs are where the key connects into the previously labeled orange scissor clips.
-
-
-
Pictured here is a piano key, but it has the same connection from the key to the scissor clip as the rest
-
The best solution is to insert the modified spudger below the inside of the key and above the key scissor clip right where the red arrow points (do not insert the tool where the dental pick is here)
-
Then pull downward to release the clip from the tabs labeled with the orange arrows.
-
-
-
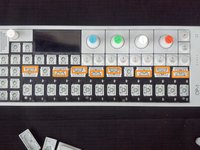
Removing the rest from here is pretty straight forward except for one part. The black piano keys alternate tab removal access points. They are labeled for your enjoyment
-
-
-
Start from the left and work your way right.
-
Once again make sure you note the correct insertion point
-
Also note that sometimes the scissor clip occasionally detaches from the key bed, but don't fret they easily reinsert.
-


To reassemble your device, follow these instructions in reverse order.
To reassemble your device, follow these instructions in reverse order.
crwdns2935221:0crwdne2935221:0
crwdns2935229:09crwdne2935229:0

crwdns2947412:013crwdne2947412:0
A very useful article. Does anyone know if the key caps are available elsewhere?
Hello, is it possible to order the scissor clips for the black key on the far right of my OP-1?
Thanks,
Patrick
Patrick - read the below. x
Not really. I contacted TE about my snapped plastic scissor bracket replacement. The guy from customer service asked me to put on hold as they were out of stock. After 4 months waiting time I got an email to spent 80 quid and get a whole keyboard panel. I asked why and it makes no sense, also that does not seem to be too eco-friendly either. I had to wait aprox 5-6 weeks for a reply. Hows that TE ?
Im going to 3D print it so suck on that TE. Thanks x