crwdns2933423:0crwdne2933423:0

Numark TT1600 Audio Jacks Replacement

crwdns2942213:0crwdne2942213:0

  1. Numark TT1600 Audio Jacks Replacement, Audio Jacks: crwdns2935265:01crwdnd2935265:01crwdnd2935265:01crwdne2935265:0
    • Flip over the turntable and remove the nine screws on the outer edges.

  2. Numark TT1600 Audio Jacks Replacement: crwdns2935265:02crwdnd2935265:01crwdnd2935265:02crwdne2935265:0 Numark TT1600 Audio Jacks Replacement: crwdns2935265:02crwdnd2935265:02crwdnd2935265:02crwdne2935265:0
    • Find the audio jacks located on the back side of the turntable.

    • Remove the screw located in between the right and left audio jacks.

  3. Numark TT1600 Audio Jacks Replacement: crwdns2935265:03crwdnd2935265:01crwdnd2935265:01crwdne2935265:0
    • Remove the back cover by pulling it apart.

  4. Numark TT1600 Audio Jacks Replacement: crwdns2935265:04crwdnd2935265:01crwdnd2935265:01crwdne2935265:0
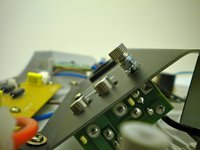
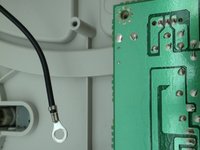
    • Remove the grounding hardware located next to the audio jacks.

  5. Numark TT1600 Audio Jacks Replacement: crwdns2935265:05crwdnd2935265:01crwdnd2935265:02crwdne2935265:0 Numark TT1600 Audio Jacks Replacement: crwdns2935265:05crwdnd2935265:02crwdnd2935265:02crwdne2935265:0
    • Remove the ground screw and washers.

  6. Numark TT1600 Audio Jacks Replacement: crwdns2935265:06crwdnd2935265:01crwdnd2935265:01crwdne2935265:0
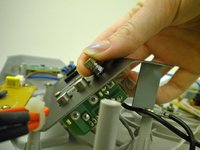
    • Remove the remaining nut and washer.

  7. Numark TT1600 Audio Jacks Replacement: crwdns2935265:07crwdnd2935265:01crwdnd2935265:01crwdne2935265:0
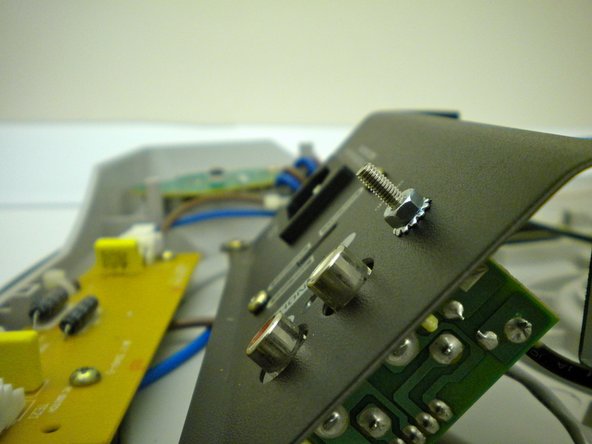
    • Remove the screw located on the back panel of the audio jack housing.

  8. Numark TT1600 Audio Jacks Replacement: crwdns2935265:08crwdnd2935265:01crwdnd2935265:03crwdne2935265:0 Numark TT1600 Audio Jacks Replacement: crwdns2935265:08crwdnd2935265:02crwdnd2935265:03crwdne2935265:0 Numark TT1600 Audio Jacks Replacement: crwdns2935265:08crwdnd2935265:03crwdnd2935265:03crwdne2935265:0
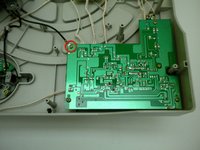
    • Remove the screw that connects the audio jacks to the biggest circuit board via wire.

  9. Numark TT1600 Audio Jacks Replacement: crwdns2935265:09crwdnd2935265:01crwdnd2935265:01crwdne2935265:0
    • Gently pull out the audio input jacks from the audio input housing.

crwdns2915888:0crwdne2915888:0

To reassemble your device, follow these instructions in reverse order.

crwdns2935227:0crwdne2935227:0

Nikolai

crwdns2935283:010/12/11crwdne2935283:0

254 crwdns2915208:0crwdne2915208:0

crwdns2935297:05crwdne2935297:0

crwdns2915084:0crwdne2915084:0

Cal Poly, Team 17-14, Regan Fall 2011 crwdns2935289:0Cal Poly, Team 17-14, Regan Fall 2011crwdne2935289:0

CPSU-REGAN-F11S17G14

crwdns2931471:04crwdne2931471:0

crwdns2935297:011crwdne2935297:0

crwdns2944067:00crwdne2944067:0

crwdns2917038:0crwdne2917038:0

crwdns2936625:0crwdne2936625:0:

crwdns2936751:024crwdne2936751:0 1

crwdns2936753:07crwdne2936753:0 5

crwdns2936753:030crwdne2936753:0 9

crwdns2942667:0crwdne2942667:0 1,402