crwdns2933423:0crwdne2933423:0
crwdns2947577:0crwdnd2947577:0crwdne2947577:0

Nook HD+ Volume/Power Buttons Replacement

crwdns2942213:0crwdne2942213:0

    1. Nook HD+ Volume/Power Buttons Replacement, Volume/Power Buttons: crwdns2935265:01crwdnd2935265:01crwdnd2935265:03crwdne2935265:0 Nook HD+ Volume/Power Buttons Replacement, Volume/Power Buttons: crwdns2935265:01crwdnd2935265:02crwdnd2935265:03crwdne2935265:0 Nook HD+ Volume/Power Buttons Replacement, Volume/Power Buttons: crwdns2935265:01crwdnd2935265:03crwdnd2935265:03crwdne2935265:0
      • Open the plastic frame by wedging the plastic iFixit opening tool under the plastic frame to remove adhesive.

      • Pop up all plastic tabs that secure the frame to the chassis.

      crwdns2952109:0crwdne2952109:0

      crwdns2917038:0crwdne2917038:0

    2. Nook HD+ Volume/Power Buttons Replacement: crwdns2935265:02crwdnd2935265:01crwdnd2935265:03crwdne2935265:0 Nook HD+ Volume/Power Buttons Replacement: crwdns2935265:02crwdnd2935265:02crwdnd2935265:03crwdne2935265:0 Nook HD+ Volume/Power Buttons Replacement: crwdns2935265:02crwdnd2935265:03crwdnd2935265:03crwdne2935265:0
      • Remove twenty 5.0 mm Torx T5 screws that hold the chassis to the back casing.

      • Disconnect battery from motherboard.

      • Remove back casing.

      crwdns2952109:0crwdne2952109:0

      crwdns2917038:0crwdne2917038:0

    3. Nook HD+ Volume/Power Buttons Replacement: crwdns2935265:03crwdnd2935265:01crwdnd2935265:02crwdne2935265:0 Nook HD+ Volume/Power Buttons Replacement: crwdns2935265:03crwdnd2935265:02crwdnd2935265:02crwdne2935265:0
      crwdns2935267:0crwdne2935267:0
      Tweezers
      $4.99
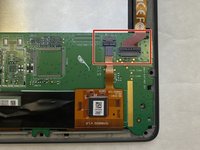
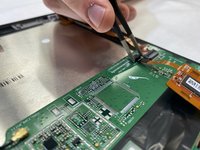
      • Disconnect both ribbons from the motherboard by pulling up on the dark grey flaps and pulling out the ribbons.

      • Use tweezers to lift the flaps.

      crwdns2952109:0crwdne2952109:0

      crwdns2917038:0crwdne2917038:0

    4. Nook HD+ Volume/Power Buttons Replacement: crwdns2935265:04crwdnd2935265:01crwdnd2935265:02crwdne2935265:0 Nook HD+ Volume/Power Buttons Replacement: crwdns2935265:04crwdnd2935265:02crwdnd2935265:02crwdne2935265:0
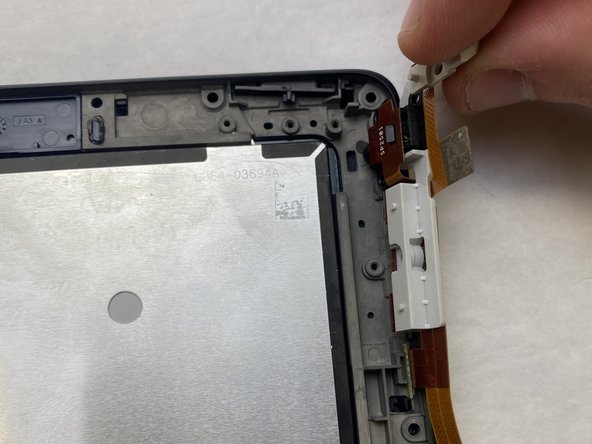
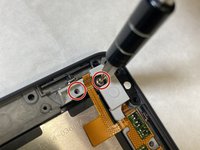
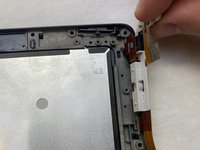
      • Remove three 5.0 mm Torx T5 screws that secure buttons to chassis.

      • Slide button assembly up and out of the chassis.

      crwdns2952109:0crwdne2952109:0

      crwdns2917038:0crwdne2917038:0

crwdns2915888:0crwdne2915888:0

To reassemble your device, follow these instructions in reverse order.

crwdns2935221:0crwdne2935221:0

Brennan Holcombe

crwdns2935283:003/31/22crwdne2935283:0

256 crwdns2915208:0crwdne2915208:0

crwdns2935297:02crwdne2935297:0

crwdns2935287:0crwdne2935287:0

IUPUI, Team 3-3, Harley Spring 2022 crwdns2935289:0IUPUI, Team 3-3, Harley Spring 2022crwdne2935289:0

IUPUI-HARLEY-S22S3G3

crwdns2931471:03crwdne2931471:0

crwdns2935297:036crwdne2935297:0

crwdns2947412:00crwdne2947412:0

crwdns2917038:0crwdne2917038:0

crwdns2936625:0crwdne2936625:0:

crwdns2936751:024crwdne2936751:0 1

crwdns2936753:07crwdne2936753:0 4

crwdns2936753:030crwdne2936753:0 24

crwdns2942667:0crwdne2942667:0 410