crwdns2915892:0crwdne2915892:0
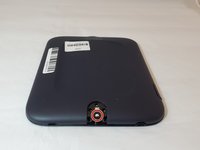
This guide describes the removal of the motherboard from the Nook BNRV300 device. This device is also called the “Nook Simple Touch.”
Removing the motherboard allows access to the display and the plastic front cover frame. Removal of the motherboard also enables you to work on electrical components.
Warning: Using metal tools on the motherboard or any electrical components could cause shock to yourself and/or your device. Using plastic tools reduces this risk, but pay attention when working on your device.
crwdns2942213:0crwdne2942213:0
-
-
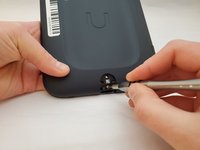
Turn the Nook over to find the power button along the back upper edge.
-
Wedge the spudger between the top of the power button and the upper edge of the device.
-
Push the tool down to pry the button up and off.
-
-
-
Using your fingers, take off the power button.
-
-
-
Peel off the white sticker that is covering the screw head.
-
Remove the one 2mm-long screw using a size T5 Torx screwdriver.
-
-
-
-
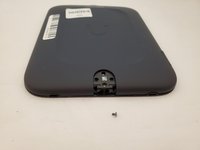
Slide the back cover down towards the USB port to release it. The pictures show the case being pried open but this should not be necessary.
-
-
-
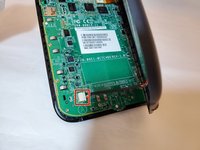
Use a spudger or your fingers to gently pry the connector out of the white socket.
-
The back cover is now fully detached.
-
-
crwdns2935267:0crwdne2935267:0Tweezers$4.99
-
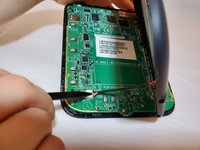
Use tweezers to remove the brass-colored threaded fastener from the Nook plastic casing.
-
-
-
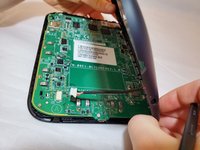
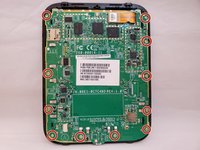
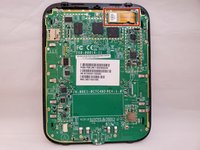
Using a T5 Torx screwdriver, remove the eleven 3mm screws.
-
-
-
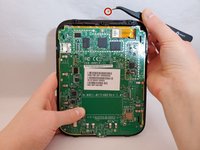
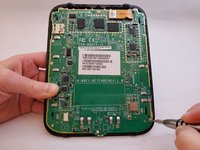
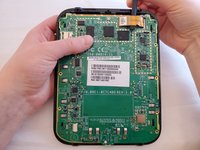
Place the spudger through the loop of the display cable. Lift the tool up, which will unhook the display cable.
-
Using your fingers, lift up the display cable.
-
-
-
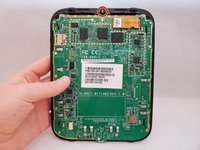
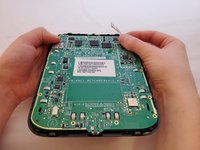
Using your fingers, gently lift the motherboard from the display.
-


To reassemble your device, follow these instructions in reverse order.
To reassemble your device, follow these instructions in reverse order.
crwdns2915084:0crwdne2915084:0

Eastern Washington University, Team S1-G1, Al-Hmeyrat Fall 2019 crwdns2935289:0Eastern Washington University, Team S1-G1, Al-Hmeyrat Fall 2019crwdne2935289:0
EWU-AL-HMEYRAT-F19S1G1
crwdns2931471:03crwdne2931471:0
crwdns2935297:05crwdne2935297:0
crwdns2947410:01crwdne2947410:0
Check the comments on each step. There are some adjustments to the process to properly and safely take this apart.