crwdns2915892:0crwdne2915892:0
Removing and replacing the screen of the Nokia Lumia 1020 requires you to separate the screen from the internal components of the phone.
crwdns2942213:0crwdne2942213:0
-
-
Use a SIM door key to remove the SIM card and SIM card tray from the device.
-
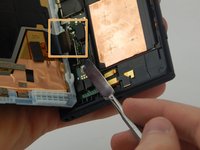
Use a T4 screwdriver to loosen the captured torx screw to the right of the SIM card tray (the screw will not come out).
-
-
-
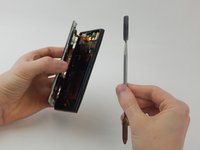
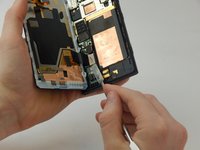
Wedge a spudger in between the screen and the back of the device, starting from the top left corner of the phone.
-
Gently pry the screen away from the back of the device using slight upward pressure.
-
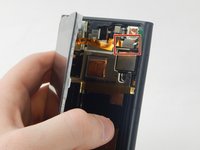
Slide the spudger down towards the bottom left corner of the device, continuing to gently pry upwards. The screen will now be slightly separated from the back of the phone.
-
-
-
-
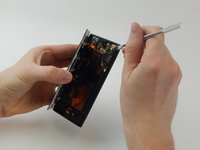
Wedge a spudger underneath the silver rectangle in the upper right corner until it pops off the back of the phone.
-
-
-
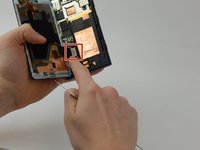
Wedge a spudger underneath the silver rectangle in the lower left corner until it pops off the back of the phone.
-
Completely remove the screen from the back of the phone.
-


To reassemble your device, follow these instructions in reverse order.
To reassemble your device, follow these instructions in reverse order.
crwdns2935221:0crwdne2935221:0
crwdns2935229:05crwdne2935229:0
crwdns2915084:0crwdne2915084:0

USF Tampa, Team S1-G4, Leahy Spring 2018 crwdns2935289:0USF Tampa, Team S1-G4, Leahy Spring 2018crwdne2935289:0
USFT-LEAHY-S18S1G4
crwdns2931471:04crwdne2931471:0
crwdns2935297:010crwdne2935297:0
crwdns2947412:03crwdne2947412:0
Thank you alot
Topo très utile. Merci.
Il serait bien de préciser que, après avoir déposé l'écran, il faut encore transférer la caméra de l'ancien au nouvel écran.
Topo bien clair. Merci.
Il serait bien de préciser que, après avoir déposé l'écran, il faut encore transférer la caméra de l'ancien écran vers le nouvel écran.