crwdns2933423:0crwdne2933423:0

Nokia 8290 Adhesive White Film Replacement

crwdns2942213:0crwdne2942213:0

  1. Nokia 8290 Adhesive White Film Replacement, Front Cover: crwdns2935265:01crwdnd2935265:01crwdnd2935265:03crwdne2935265:0 Nokia 8290 Adhesive White Film Replacement, Front Cover: crwdns2935265:01crwdnd2935265:02crwdnd2935265:03crwdne2935265:0 Nokia 8290 Adhesive White Film Replacement, Front Cover: crwdns2935265:01crwdnd2935265:03crwdnd2935265:03crwdne2935265:0
    • Locate the small button on the top of the phone.

    • Depress the button.

    • With your other hand, pull the front cover away from the phone.

  2. Nokia 8290 Adhesive White Film Replacement, Circuit Board: crwdns2935265:02crwdnd2935265:01crwdnd2935265:03crwdne2935265:0 Nokia 8290 Adhesive White Film Replacement, Circuit Board: crwdns2935265:02crwdnd2935265:02crwdnd2935265:03crwdne2935265:0 Nokia 8290 Adhesive White Film Replacement, Circuit Board: crwdns2935265:02crwdnd2935265:03crwdnd2935265:03crwdne2935265:0
    • Remove all six 5.3 mm long T6 screws.

    • Remove the circuit board/faceplate sub-assembly from the back of the phone.

    • Take care to place screws in a safe location.

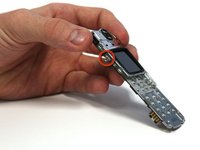
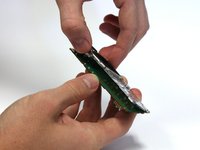
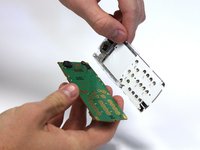
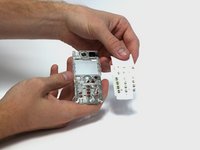
  3. Nokia 8290 Adhesive White Film Replacement: crwdns2935265:03crwdnd2935265:01crwdnd2935265:03crwdne2935265:0 Nokia 8290 Adhesive White Film Replacement: crwdns2935265:03crwdnd2935265:02crwdnd2935265:03crwdne2935265:0 Nokia 8290 Adhesive White Film Replacement: crwdns2935265:03crwdnd2935265:03crwdnd2935265:03crwdne2935265:0
    • Using your fingers, pull the small plastic tab away from the circuit board/faceplate sub-assembly.

    • Rotate the faceplate away from the circuit board.

    • Gently remove the faceplate from the circuit board, taking care to not break the small plastic tab on the other side of the sub-assembly.

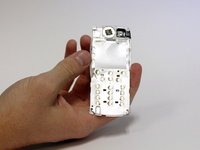
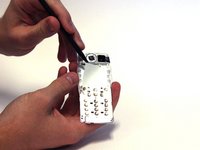
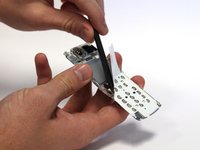
  4. Nokia 8290 Adhesive White Film Replacement, Adhesive White Film: crwdns2935265:04crwdnd2935265:01crwdnd2935265:03crwdne2935265:0 Nokia 8290 Adhesive White Film Replacement, Adhesive White Film: crwdns2935265:04crwdnd2935265:02crwdnd2935265:03crwdne2935265:0 Nokia 8290 Adhesive White Film Replacement, Adhesive White Film: crwdns2935265:04crwdnd2935265:03crwdnd2935265:03crwdne2935265:0
    • Hold the faceplate with the adhesive film facing upwards.

    • Use the spudger to pry the adhesive film away. This can be done by working the tool back and forth underneath the film.

    • It is easiest to begin in the upper left corner.

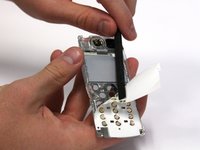
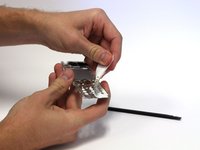
  5. Nokia 8290 Adhesive White Film Replacement: crwdns2935265:05crwdnd2935265:01crwdnd2935265:03crwdne2935265:0 Nokia 8290 Adhesive White Film Replacement: crwdns2935265:05crwdnd2935265:02crwdnd2935265:03crwdne2935265:0 Nokia 8290 Adhesive White Film Replacement: crwdns2935265:05crwdnd2935265:03crwdnd2935265:03crwdne2935265:0
    • Continue to loosen the film with the spudger.

    • Once the film has been mostly loosened, you can peel away the film.

    • Once the film has been removed, the microphone may fall out, if so, place it aside until all other repairs are finished.

crwdns2915888:0crwdne2915888:0

To reassemble your device, follow these instructions in reverse order.

Austin Culberson

crwdns2935283:010/22/12crwdne2935283:0

87 crwdns2915208:0crwdne2915208:0

crwdns2935297:05crwdne2935297:0

crwdns2915084:0crwdne2915084:0

Clemson, Team 15-3, Benson Fall 2012 crwdns2935289:0Clemson, Team 15-3, Benson Fall 2012crwdne2935289:0

CLEM-BENSON-F12S15G3

crwdns2931471:03crwdne2931471:0

crwdns2935297:021crwdne2935297:0

crwdns2944067:00crwdne2944067:0

crwdns2917038:0crwdne2917038:0

crwdns2936625:0crwdne2936625:0:

crwdns2936751:024crwdne2936751:0 0

crwdns2936753:07crwdne2936753:0 1

crwdns2936753:030crwdne2936753:0 2

crwdns2942667:0crwdne2942667:0 333