crwdns2933423:0crwdne2933423:0

Nokia 6200 Classic Vibrator Replacement

crwdns2942213:0crwdne2942213:0

  1. Nokia 6200 Classic Vibrator Replacement, Front Plate: crwdns2935265:01crwdnd2935265:01crwdnd2935265:03crwdne2935265:0 Nokia 6200 Classic Vibrator Replacement, Front Plate: crwdns2935265:01crwdnd2935265:02crwdnd2935265:03crwdne2935265:0 Nokia 6200 Classic Vibrator Replacement, Front Plate: crwdns2935265:01crwdnd2935265:03crwdnd2935265:03crwdne2935265:0
    • Pull up on both of the clips near the bottom of the phone as shown.

    • Lift off the front plate.

  2. Nokia 6200 Classic Vibrator Replacement: crwdns2935265:02crwdnd2935265:01crwdnd2935265:01crwdne2935265:0
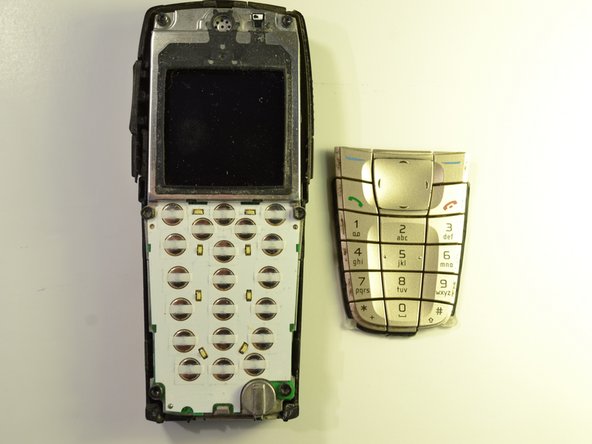
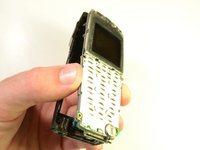
    • The keypad and LCD screen are revealed.

  3. Nokia 6200 Classic Vibrator Replacement, Vibrator: crwdns2935265:03crwdnd2935265:01crwdnd2935265:02crwdne2935265:0 Nokia 6200 Classic Vibrator Replacement, Vibrator: crwdns2935265:03crwdnd2935265:02crwdnd2935265:02crwdne2935265:0
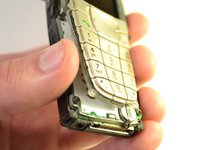
    • Separate the keypad from the phone and place aside.

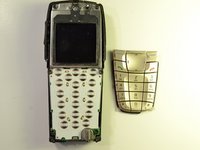
    • Wipe off any excess dust from where the keypad was attached to the phone.

  4. Nokia 6200 Classic Vibrator Replacement: crwdns2935265:04crwdnd2935265:01crwdnd2935265:02crwdne2935265:0 Nokia 6200 Classic Vibrator Replacement: crwdns2935265:04crwdnd2935265:02crwdnd2935265:02crwdne2935265:0
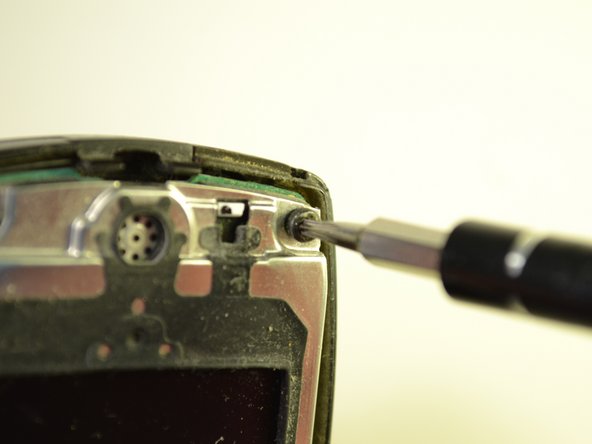
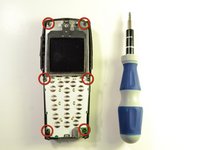
    • Remove the six screws highlighted by the markers using the screwdriver.

  5. Nokia 6200 Classic Vibrator Replacement: crwdns2935265:05crwdnd2935265:01crwdnd2935265:02crwdne2935265:0 Nokia 6200 Classic Vibrator Replacement: crwdns2935265:05crwdnd2935265:02crwdnd2935265:02crwdne2935265:0
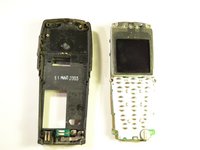
    • Separate the inside of the phone from the back of the phone.

  6. Nokia 6200 Classic Vibrator Replacement: crwdns2935265:06crwdnd2935265:01crwdnd2935265:03crwdne2935265:0 Nokia 6200 Classic Vibrator Replacement: crwdns2935265:06crwdnd2935265:02crwdnd2935265:03crwdne2935265:0 Nokia 6200 Classic Vibrator Replacement: crwdns2935265:06crwdnd2935265:03crwdnd2935265:03crwdne2935265:0
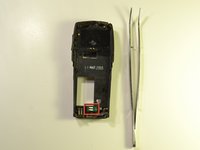
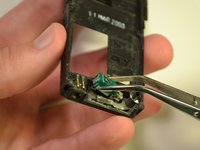
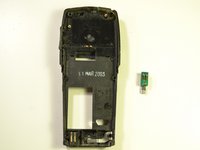
    • Locate vibration device on the bottom of the back cover.

    • Pull up on the vibration device using tweezers.

    • Remove the vibration device and place it aside.

crwdns2915888:0crwdne2915888:0

To reassemble your device, follow these instructions in reverse order.

Reid Polstra

crwdns2935283:010/22/12crwdne2935283:0

1 crwdns2915208:0crwdne2915208:0

crwdns2935297:07crwdne2935297:0

crwdns2915084:0crwdne2915084:0

Clemson, Team 15-5, Benson Fall 2012 crwdns2935289:0Clemson, Team 15-5, Benson Fall 2012crwdne2935289:0

CLEM-BENSON-F12S15G5

crwdns2931471:03crwdne2931471:0

crwdns2935297:07crwdne2935297:0

crwdns2944067:00crwdne2944067:0

crwdns2917038:0crwdne2917038:0

crwdns2936625:0crwdne2936625:0:

crwdns2936751:024crwdne2936751:0 1

crwdns2936753:07crwdne2936753:0 1

crwdns2936753:030crwdne2936753:0 1

crwdns2942667:0crwdne2942667:0 518