crwdns2933423:0crwdne2933423:0

Nokia 6200 Classic Circuit Board Replacement

crwdns2942213:0crwdne2942213:0

  1. Nokia 6200 Classic Circuit Board Replacement, Front Plate: crwdns2935265:01crwdnd2935265:01crwdnd2935265:03crwdne2935265:0 Nokia 6200 Classic Circuit Board Replacement, Front Plate: crwdns2935265:01crwdnd2935265:02crwdnd2935265:03crwdne2935265:0 Nokia 6200 Classic Circuit Board Replacement, Front Plate: crwdns2935265:01crwdnd2935265:03crwdnd2935265:03crwdne2935265:0
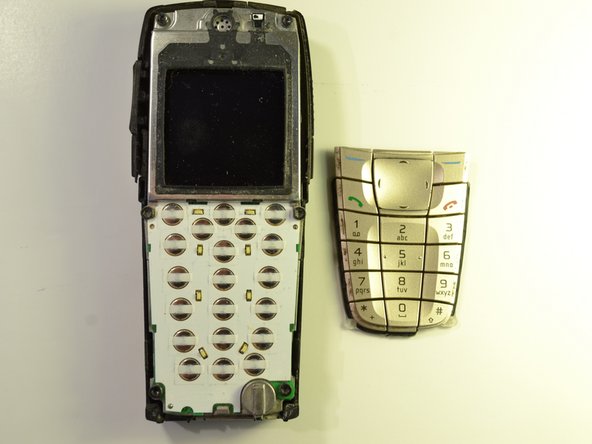
    • Pull up on both of the clips near the bottom of the phone as shown.

    • Lift off the front plate.

  2. Nokia 6200 Classic Circuit Board Replacement: crwdns2935265:02crwdnd2935265:01crwdnd2935265:01crwdne2935265:0
    • The keypad and LCD screen are revealed.

  3. Nokia 6200 Classic Circuit Board Replacement, Circuit Board: crwdns2935265:03crwdnd2935265:01crwdnd2935265:02crwdne2935265:0 Nokia 6200 Classic Circuit Board Replacement, Circuit Board: crwdns2935265:03crwdnd2935265:02crwdnd2935265:02crwdne2935265:0
    • Separate the keypad from the phone and place aside.

    • Wipe off any excess dust from where the keypad was attached to the phone.

  4. Nokia 6200 Classic Circuit Board Replacement: crwdns2935265:04crwdnd2935265:01crwdnd2935265:02crwdne2935265:0 Nokia 6200 Classic Circuit Board Replacement: crwdns2935265:04crwdnd2935265:02crwdnd2935265:02crwdne2935265:0
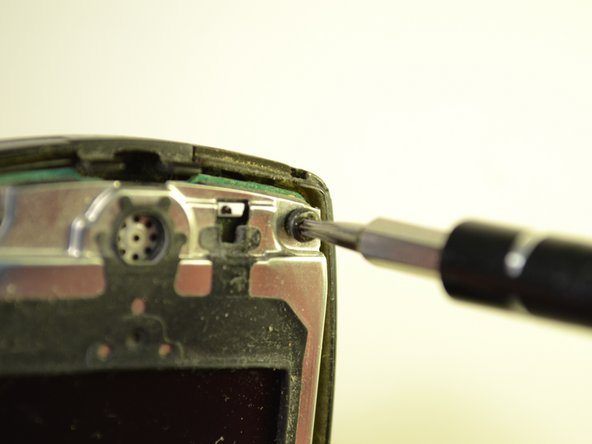
    • Remove the 6 - 7.9 mm screws highlighted by the markers using the T-6 head on the screwdriver.

  5. Nokia 6200 Classic Circuit Board Replacement: crwdns2935265:05crwdnd2935265:01crwdnd2935265:02crwdne2935265:0 Nokia 6200 Classic Circuit Board Replacement: crwdns2935265:05crwdnd2935265:02crwdnd2935265:02crwdne2935265:0
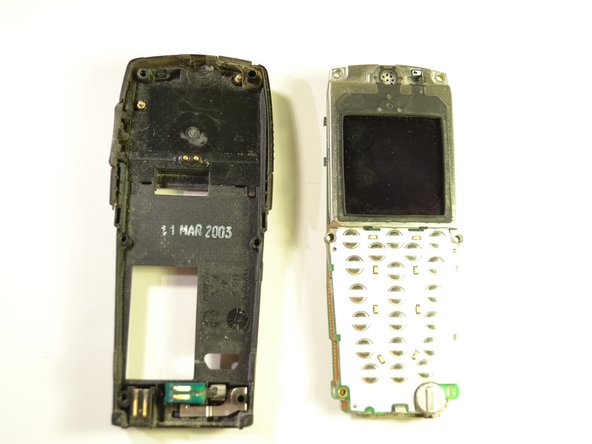
    • Separate the inside of the phone from the back of the phone.

  6. Nokia 6200 Classic Circuit Board Replacement: crwdns2935265:06crwdnd2935265:01crwdnd2935265:02crwdne2935265:0 Nokia 6200 Classic Circuit Board Replacement: crwdns2935265:06crwdnd2935265:02crwdnd2935265:02crwdne2935265:0
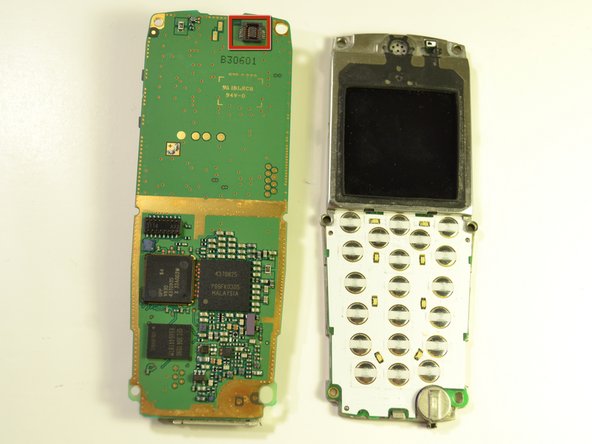
    • Gently pull apart the circuit board from the rest of the phone.

    • There is a small connector holding these two pieces together, so use caution when pulling apart so as not to damage it.

crwdns2915888:0crwdne2915888:0

To reattach the circuit board, line up the connector at the top of the board with the back of the LCD Screen attachment. Place the two boards together, and screw in the 6 screws.

Reid Polstra

crwdns2935283:010/22/12crwdne2935283:0

1 crwdns2915208:0crwdne2915208:0

crwdns2935297:07crwdne2935297:0

crwdns2915084:0crwdne2915084:0

Clemson, Team 15-5, Benson Fall 2012 crwdns2935289:0Clemson, Team 15-5, Benson Fall 2012crwdne2935289:0

CLEM-BENSON-F12S15G5

crwdns2931471:03crwdne2931471:0

crwdns2935297:07crwdne2935297:0

crwdns2944067:00crwdne2944067:0

crwdns2917038:0crwdne2917038:0

crwdns2936625:0crwdne2936625:0:

crwdns2936751:024crwdne2936751:0 0

crwdns2936753:07crwdne2936753:0 0

crwdns2936753:030crwdne2936753:0 3

crwdns2942667:0crwdne2942667:0 767