crwdns2915892:0crwdne2915892:0
Having trouble hearing from your Nokia 6085h? No worries, you are in the right place!
The speaker is responsible for all audible output from the device. Over time, it can fail due to dust accumulation, water exposure, or general wear. Before beginning this repair, confirm that the issue is not caused by software settings or debris in the speaker grill.
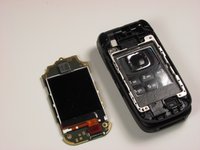
This repair involves fully opening the device and requires removing the battery, both display assemblies, and the main board to access the speaker. Several delicate ribbon cables and adhesive-backed components must be carefully lifted and disconnected during this process.
Before you begin, ensure the device is powered off and the battery is removed. Use ESD-safe tools to prevent electrostatic damage. Ensure you are handling ribbon cables gently to avoid tearing.
No soldering is required, but moderate precision and patience are needed to navigate the internal components safely. Before you know it, your phone will be playing music, ringing, and working just like it used to!
crwdns2942213:0crwdne2942213:0
-
-
Flip over the phone so that the back is facing up.
-
Pressing your thumb against the back cover, slide the cover off of the phone.
-
-
-
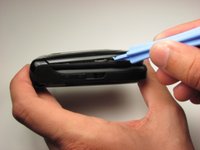
With the phone closed, run a plastic opening tool along the seam of the top half of the phone.
-
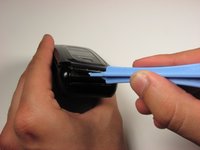
Make sure to disconnect each of the five clips before proceeding to the next step.
-
-
-
Remove the four 3.2 mm screws from the front panel using a T6 Torx screwdriver.
-
-
-
Starting in the lower right corner, slowly begin to lift the tape that is holding down the front LCD and cables.
-
Lift the tape from the board.
-
-
-
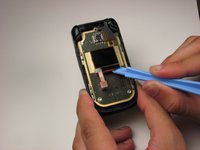
Using a plastic opening tool, lift the ribbon cable connection below the front LCD.
-
-
-
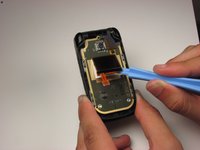
Using a plastic opening tool, slowly pry the LCD display from the bottom, releasing it from the glue that is holding it to the board.
-
-
-
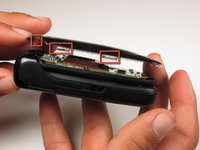
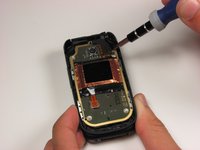
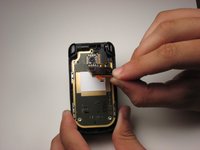
Locate the ribbon cable connection in the upper right hand corner of the board.
-
Using a plastic opening tool, lift off the cable from the board.
-
-
-
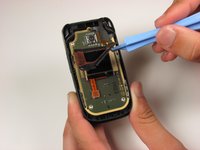
Using a plastic opening tool, slowly work the board off the mounts holding it to the frame.
-
Flip the board over to reveal the main display.
-
-
-
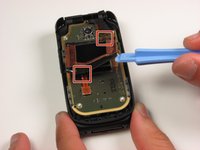
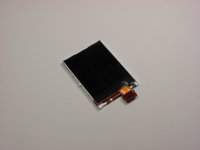
Locate the ribbon cable for the main display on the bottom of the board.
-
Slowly lift off the ribbon connector from its housing using a plastic opening tool.
-
-
-
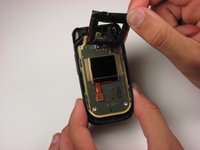
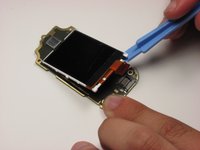
Slowly wedge the plastic opening tool under the bottom of the main display.
-
Separate the display from the glue lifting it off the board.
-
-
-
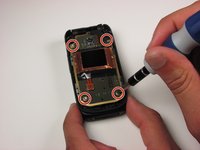
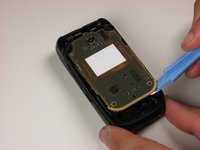
Using a case opening tool, gently pry the speaker in the bottom corner from the glue from right to left until it pops out.
-


To reassemble your device, follow these instructions in reverse order.
crwdns2935221:0crwdne2935221:0
crwdns2935227:0crwdne2935227:0
crwdns2935287:0crwdne2935287:0

Cal Poly, Team 4-46, Amido Fall 2010 crwdns2935289:0Cal Poly, Team 4-46, Amido Fall 2010crwdne2935289:0
CPSU-AMIDO-F10S4G46
crwdns2931471:04crwdne2931471:0
crwdns2935297:014crwdne2935297:0