crwdns2915892:0crwdne2915892:0
Follow this guide to replace your Nokia 6 microphone.
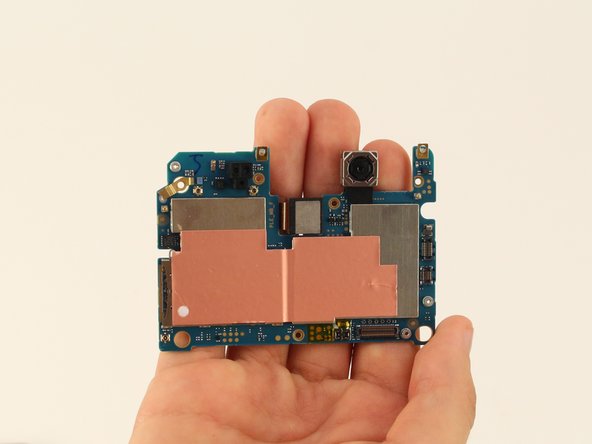
In this guide, you do not have to take apart the front and rear facing cameras from the motherboard. Simply removing the motherboard will expose the parts needed for the next steps.
crwdns2942213:0crwdne2942213:0
-
-
Insert the SIM card ejection tool into the hole on the left side of the phone.
-
Remove the SIM card and microSD card.
-
-
-
Lay overlapping strips of clear packing tape over the Nokia 6's display until the whole screen is covered.
-
-
-
To soften the adhesive, use a heat gun and heat one edge of the phone for five minutes.
-
To use the heat gun, plug it into an outlet.
-
-
-
Take a Jimmy and slide it under the glass after the adhesive has been softened.
-
Place a pick under the glass after lifting with the pry tool so that the screen won't re-adhere to the frame again.
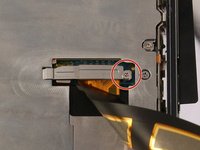
The display has a small flat cable curving under the right “square” button about 5 mm from the right edge. It It’s very easy to accidentally cut it with a pick when slicing glue under the bottom right corner, especially when coming down the right edge. A photo of the cable (cut, unfortunately), another photo from a different angle.
It isn't obvious from the description that the major glued areas are at the ends, and particularly the corners. Further, the glass screen itself is overlaid with a thin, flexible cover, and this extends from the glass edge about a centimeter top and bottom. The real danger of screen break is at the sides, where the underlying glass comes very close to the edge of the plastic cover. What you see in the picture is OK, the spudgers going under the cover but not too close to the glass at the end. You need to lift both ends of the screen very slightly before easing the sides up. And the glue patches at the ends are pretty tenacious.
-
-
-
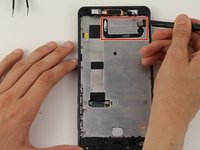
Use a Phillips #000 screwdriver to remove the 1 mm x 1.4 mm screw holding down the metal bracket over the screen ribbon connector.
-
-
-
Remove the metal bracket with a tweezer.
-
-
-
-
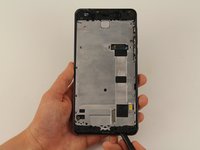
Use a spudger to disconnect the screen ribbon connector and free the display assembly.
-
Carefully remove the screen from the device.
Although below it says that you simply do the reverse to reassemble, be aware that the home button has to be very carefully positioned else it tends to hold the screen up and it won't work reliably. Secondly, you need to clean off the glued areas on the frame very thoroughly, because they pucker badly when taking the screen off. If you buy a reputable screen, included with it there should be a couple of double-sided sticky pads, shaped to fit the ends, which will hold the screen down.
-
-
-
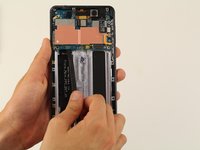
Disconnect the battery connector with a spudger.
Battery kaha hothe hai front mein ya back per
-
-
crwdns2935267:0crwdne2935267:0Tweezers$4.99
-
Use a Phillips #00 screwdriver to remove the 1.2 mm x 2.2 mm screw in the upper hand corner of the phone.
-
Use tweezers to remove the bracket.
-
-
-
Detach the cable with the black nylon spudger.
-
Detach the home button and remove it from the device.
DON’T remove it if you are only changing the battery. The screws in the next step can be removed easily by just lift up the buttons. Leave it sticks on the middle plate can save you a lot of trouble.
-
-
-
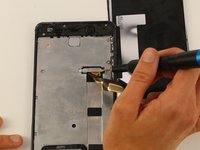
Remove 18 screws.
-
There is one 1 mm x 1.4 mm screw that needs to be removed by a Phillips #000 screwdriver.
-
One of the screws is 1.2 mm x 4.2 mm and will be removed by a Phillips #00.
-
The remaining 16 screws can be removed by the Phillips #00 screwdriver and are 1.2 mm x 2.2 mm.
Two things I found wrong in this step:
1) The 1 mm x 1.4 mm screw is the one on the right of the red circle, not the red circled one.
2) It not needed to remove that screw if we are changing the battery only. That screw is holding a bracket not the the middle plate, remove it only cause unnecessary trouble.
This comment is accurate, the #000 screw should be left untouched.
Tarmo -
-
-
-
Decouple the midframe with the spudger and remove the midframe from the device.
-
-
crwdns2935267:0crwdne2935267:0Tweezers$4.99
-
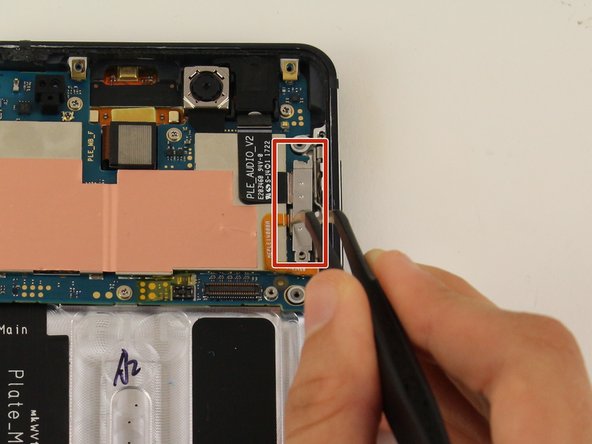
Remove the bracket with tweezers.
-
-
-
Detach the two cables with the spudger.
-
Detach the cable with a pair of tweezers.
-
-
-
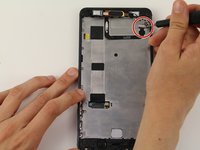
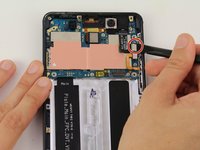
Remove six screws.
-
Two of these screws are 1.0 mm x 1.4 mm and need to be removed by a Phillips #000 screwdriver.
-
The remaining four screws are 1.2 mm x 2.2 mm and are removed by a Phillips #00 screwdriver.
-
-
-
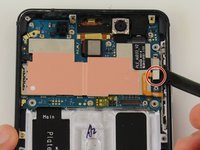
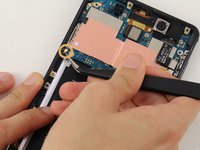
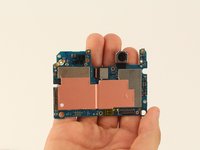
Remove the motherboard from the Nokia 6 with the spudger.
-
-
crwdns2935267:0crwdne2935267:0Tweezers$4.99
-
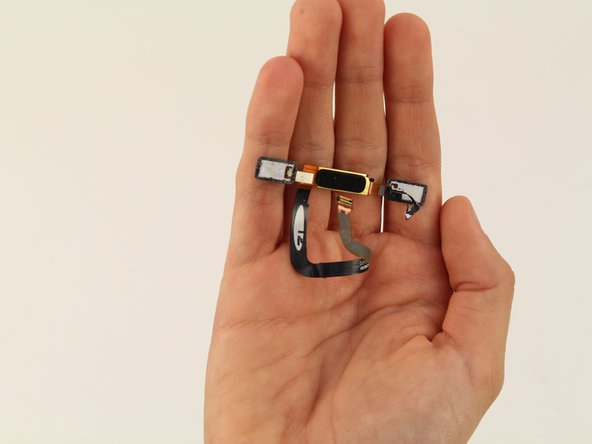
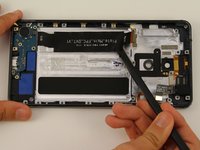
With tweezers, lift the wire by the microUSB port and the microphone unit.
-
-
-
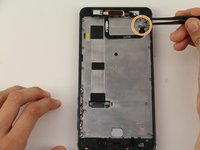
Remove three screws.
-
Two of these are 1 mm x 1.4 mm and can be removed by a Phillips #000.
-
One of the screws is 1.2 mm x 2.2 mm and can be removed by a Phillips #00.
-
-
-
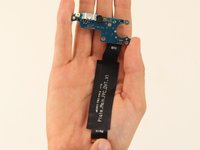
Remove the microUSB port and the microphone by lifting the unit with a spudger.
-


To reassemble your device, follow these instructions in reverse order.
To reassemble your device, follow these instructions in reverse order.
crwdns2935221:0crwdne2935221:0
crwdns2935229:02crwdne2935229:0

crwdns2915084:0crwdne2915084:0

Cal Poly, Team S9-G15, Maness Spring 2019 crwdns2935289:0Cal Poly, Team S9-G15, Maness Spring 2019crwdne2935289:0
CPSU-MANESS-S19S9G15
crwdns2931471:04crwdne2931471:0
crwdns2935297:014crwdne2935297:0
crwdns2947410:01crwdne2947410:0
Thanks. I used this guide to help me replace the thermal paste TIM on my LG V20 H990DS… It did make the phone more stable, but didn’t fix image ghosting… Oh well. Thanks again! 8 ball pool