crwdns2933423:0crwdne2933423:0
crwdns2947577:0crwdnd2947577:0crwdne2947577:0
Nokia 2128i Logic Board Replacement

Nokia 2128i Logic Board Replacement

Chad

crwdns2944107:0crwdnd2944107:0Chadcrwdnd2944107:0crwdnd2944107:0crwdnd2944107:04crwdnd2944107:0crwdne2944107:0

crwdns2944111:0Ndz 9, 2017crwdne2944111:0

5 - 10 crwdns2931279:0crwdne2931279:0
crwdns2937801:0crwdne2937801:0

crwdns2915892:0crwdne2915892:0

crwdns2942287:0crwdne2942287:0

If the phone's problem lies in the logic board, use this guide to change the logic board out.

crwdns2942213:0crwdne2942213:0

crwdns2943215:0crwdne2943215:0

  1. Nokia 2128i Logic Board Replacement, Battery: crwdns2935265:01crwdnd2935265:01crwdnd2935265:03crwdne2935265:0 Nokia 2128i Logic Board Replacement, Battery: crwdns2935265:01crwdnd2935265:02crwdnd2935265:03crwdne2935265:0 Nokia 2128i Logic Board Replacement, Battery: crwdns2935265:01crwdnd2935265:03crwdnd2935265:03crwdne2935265:0
    • Be sure cell phone is off before you begin to disassemble the phone.

    • Press the button on the bottom of the back of the cell phone.

    • Slide rear panel down and remove it.

  2. Nokia 2128i Logic Board Replacement: crwdns2935265:02crwdnd2935265:01crwdnd2935265:03crwdne2935265:0 Nokia 2128i Logic Board Replacement: crwdns2935265:02crwdnd2935265:02crwdnd2935265:03crwdne2935265:0 Nokia 2128i Logic Board Replacement: crwdns2935265:02crwdnd2935265:03crwdnd2935265:03crwdne2935265:0
    • Using your fingernail, pry the back of the battery upwards and pull out.

  3. Nokia 2128i Logic Board Replacement, Faceplate: crwdns2935265:03crwdnd2935265:01crwdnd2935265:03crwdne2935265:0 Nokia 2128i Logic Board Replacement, Faceplate: crwdns2935265:03crwdnd2935265:02crwdnd2935265:03crwdne2935265:0 Nokia 2128i Logic Board Replacement, Faceplate: crwdns2935265:03crwdnd2935265:03crwdnd2935265:03crwdne2935265:0
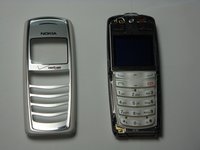
    • Insert the plastic opening tool under the faceplate.

    • Separate the faceplate from main body by twisting the prying tool with some force.

    • The faceplate is held by three plastic fasteners, so pry evenly on both sides of phone.

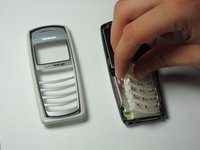
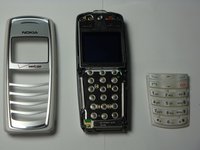
  4. Nokia 2128i Logic Board Replacement, Keypad: crwdns2935265:04crwdnd2935265:01crwdnd2935265:03crwdne2935265:0 Nokia 2128i Logic Board Replacement, Keypad: crwdns2935265:04crwdnd2935265:02crwdnd2935265:03crwdne2935265:0 Nokia 2128i Logic Board Replacement, Keypad: crwdns2935265:04crwdnd2935265:03crwdnd2935265:03crwdne2935265:0
    • With the faceplate removed, simply peel off rubber key pad and remove.

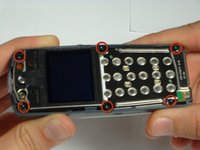
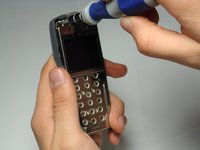
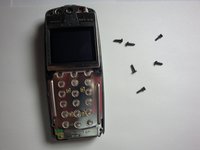
  5. Nokia 2128i Logic Board Replacement, Motherboard Assembly: crwdns2935265:05crwdnd2935265:01crwdnd2935265:03crwdne2935265:0 Nokia 2128i Logic Board Replacement, Motherboard Assembly: crwdns2935265:05crwdnd2935265:02crwdnd2935265:03crwdne2935265:0 Nokia 2128i Logic Board Replacement, Motherboard Assembly: crwdns2935265:05crwdnd2935265:03crwdnd2935265:03crwdne2935265:0
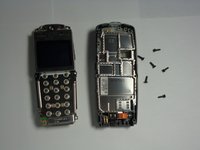
    • Locate and remove the six screws on the front of the phone using a T6 Torx.

    • All 6 screws are 6.9mm long.

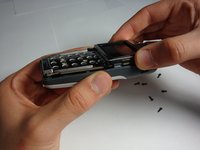
  6. Nokia 2128i Logic Board Replacement: crwdns2935265:06crwdnd2935265:01crwdnd2935265:03crwdne2935265:0 Nokia 2128i Logic Board Replacement: crwdns2935265:06crwdnd2935265:02crwdnd2935265:03crwdne2935265:0 Nokia 2128i Logic Board Replacement: crwdns2935265:06crwdnd2935265:03crwdnd2935265:03crwdne2935265:0
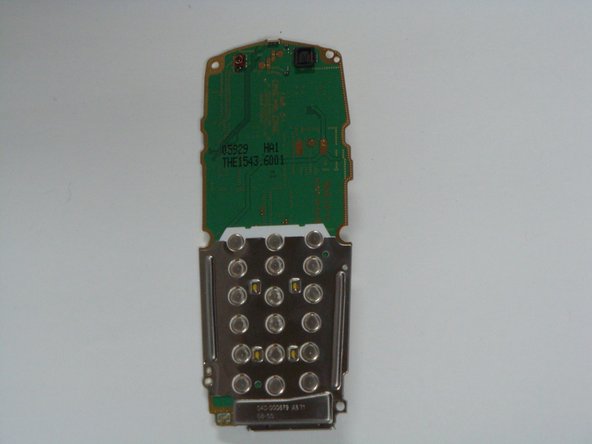
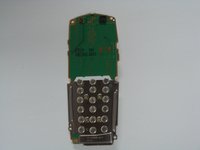
    • After removing screws, lift the motherboard assembly straight off the cell phone body.

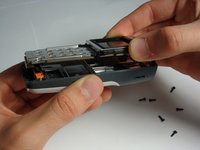
  7. Nokia 2128i Logic Board Replacement, Logic Board: crwdns2935265:07crwdnd2935265:01crwdnd2935265:03crwdne2935265:0 Nokia 2128i Logic Board Replacement, Logic Board: crwdns2935265:07crwdnd2935265:02crwdnd2935265:03crwdne2935265:0 Nokia 2128i Logic Board Replacement, Logic Board: crwdns2935265:07crwdnd2935265:03crwdnd2935265:03crwdne2935265:0
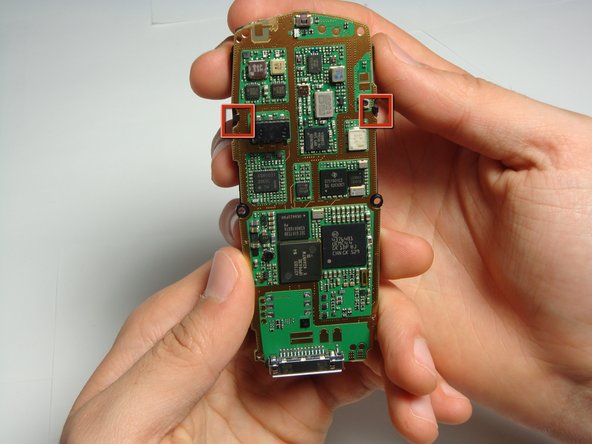
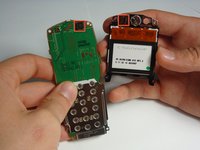
    • Locate the two plastic LCD unit hooks.

    • Pry hooks outward.

  8. Nokia 2128i Logic Board Replacement: crwdns2935265:08crwdnd2935265:01crwdnd2935265:03crwdne2935265:0 Nokia 2128i Logic Board Replacement: crwdns2935265:08crwdnd2935265:02crwdnd2935265:03crwdne2935265:0 Nokia 2128i Logic Board Replacement: crwdns2935265:08crwdnd2935265:03crwdnd2935265:03crwdne2935265:0
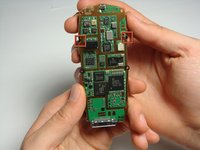
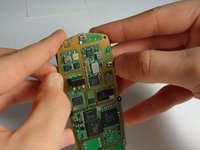
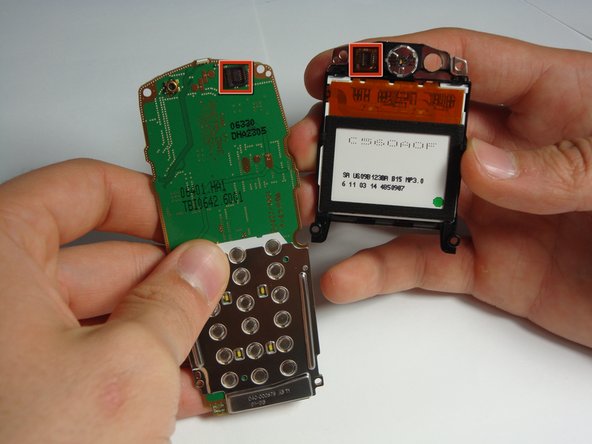
    • Gently pull LCD unit away from the logic board.

    • Be careful not to damage the connection on the top, right hand side of the logic board.

crwdns2915888:0crwdne2915888:0

To reassemble your device, follow these instructions in reverse order.

crwdns2947821:0crwdne2947821:0

crwdns2947823:0crwdne2947823:0

Chad

crwdns2935283:010/29/10crwdne2935283:0

28 crwdns2915208:0crwdne2915208:0

crwdns2935297:05crwdne2935297:0

crwdns2915084:0crwdne2915084:0

Cal Poly, Team 20-8, Maness Fall 2010 crwdns2935289:0Cal Poly, Team 20-8, Maness Fall 2010crwdne2935289:0

CPSU-MANESS-F10S20G8

crwdns2931471:04crwdne2931471:0

crwdns2935297:024crwdne2935297:0

crwdns2947412:00crwdne2947412:0

crwdns2917038:0crwdne2917038:0

crwdns2936625:0crwdne2936625:0:

crwdns2936751:024crwdne2936751:0 0

crwdns2936753:07crwdne2936753:0 2

crwdns2936753:030crwdne2936753:0 12

crwdns2942667:0crwdne2942667:0 1,330