crwdns2915892:0crwdne2915892:0
If your trigger buttons for the Wii U gamepad aren't working as intended, broken, worn, stuck or create unwanted noise, you can use this guide to replace the ZL and ZR triggers of your gamepad. The process will follow six easy steps and it is very beginner-friendly.
The gamepad will be screwed open and some wires will be temporarily disconnected to gain access to the trigger buttons. The gamepad will require one special tool to be opened so refer to the tools section to make sure you are ready.
Before starting, make sure your Wii U gamepad is powered off and disconnected from any wires.
crwdns2942213:0crwdne2942213:0
-
-
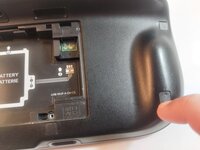
Loosen the two 4.7 mm screws located on the bottom using a Phillips #00 screwdriver.
-
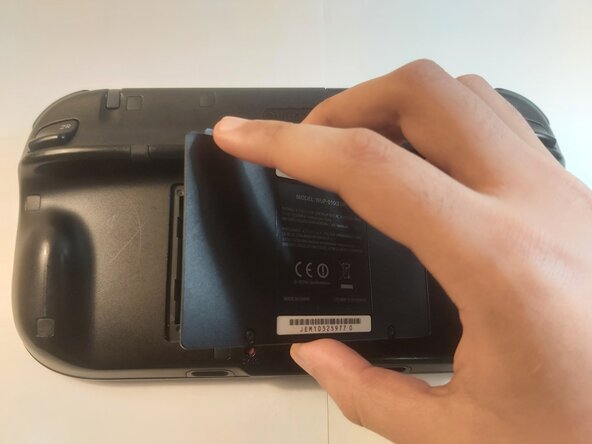
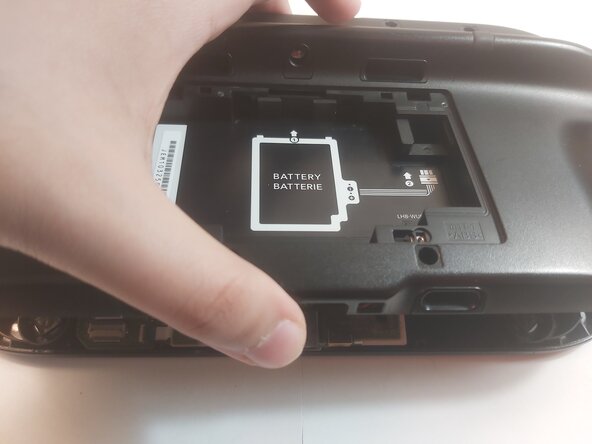
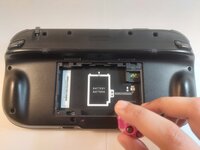
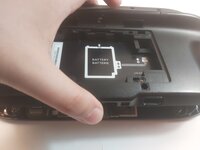
Unlatch and remove the cover to unveil the battery.
-
-
-
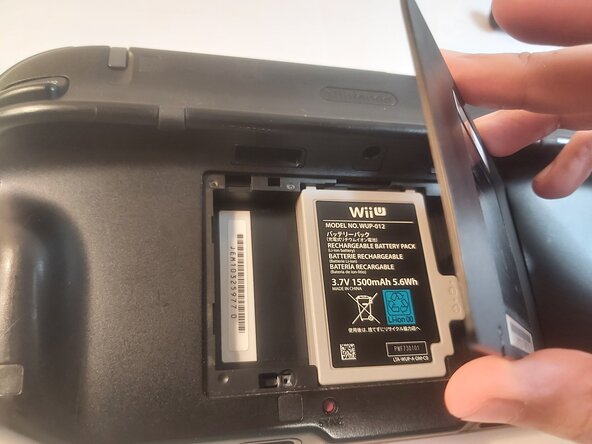
Grab the battery by the sides and gently remove it from the slot.
-
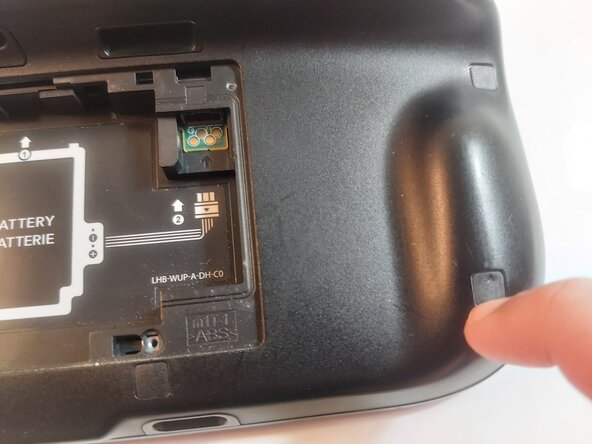
Gently press down on the wire's latch to disconnect the battery.
-
Remove the battery and set it aside.
-
-
-
-
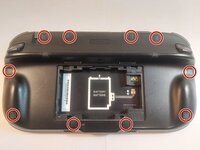
Gently slide your fingernails under the ten rubber pads to remove them and reveal the hidden screws.
-
-
-
Remove the ten 8.9 mm Tri-wing Y1 backplate screws.
-
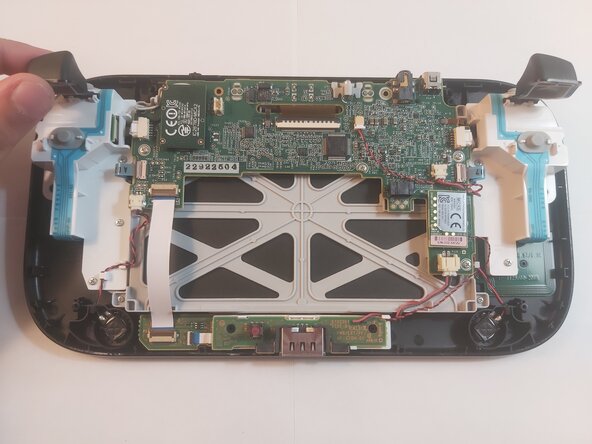
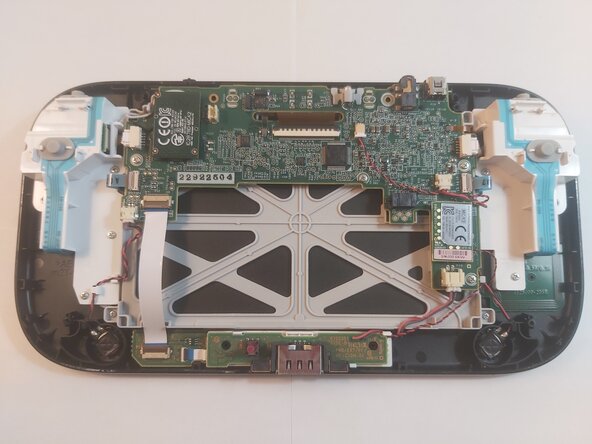
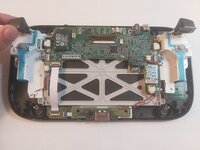
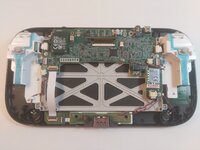
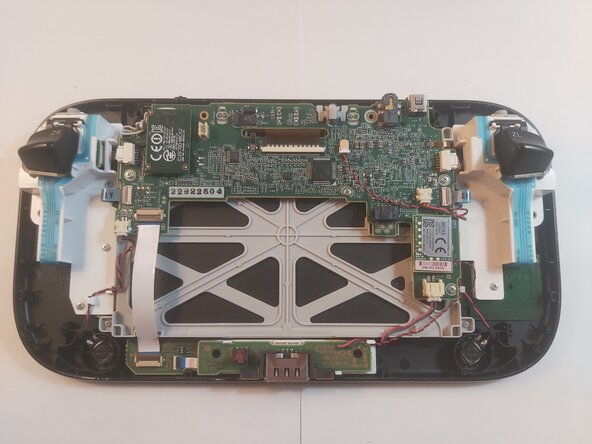
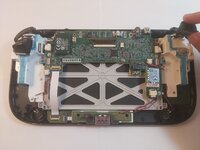
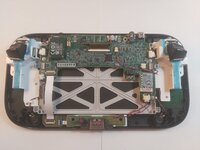
Gently open the backplate by lifting it from the bottom to unveil the internals.
-
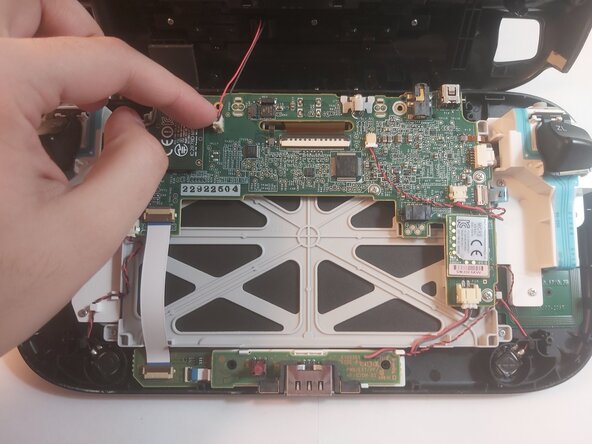
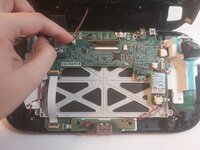
Gently remove the plastic wire connecting the backplate to the board.
-
-
-
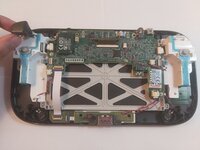
Gently lift and slide the ZL and ZR triggers off to remove them from the slot.
-
-
-
Insert the new triggers by gently sliding them into the ZL and ZR spots respectively.
-
Continue to reassembling the Gamepad.
-


To reassemble your device, follow these instructions in reverse order.
crwdns2935221:0crwdne2935221:0
crwdns2935227:0crwdne2935227:0

crwdns2935287:0crwdne2935287:0

York University, Team 2-7, Woodhouse Spring 2025 crwdns2935289:0York University, Team 2-7, Woodhouse Spring 2025crwdne2935289:0
YORK-WOODHOUSE-S25S2G7
crwdns2931471:02crwdne2931471:0
crwdns2935303:01crwdne2935303:0