crwdns2915892:0crwdne2915892:0
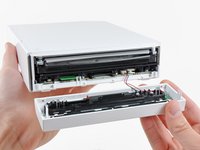
Use this guide to replace your Wii's faceplate. Replacing the faceplate will provide new blue LEDs that light up around the optical drive opening.
crwdns2942213:0crwdne2942213:0
-
-
Use a metal spudger to remove the white plastic screw covers stuck to the lower case near the front of the Wii.
 crwdns2952109:0crwdne2952109:0
-
-
-
Remove the two 8.3 mm Tri-Point screws hidden under the covers you just removed.
-
-
-
-
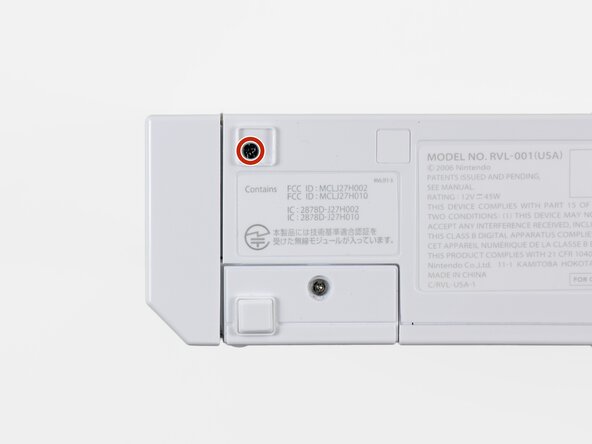
Remove the single 5.9 mm Phillips screw under the controller port door nearest the faceplate.
-
-
-
Use a metal spudger to remove the rubber foot stuck to the side of the Wii near the DVD drive opening.
-
-
-
Remove the single 5.9 mm Phillips screw hidden under the foot you just removed.
-
-
crwdns2935267:0crwdne2935267:0Tweezers$4.99


To reassemble your device, follow these instructions in reverse order.
crwdns2935221:0crwdne2935221:0
crwdns2935229:026crwdne2935229:0

crwdns2947412:03crwdne2947412:0
Any more to do if pressing the on button does nothing, its still red power light?
Kyrre - crwdns2934203:0crwdne2934203:0 crwdns2950251:0crwdne2950251:0
Tanks for this guide Btw
Kyrre - crwdns2934203:0crwdne2934203:0 crwdns2950251:0crwdne2950251:0
Thanks for the guide, I just wish it continued with replacing the components within the faceplate, as I wanted to replace the white shell. Still helpful though!
Cynthia - crwdns2934203:0crwdne2934203:0 crwdns2950251:0crwdne2950251:0