crwdns2915892:0crwdne2915892:0
Use this guide to replace a broken DVD drive. Depending on your new part, you may have to swap out the four rubber grommets on the DVD drive housing.
crwdns2942213:0crwdne2942213:0
-
-
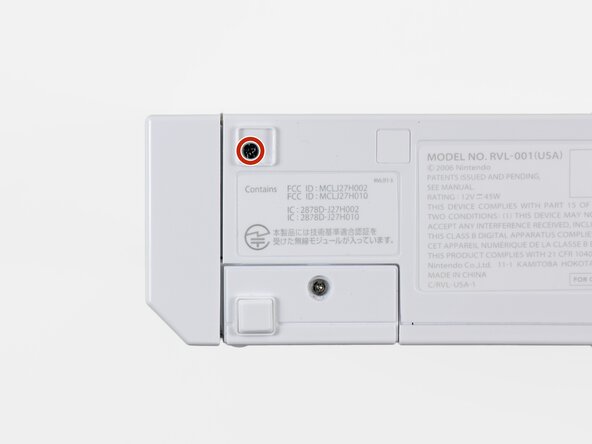
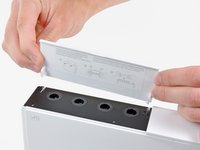
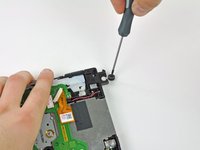
Use a metal spudger to remove the white plastic screw covers stuck to the lower case near the front of the Wii.
 crwdns2952109:0crwdne2952109:0
-
-
-
Remove the two 8.3 mm Tri-Point screws hidden under the covers you just removed.
-
-
-
Remove the single 5.9 mm Phillips screw under the controller port door nearest the faceplate.
-
-
-
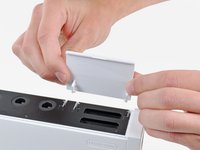
Use a metal spudger to remove the rubber foot stuck to the side of the Wii near the DVD drive opening.
-
-
-
Remove the single 5.9 mm Phillips screw hidden under the foot you just removed.
-
-
crwdns2935267:0crwdne2935267:0Tweezers$4.99
-
-
Open the controller port cover until it is perpendicular to the black controller port bezel.
-
Pull the controller port cover straight up to release it from the outer case.
-
-
-
Remove the two remaining 4.1 mm Phillips screws along the top edge of the black plastic controller port bezel.
-
Lift the bezel from the long edge furthest away from the controller ports and remove it from the Wii.
-
-
-
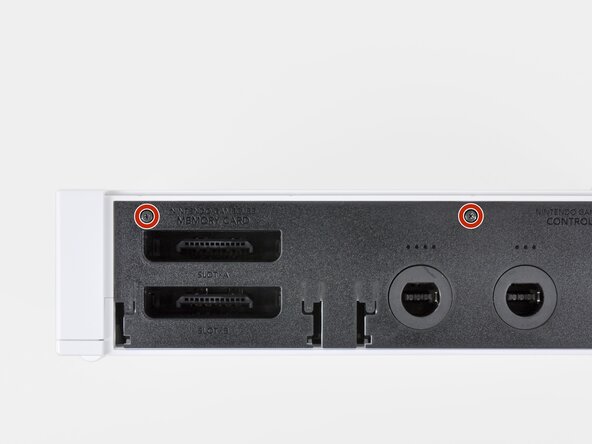
Remove the two 5 mm Phillips screws above the controller ports.
-
-
-
-
Use a metal spudger to remove the three highlighted screw covers stuck to the side of the Wii.
-
-
-
Remove the following screws:
-
Two 5 mm Phillips screws
-
One 8.2 mm Tri-Point screw
-
-
-
Use a metal spudger to remove the two rubber feet stuck to the bottom face of the Wii near the rear ports.
-
-
crwdns2935267:0crwdne2935267:0iFixit Precision 4 mm Screwdriver Bit$2.99
-
Remove the two 8.2 mm Tri-Point screws hidden under the feet you just removed.
-
-
-
Lift the outer case straight up off the body of the Wii.
-
-
-
Remove the small Phillips screw securing the battery door to the bottom panel.
-
Pull the battery door out of the Wii.
-
-
-
Remove the 8.2 mm Tri-Point screw that was hidden beneath the battery door.
-
-
-
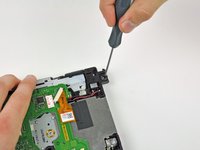
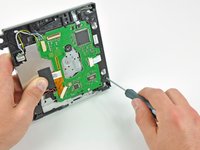
Remove the two 8.2 mm Tri-Point screws securing the DVD drive shield near the controller ports.
-
-
-
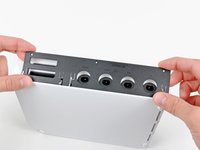
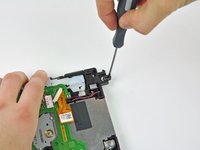
Lift the DVD drive shield upward and remove it from the Wii.
-
-
-
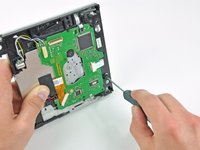
Remove the four 9 mm Phillips screws securing the DVD drive to the bottom panel.
-
-
-
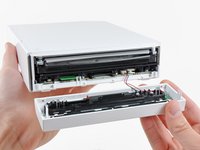
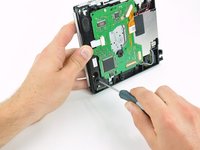
Lift the side of the DVD drive opposite the controller ports enough to access the cables on its bottom face.
-
Carefully pull the DVD drive power cable out from under the plastic shroud near the heat sink.
-
-
-
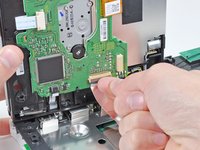
Pull the DVD drive power cable away from its socket on the DVD drive.
-
-
-
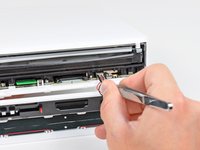
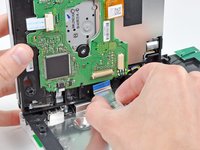
Use your fingernail to flip up the retaining flap on the DVD drive ribbon cable socket.
-
Pull the DVD drive ribbon cable out of its socket.
-
Remove the DVD drive from the Wii.
-
-
-
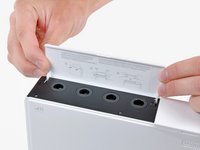
Insert the tip of a long, skinny screwdriver into the hole in the center of the first grommet on the rear of the DVD drive housing.
-
Pull the grommet straight away from the DVD drive housing until it is free.
-
-
-
Repeat the procedure described in the preceding step for the second rubber grommet on the rear of the DVD drive housing.
-
-
-
Insert the end of the skinny screwdriver into the hole in the center of the lower rubber grommet along the front of the DVD drive housing.
-
Pull the screwdriver straight up until the grommet is free.
-
-
-
Repeat the procedure in the preceding step to remove the second rubber grommet along the front of the DVD drive housing.
-


To reassemble your device, follow these instructions in reverse order.
crwdns2935221:0crwdne2935221:0
crwdns2935229:0465crwdne2935229:0

crwdns2947412:0105crwdne2947412:0
Brilliant guide. I had the drive swapped in 10 mins and my son is over the moon.
Patrick Anderson - crwdns2934203:0crwdne2934203:0 crwdns2950251:0crwdne2950251:0
My Wii stopped reading disks and there was a bad clicking noise when trying to read disks. I swapped it out with a new one by following this guide and it works perfectly now! I could not be more pleased. Great guide!
adamhuttonc - crwdns2934203:0crwdne2934203:0 crwdns2950251:0crwdne2950251:0
This was exact and awesome. I ordered a drive online and installed it using these very exact and useful instructions. worked perfectly, and two little people are quite happy. Thanks again.
markstewart73 - crwdns2934203:0crwdne2934203:0 crwdns2950251:0crwdne2950251:0
I need the video here is one: http://www.youtube.com/watch?v=u0qXRq8hB...
Tezz Ly - crwdns2934203:0crwdne2934203:0 crwdns2950251:0crwdne2950251:0
Excellent Guide!! Very descriptive.
billyf0486 - crwdns2934203:0crwdne2934203:0 crwdns2950251:0crwdne2950251:0