crwdns2915892:0crwdne2915892:0
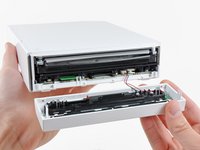
Replacing the bottom panel requires removal of every component inside the Wii.
crwdns2942213:0crwdne2942213:0
-
-
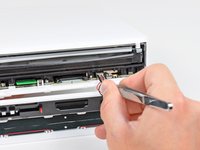
Use a metal spudger to remove the white plastic screw covers stuck to the lower case near the front of the Wii.
-
-
-
Remove the two 8.3 mm Tri-Point screws hidden under the covers you just removed.
-
-
-
Remove the single 5.9 mm Phillips screw under the controller port door nearest the faceplate.
-
-
-
Use a metal spudger to remove the rubber foot stuck to the side of the Wii near the DVD drive opening.
-
-
-
Remove the single 5.9 mm Phillips screw hidden under the foot you just removed.
-
-
crwdns2935267:0crwdne2935267:0Tweezers$4.99
-
Carefully pull the faceplate away from the front of the Wii.
-
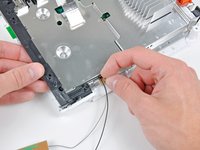
Use a pair of tweezers to disconnect the LED cable's plastic connector from the motherboard.
-
Remove the faceplate.
-
-
-
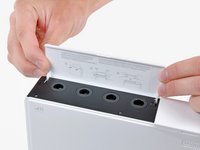
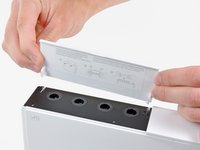
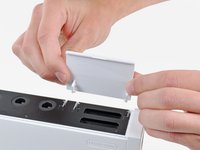
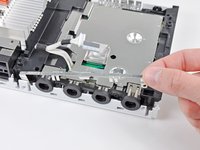
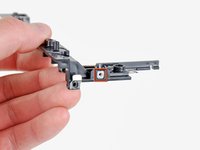
Open the controller port cover until it is perpendicular to the black controller port bezel.
-
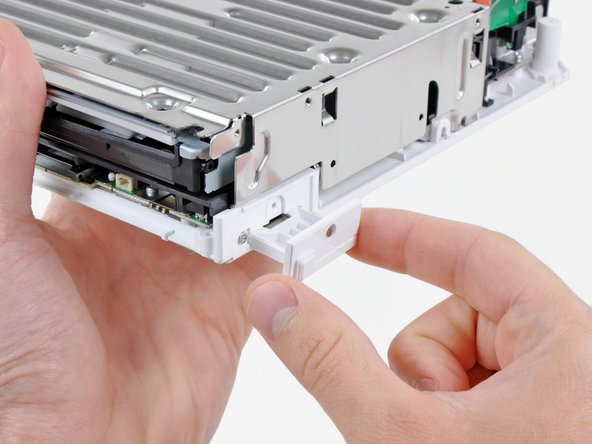
Pull the controller port cover straight up to release it from the outer case.
-
-
-
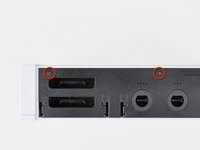
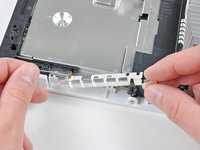
Remove the two remaining 4.1 mm Phillips screws along the top edge of the black plastic controller port bezel.
-
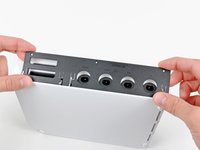
Lift the bezel from the long edge furthest away from the controller ports and remove it from the Wii.
-
-
-
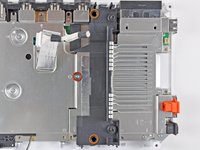
Remove the two 5 mm Phillips screws above the controller ports.
-
-
-
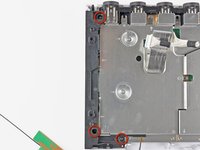
Use a metal spudger to remove the three highlighted screw covers stuck to the side of the Wii.
-
-
-
Remove the following screws:
-
Two 5 mm Phillips screws
-
One 8.2 mm Tri-Point screw
-
-
-
Use a metal spudger to remove the two rubber feet stuck to the bottom face of the Wii near the rear ports.
-
-
-
Remove the two 8.2 mm Tri-Point screws hidden under the feet you just removed.
-
-
-
-
Lift the outer case straight up off the body of the Wii.
-
-
-
Remove the small Phillips screw securing the battery door to the bottom panel.
-
Pull the battery door out of the Wii.
-
-
-
Remove the 8.2 mm Tri-Point screw that was hidden beneath the battery door.
-
-
-
Remove the two 8.2 mm Tri-Point screws securing the DVD drive shield near the controller ports.
-
-
-
Lift the DVD drive shield upward and remove it from the Wii.
-
-
-
Remove the four 9 mm #1 Phillips screws securing the DVD drive to the bottom panel.
-
-
-
Lift the side of the DVD drive opposite the controller ports enough to access the cables on its bottom face.
-
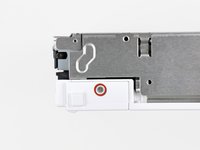
Carefully pull the DVD drive power cable out from under the plastic shroud near the heat sink.
-
-
-
Pull the DVD drive power cable away from its socket on the DVD drive.
-
-
-
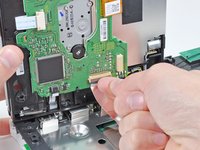
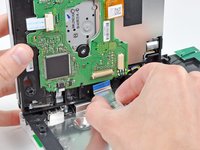
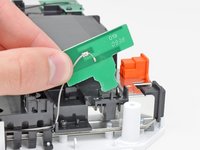
Use your fingernail to flip up the retaining flap on the DVD drive ribbon cable socket.
-
Pull the DVD drive ribbon cable out of its socket.
-
Remove the DVD drive from the Wii.
-
-
crwdns2935267:0crwdne2935267:0Tweezers$4.99
-
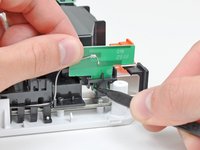
Use a pair of tweezers to lift the fan connector up and out of its socket on the logic board.
-
-
-
Remove the two 10 mm Phillips screws securing the fan to the fan shroud.
-
Remove the fan from the Wii.
-
-
-
Use the tip of a spudger or another fine-pointed tool to carefully pry one of the black plastic retaining fingers attached to the fan shroud away from the Wi-Fi antenna board.
-
Lift the Wi-Fi antenna out of the fan shroud.
-
-
-
Remove the single 10 mm Phillips screw securing the second Wi-Fi antenna to the top of the fan shroud.
-
-
-
Remove the two pieces of tape securing the second Wi-Fi antenna cable to the plastic bracket near the heat sink.
-
-
-
Carefully de-route both antennas from the frame of the Wii and lay them aside.
-
-
-
Remove the three 10 mm Phillips screws securing the fan shroud to the Wii.
-
Lift the fan shroud off the heat sink and remove it from the Wii.
-
-
-
Remove the following six screws securing the EMI fingers to the bottom panel:
-
Four 7 mm Phillips screws
-
Two 11.3 mm Phillips screws
-
Remove both sets of EMI fingers from the Wii.
-
-
-
Remove the following three screws:
-
One 7 mm Phillips screw
-
Two 10 mm Phillips screws
-
Lift the bracket out of the Wii.
-
-
-
Remove the three 10 mm Phillips screws securing the black bracket to the bottom panel near the front of the Wii.
-
Slightly lift the bracket and use your other hand to pull the retaining clip away from where the Wi-Fi antennas enter the motherboard sheild.
-
Remove the bracket from the Wii.
-
-
-
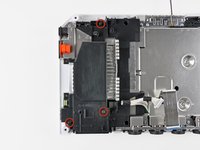
Remove the nine remaining 7 mm Phillips screws securing the motherboard cover to the bottom panel.
-
-
-
Carefully lift the motherboard cover off the motherboard, minding any cables that may get caught.
-
-
-
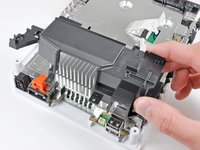
Remove the four 11.3 mm Phillips screws securing the heat sink to the bottom panel.
-
-
-
Lift the heat sink off the motherboard.
-
-
-
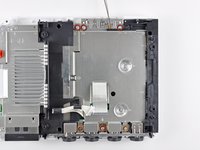
Lift the motherboard assembly off the bottom panel, minding any cables that may get caught.
-
Bottom panel remains.
-


To reassemble your device, follow these instructions in reverse order.
To reassemble your device, follow these instructions in reverse order.
crwdns2935221:0crwdne2935221:0
crwdns2935229:012crwdne2935229:0

crwdns2947412:03crwdne2947412:0
Hi, what is the purpose of the foam block in the last step? I've recently done a case mod, by my foam is not oriented correctly. Someone said this can cause issues. But I would like to know what exactly is its purpose.
### The small foam piece inside the Wii where the power cable plugs into serves as a cushion and helps to secure the connection.
* It helps to prevent any unwanted movement or vibrations that could potentially disrupt the power supply to the Wii console.
* The foam piece may act as a barrier to reduce the risk of any electrical interference or short circuits that could occur when plugging or unplugging the power cable.
* It's a simple but useful design element to ensure a stable and reliable power connection for the Wii console.
I used this to help tear down my Wii clean out a wad of dust and pet hair. Thanks for the guide!