crwdns2933423:0crwdne2933423:0

Nintendo Switch Headphone Jack and Game Card Board Replacement

crwdns2862587:0crwdne2862587:0
crwdns2862588:0crwdne2862588:0

crwdns2942213:0crwdne2942213:0

  1. Nintendo Switch Headphone Jack and Game Card Board Replacement, Headphone Jack and Game Card Board: crwdns2935265:01crwdnd2935265:01crwdnd2935265:03crwdne2935265:0 Nintendo Switch Headphone Jack and Game Card Board Replacement, Headphone Jack and Game Card Board: crwdns2935265:01crwdnd2935265:02crwdnd2935265:03crwdne2935265:0 Nintendo Switch Headphone Jack and Game Card Board Replacement, Headphone Jack and Game Card Board: crwdns2935265:01crwdnd2935265:03crwdnd2935265:03crwdne2935265:0
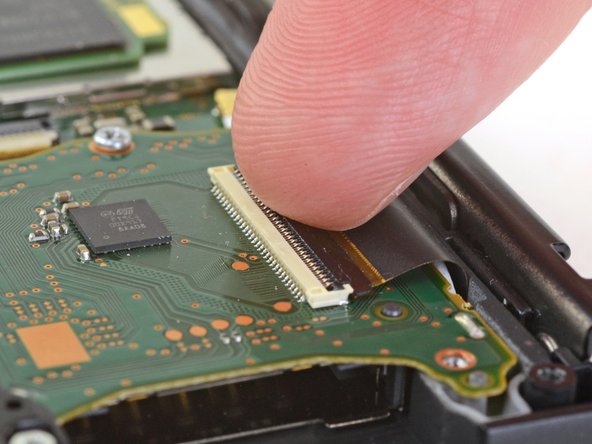
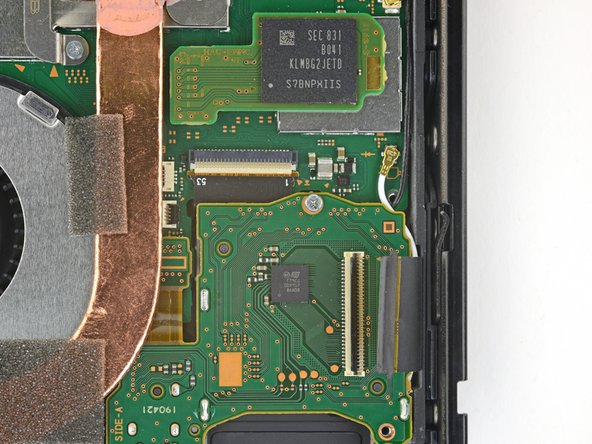
    • Use a clean fingernail to flip open the lock on the game card reader ZIF connector by prying it straight up.

  2. Nintendo Switch Headphone Jack and Game Card Board Replacement: crwdns2935265:02crwdnd2935265:01crwdnd2935265:03crwdne2935265:0 Nintendo Switch Headphone Jack and Game Card Board Replacement: crwdns2935265:02crwdnd2935265:02crwdnd2935265:03crwdne2935265:0 Nintendo Switch Headphone Jack and Game Card Board Replacement: crwdns2935265:02crwdnd2935265:03crwdnd2935265:03crwdne2935265:0
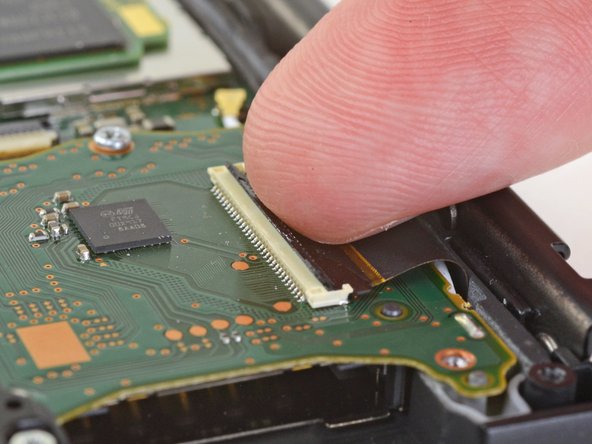
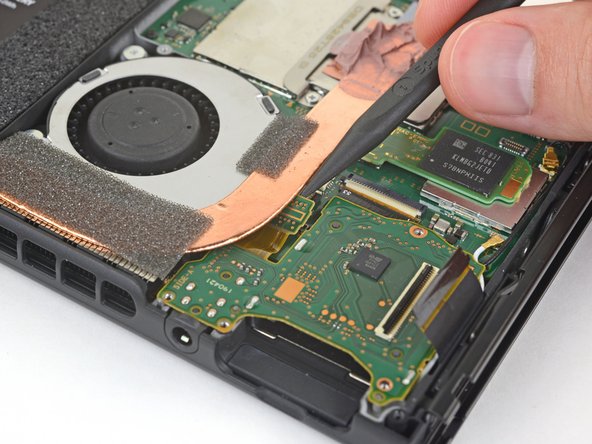
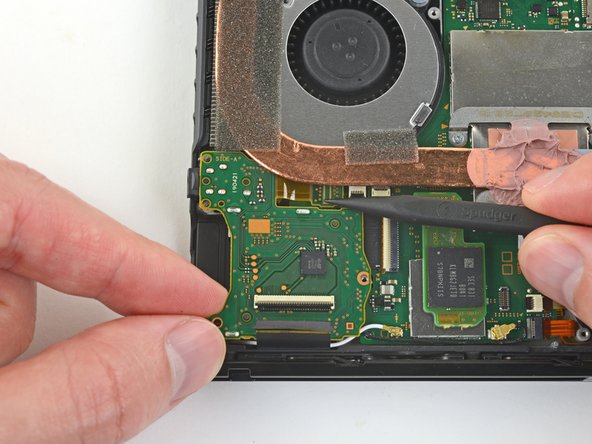
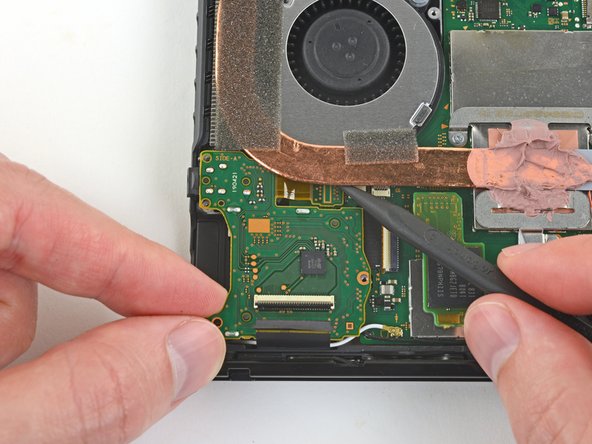
    • Use the tip of a spudger to gently slide the game card reader ribbon cable out of its socket.

  3. Nintendo Switch Headphone Jack and Game Card Board Replacement: crwdns2935265:03crwdnd2935265:01crwdnd2935265:02crwdne2935265:0 Nintendo Switch Headphone Jack and Game Card Board Replacement: crwdns2935265:03crwdnd2935265:02crwdnd2935265:02crwdne2935265:0
    • Use a Phillips driver to remove the two 3.1 mm screws from the headphone jack bracket.

  4. Nintendo Switch Headphone Jack and Game Card Board Replacement: crwdns2935265:04crwdnd2935265:01crwdnd2935265:01crwdne2935265:0
    • Remove the headphone jack bracket.

  5. Nintendo Switch Headphone Jack and Game Card Board Replacement: crwdns2935265:05crwdnd2935265:01crwdnd2935265:02crwdne2935265:0 Nintendo Switch Headphone Jack and Game Card Board Replacement: crwdns2935265:05crwdnd2935265:02crwdnd2935265:02crwdne2935265:0
    • Use a Phillips driver to remove the single 3.1 mm screw from the headphone jack and game card board.

  6. Nintendo Switch Headphone Jack and Game Card Board Replacement: crwdns2935265:06crwdnd2935265:01crwdnd2935265:02crwdne2935265:0 Nintendo Switch Headphone Jack and Game Card Board Replacement: crwdns2935265:06crwdnd2935265:02crwdnd2935265:02crwdne2935265:0
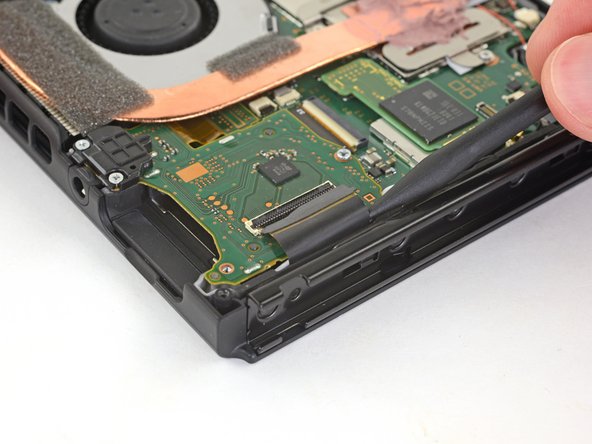
    • Use the tip of a spudger to disconnect the headphone jack by prying its connector straight up.

    • The connector is partially obscured by the copper heat pipe. Make sure it disconnects completely.

  7. Nintendo Switch Headphone Jack and Game Card Board Replacement: crwdns2935265:07crwdnd2935265:01crwdnd2935265:03crwdne2935265:0 Nintendo Switch Headphone Jack and Game Card Board Replacement: crwdns2935265:07crwdnd2935265:02crwdnd2935265:03crwdne2935265:0 Nintendo Switch Headphone Jack and Game Card Board Replacement: crwdns2935265:07crwdnd2935265:03crwdnd2935265:03crwdne2935265:0
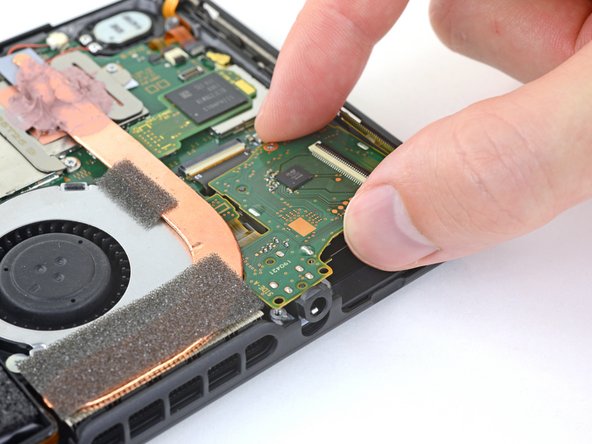
    • Gently lift the game card reader board, starting with the headphone jack.

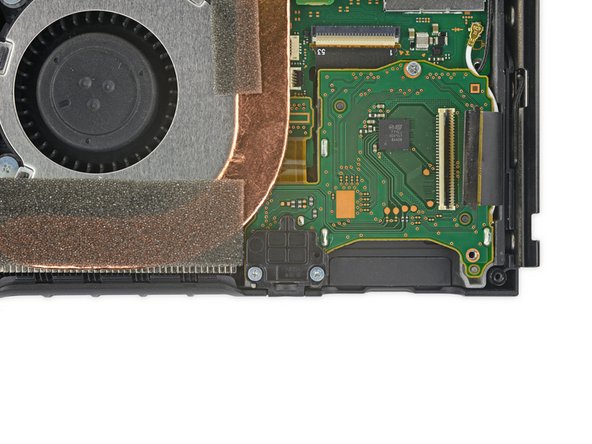
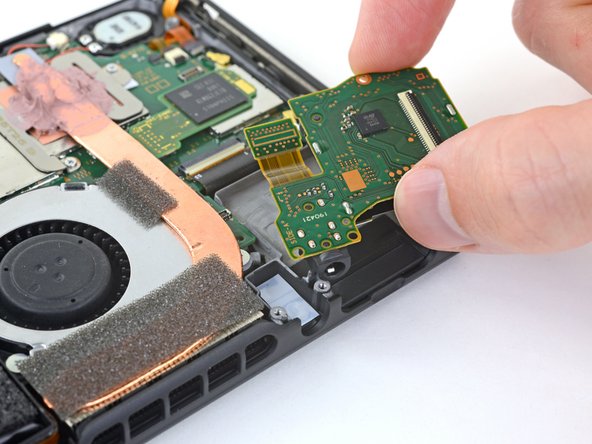
    • Slide the game card reader board away from the copper heat pipe, and remove it.

  8. Nintendo Switch Headphone Jack and Game Card Board Replacement, Reassembly Note: crwdns2935265:08crwdnd2935265:01crwdnd2935265:03crwdne2935265:0 Nintendo Switch Headphone Jack and Game Card Board Replacement, Reassembly Note: crwdns2935265:08crwdnd2935265:02crwdnd2935265:03crwdne2935265:0 Nintendo Switch Headphone Jack and Game Card Board Replacement, Reassembly Note: crwdns2935265:08crwdnd2935265:03crwdnd2935265:03crwdne2935265:0
    • During reassembly, to seat the headphone jack connector, pull the entire game card reader board slightly toward the top edge of the Switch so that the headphone jack connector lines up with its socket.

    • Use your spudger to press the connector down until it snaps into place.

    • Press all along the top of the connector to make sure it seats correctly, including the area under the heat pipe.

crwdns2915888:0crwdne2915888:0

To reassemble your device, follow these instructions in reverse order.

Blake Klein

crwdns2935283:001/29/17crwdne2935283:0

72.405 crwdns2915208:0crwdne2915208:0

crwdns2935297:050crwdne2935297:0

crwdns2947412:00crwdne2947412:0

crwdns2917038:0crwdne2917038:0

crwdns2936625:0crwdne2936625:0:

crwdns2936751:024crwdne2936751:0 0

crwdns2936753:07crwdne2936753:0 0

crwdns2936753:030crwdne2936753:0 3

crwdns2942667:0crwdne2942667:0 14