crwdns2915892:0crwdne2915892:0
This guide will teach you how to disassemble the GameCube Optical Drive Assembly for the purpose of accessing the Optical Drive and the laser. These parts are responsible for reading the information off of the game discs which allows games to be played on the console.
If the Optical Drive malfunctions (fails to spin the disc for example) or the Optical Laser Lens is damaged, it can prevent the game discs from being read properly. This can warrant a replacement of the device part. As the GameCube is an older console, E-bay would be a good place to start when searching for a replacement part.
Before attempting the disassembly, you will need a 4.5 mm Gamebit screwdriver. This is special tool that is used to open certain Nintendo consoles and can be ordered online from Amazon.
crwdns2942213:0crwdne2942213:0
-
-
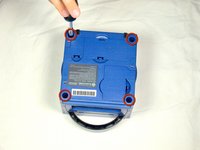
Turn over the Gamecube so that the bottom side is facing up.
-
Use the 4.5 mm Gamebit screwdriver to remove all four screws.
-
-
-
With the bottom side of the GameCube facing upward and the screws removed, carefully pull the outer shell of the unit away from the top half.
-
Move the GameCube so that the inside is facing upwards.
This can also be done whilst being in the normal upright position after all 4 of the 4.5mm Gamebit screws have been removed. Pull the top of the shell directly upwards and it should slide off easily.
Less chance of snagging any wires or parts.
-
-
-
Gently press down on the clips located on either side of the back panel.
-
Carefully remove the back panel from the GameCube.
A second picture clearly showing which direction to pull the back panel away from the unit would be nice.
-
-
-
Unclip the controller ports at the front of the unit.
well... what happens if accidentally i disconnected it?
presumably nothing major. The CMOS battery is attached to the controller ports, so the most i'd expect is that the gamecube loses it's date/time setting. As long as you reset that before jumping into animal crossing or something, you should be fine. I'm currently doing a teardown of my gamecube, and if something does prove to have gone wrong, i'll report back.
sigoshi -
okay, i finished putting it back together. gamecube works fine and surprisingly still remembers what year it is. boots into smash bros and shows memory card contents fine.
sigoshi -
-
-
-
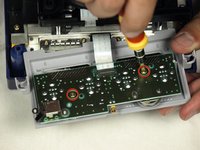
Use a Phillips #2 screwdriver to remove the two screws on the back of the control port.
-
Carefully separate the gray outer casing of the control port and the circuit board.
must do this?
That step is not needed for the laser replacement.
Love ur labeling and legends. Good on ya
Not a necessary step
-
-
-
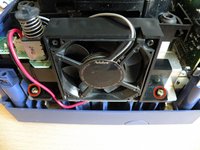
The left side of the unit contains the cooling fan and its housing.
-
Carefully remove the two screws attaching the cooling fan housing to the unit.
Why can't the fan wire be detached?
It can, but you might not want to
-
-
-
-
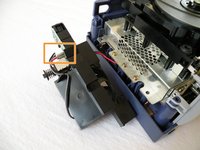
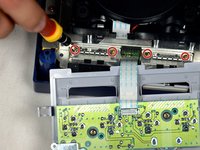
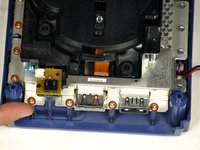
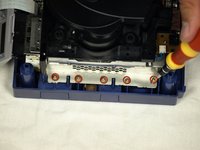
Remove the four Phillips #1 screws retaining the ground springs.
-
Carefully remove the ground springs from the main unit.
-
-
-
The optical drive is secured to a metal plate.
-
Using a Phillips #2 screwdriver, unscrew the twelve screws that are around the outer edge of the optical drive.
Are these 12 screws the exact same kind like the 2 that were on the fan?
Yes! As far as I can tell anyway. Makes sense, too since opposite the fan you have five of the same holes as well.
-
-
-
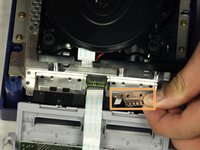
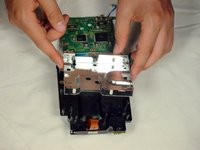
Carefully separate the optical drive assembly from the rest of the GameCube unit.
-
The optical drive assembly is secured to the motherboard underneath by a slot; some force may be required to carefully free the assembly.
-
The metal plate and the actual optical drive will remain attached.
-
-
-
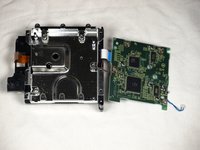
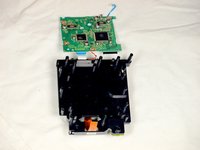
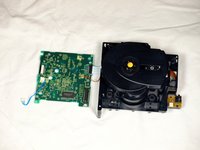
At this point, your optical drive assembly should be separated from your GameCube.
-
Flip the optical drive assembly upside down.
-
Remove the six screws with a Phillips #1 screwdriver.
-
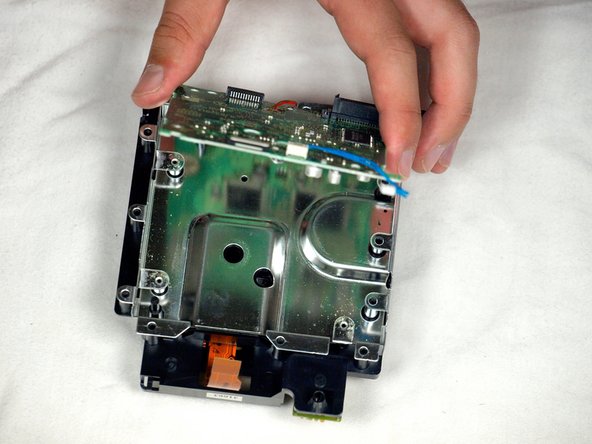
Gently lift and remove the metal plate.
If you are just doing the lens power adjustment, from this step skip straight to step 17. Steps 11-16 are unnecessary unless you are replacing the lens completely.
-
-
-
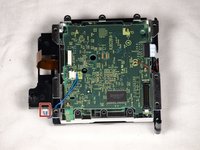
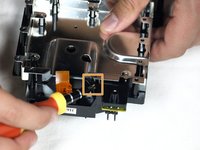
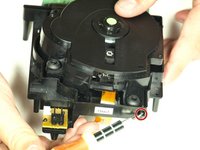
Remove the blue wire by gently pulling.
-
Disconnect the brown cable. This is done by gently pulling the black tab away from the white plastic. This will loosen the tension on the brown cable, allowing it to slide away from the tab gently.
-
Remove the four Phillips #1 screws connecting the circuit board to the optical drive assembly.
-
The fourth screw is located behind the screwdriver in the third picture.
A helpful addition/change to this step would be to include a photo of where/how to remove the brown ribbon cable (maybe also include this terminology in the text, instead of just “cable”). Furthermore, the yellow box to indicate the blue cable highlights everything except the part that you need to remove, which is a little confusing.
Thanks!
Ben
I cannot get the 4 little screws to go back into the board once removed. There is nothing for them to bite into - how do I get this board put back together?
I had this same issue — until I realized that the metal plate goes back on BEFORE the circuit board XD. Once you out the metal plate back on and put the circuit board on top of that, the screws should go in okay.
-
-
-
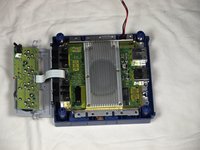
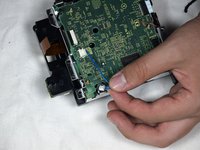
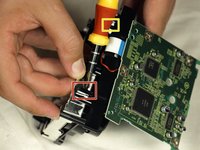
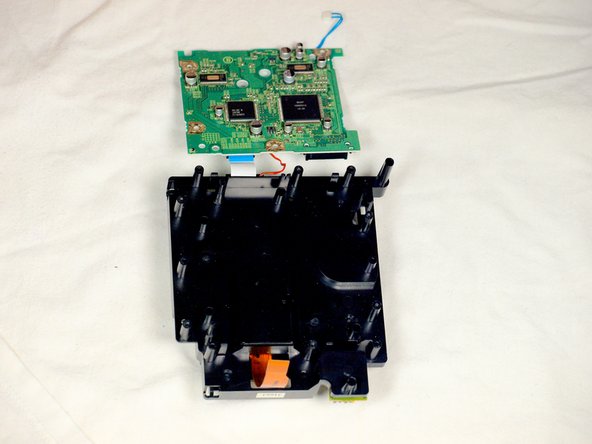
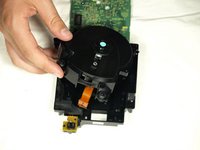
Release the small clip holding the board down.
-
Gently remove the circuit board (the large green square) as shown in the three pictures.
-
Red Wire
-
White ribbon Cable
What would happen if I accidentally separated the white ribbon cable... because I watched a video of some guy going through this same process. Separated all the cables and his worked. My cube stopped reading disks recently. Laser is calibrated properly. Begins to spin then stops
Ps
Is there anyway I can save my cube
I'm just guessing here, but I think they mean there's no need to separate those cables to complete the repair—just be careful not to pull or stress them. Like you said, nothing bad will happen if you choose to disconnect a couple cables. As for what's wrong with your cube, you might want to try asking your question over in the Answers forum.
There is a small tab to the left of the red wire that you need to pull out to release the circuit board.
Why do we need further disassembly that this ? The potentiometer is already accessible at this point. Why do we need to tear down the lens from it’s slot in step 16 ?
Good question! I’m wondering the same thing.
You don’t. You can stop here if you’re doing the laser potentiometer calibration.
jweeman -
The plastic post closest to the white ribbon cable can be annoying to deal with to remove the circuit board. Removing the white ribbon cable carefully with blunt tweezers can be necessary to remove the circuit board.
-
-
-
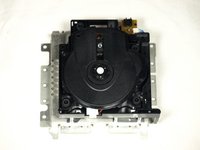
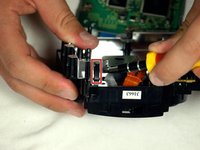
Use a flathead screwdriver to carefully release the four plastic clips holding the drive assembly together.
-
Carefully use a screwdriver as leverage to unscrew and release the last clip.
Since this step uses a flathead screwdriver, it might be useful to include that in the list of required tools at the top.
Unnecessary step
-
-
-
Gently lift the metal plate off the drive assembly.
-
Then, flip the two halves of the drive assembly upside down.
-
-
-
Use a flathead screwdriver to release the two clips located on the back half of the drive assembly.
-
The final clip doesn't need to be released; the top half of the drive assembly will slide away from the lower half.
-
Finish removing the top half of the drive assembly from the base.
-
-
-
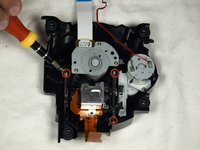
Once the top half of the drive assembly is detached, turn it upside down.
-
Using a Phillips #1 screwdriver, carefully remove the three final screws near the lens assembly bars.
-
Extract the final three screws and remove the lens assembly.
what kind of screws are these on the laser lens i lost one and need to buy new ones cause i cant find the 3rd
This step isn't necessary for adjustment of the lens
we're replacing the laser tho
-


To reassemble your device, follow these instructions in reverse order.
To reassemble your device, follow these instructions in reverse order.
crwdns2935221:0crwdne2935221:0
crwdns2935229:020crwdne2935229:0

crwdns2915084:0crwdne2915084:0

Cal Poly, Team 6-2, Maness Fall 2009 crwdns2935289:0Cal Poly, Team 6-2, Maness Fall 2009crwdne2935289:0
CPSU-MANESS-F09S6G2
crwdns2931471:04crwdne2931471:0
crwdns2935297:045crwdne2935297:0
crwdns2947412:05crwdne2947412:0
What type of optical drive could I use to replace the one in said GameCube once I've broken it down?
Did you ever find out, Bob?
I found OEM parts (removed from other Game Cubes) available on Ebay. Just ordered the part for about $16.
Good walkthrough. My 8 year old completed this repair with minimal help from me. Thanks!
As a tech writer I just wanted to say our step by step instructions are spot on. Great Job