crwdns2933423:0crwdne2933423:0
crwdns2947577:0crwdnd2947577:0crwdne2947577:0

Nintendo GameCube Motherboard Replacement

crwdns2942213:0crwdne2942213:0

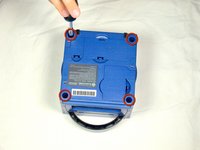
    1. Nintendo GameCube Motherboard Replacement, Top Case: crwdns2935265:01crwdnd2935265:01crwdnd2935265:03crwdne2935265:0 Nintendo GameCube Motherboard Replacement, Top Case: crwdns2935265:01crwdnd2935265:02crwdnd2935265:03crwdne2935265:0 Nintendo GameCube Motherboard Replacement, Top Case: crwdns2935265:01crwdnd2935265:03crwdnd2935265:03crwdne2935265:0
      • Turn over the Gamecube so that the bottom side is facing up.

      • Use the 4.5 mm Gamebit screwdriver to remove all four screws.

      crwdns2952109:0crwdne2952109:0

      crwdns2917038:0crwdne2917038:0

    2. Nintendo GameCube Motherboard Replacement: crwdns2935265:02crwdnd2935265:01crwdnd2935265:03crwdne2935265:0 Nintendo GameCube Motherboard Replacement: crwdns2935265:02crwdnd2935265:02crwdnd2935265:03crwdne2935265:0 Nintendo GameCube Motherboard Replacement: crwdns2935265:02crwdnd2935265:03crwdnd2935265:03crwdne2935265:0
      • With the bottom side of the GameCube facing upward and the screws removed, carefully pull the outer shell of the unit away from the top half.

      • Move the GameCube so that the inside is facing upwards.

      crwdns2952109:0crwdne2952109:0

      crwdns2917038:0crwdne2917038:0

    1. Nintendo GameCube Motherboard Replacement, Removing the back panel: crwdns2935265:03crwdnd2935265:01crwdnd2935265:01crwdne2935265:0
      • Gently press down on the clips located on either side of the back panel.

      • Carefully remove the back panel from the GameCube.

      crwdns2952109:0crwdne2952109:0

      crwdns2917038:0crwdne2917038:0

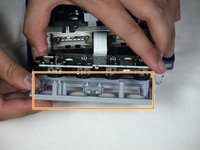
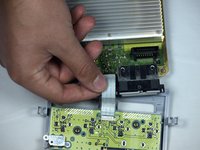
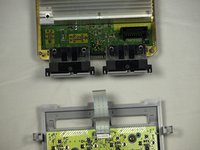
    2. Nintendo GameCube Motherboard Replacement: crwdns2935265:04crwdnd2935265:01crwdnd2935265:01crwdne2935265:0
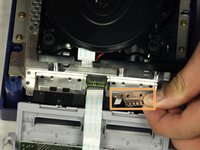
      • Unclip the controller ports at the front of the unit.

      • A ribbon cable (outlined in orange) is still attached to the unit. Do not disconnect this cable.

      • Controller ports are where the controllers plug into the game console, and are a half circular shape.

      crwdns2952109:0crwdne2952109:0

      crwdns2917038:0crwdne2917038:0

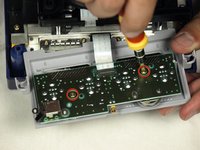
    3. Nintendo GameCube Motherboard Replacement, Separate the casing: crwdns2935265:05crwdnd2935265:01crwdnd2935265:02crwdne2935265:0 Nintendo GameCube Motherboard Replacement, Separate the casing: crwdns2935265:05crwdnd2935265:02crwdnd2935265:02crwdne2935265:0
      • This step may not be necessary depending on your end goal

      • Use a Phillips #2 screwdriver to remove the two screws on the back of the control port.

      • Carefully separate the gray outer casing of the control port and the circuit board.

      crwdns2952109:0crwdne2952109:0

      crwdns2917038:0crwdne2917038:0

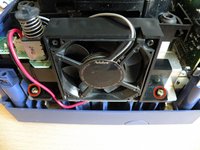
    1. Nintendo GameCube Motherboard Replacement, Remove Nintendo GameCube Optical Drive Assembly: crwdns2935265:06crwdnd2935265:01crwdnd2935265:02crwdne2935265:0 Nintendo GameCube Motherboard Replacement, Remove Nintendo GameCube Optical Drive Assembly: crwdns2935265:06crwdnd2935265:02crwdnd2935265:02crwdne2935265:0
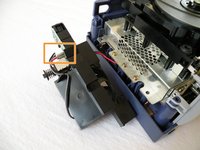
      • The left side of the unit contains the cooling fan and its housing.

      • Carefully remove the two screws attaching the cooling fan housing to the unit.

      • Do not detach the red and black cooling fan wire from the main unit. Boxed in orange.

      crwdns2952109:0crwdne2952109:0

      crwdns2917038:0crwdne2917038:0

    2. Nintendo GameCube Motherboard Replacement: crwdns2935265:07crwdnd2935265:01crwdnd2935265:02crwdne2935265:0 Nintendo GameCube Motherboard Replacement: crwdns2935265:07crwdnd2935265:02crwdnd2935265:02crwdne2935265:0
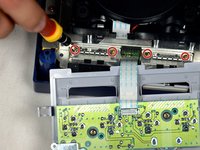
      • Remove the four Phillips #1 screws retaining the ground springs.

      • Carefully remove the ground springs from the main unit.

      crwdns2952109:0crwdne2952109:0

      crwdns2917038:0crwdne2917038:0

    3. Nintendo GameCube Motherboard Replacement: crwdns2935265:08crwdnd2935265:01crwdnd2935265:02crwdne2935265:0 Nintendo GameCube Motherboard Replacement: crwdns2935265:08crwdnd2935265:02crwdnd2935265:02crwdne2935265:0
      • The optical drive is secured to a metal plate.

      • Using a Phillips #2 screwdriver, unscrew the twelve screws that are around the outer edge of the optical drive.

      crwdns2952109:0crwdne2952109:0

      crwdns2917038:0crwdne2917038:0

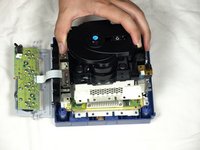
    4. Nintendo GameCube Motherboard Replacement, Remove the assembly: crwdns2935265:09crwdnd2935265:01crwdnd2935265:03crwdne2935265:0 Nintendo GameCube Motherboard Replacement, Remove the assembly: crwdns2935265:09crwdnd2935265:02crwdnd2935265:03crwdne2935265:0 Nintendo GameCube Motherboard Replacement, Remove the assembly: crwdns2935265:09crwdnd2935265:03crwdnd2935265:03crwdne2935265:0
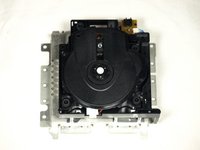
      • Carefully separate the optical drive assembly from the rest of the GameCube unit.

      • The optical drive assembly is secured to the motherboard underneath by a slot; some force may be required to carefully free the assembly.

      • The metal plate and the actual optical drive will remain attached.

      crwdns2952109:0crwdne2952109:0

      crwdns2917038:0crwdne2917038:0

    1. Nintendo GameCube Motherboard Replacement, Motherboard: crwdns2935265:010crwdnd2935265:01crwdnd2935265:02crwdne2935265:0 Nintendo GameCube Motherboard Replacement, Motherboard: crwdns2935265:010crwdnd2935265:02crwdnd2935265:02crwdne2935265:0
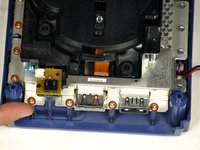
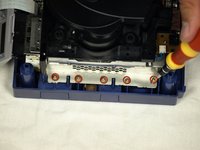
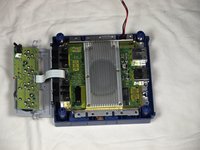
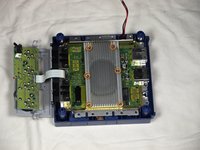
      • With the Optical Drive Assembly removed, your GameCube should now look like this.

      • Remove the 6 screws (circled in orange) on the heat sink using a #1 Phillips screwdriver.

      crwdns2952109:0crwdne2952109:0

      crwdns2917038:0crwdne2917038:0

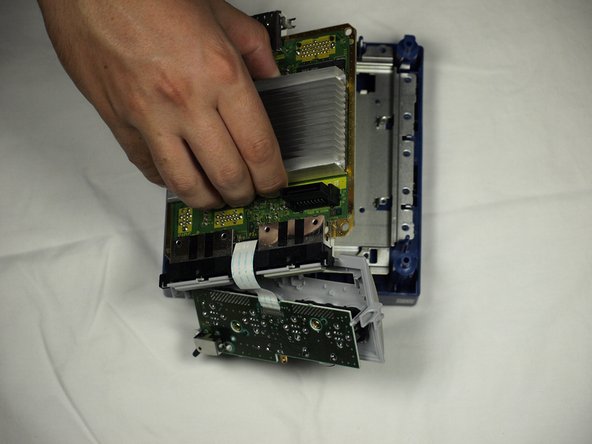
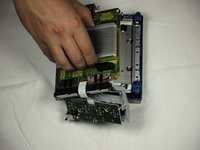
    2. Nintendo GameCube Motherboard Replacement: crwdns2935265:011crwdnd2935265:01crwdnd2935265:02crwdne2935265:0 Nintendo GameCube Motherboard Replacement: crwdns2935265:011crwdnd2935265:02crwdnd2935265:02crwdne2935265:0
      • Gently lift the motherboard from base (as shown in second picture).

      crwdns2952109:0crwdne2952109:0

      crwdns2917038:0crwdne2917038:0

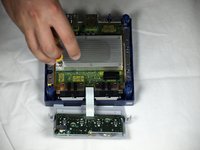
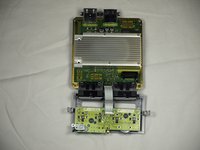
    3. Nintendo GameCube Motherboard Replacement: crwdns2935265:012crwdnd2935265:01crwdnd2935265:02crwdne2935265:0 Nintendo GameCube Motherboard Replacement: crwdns2935265:012crwdnd2935265:02crwdnd2935265:02crwdne2935265:0
      • Carefully disconnect the ribbon cable connecting the motherboard with the front panel.

      • At this point you can replace the old motherboard with a new one and enjoy your now-functional GameCube!

      crwdns2952109:0crwdne2952109:0

      crwdns2917038:0crwdne2917038:0

crwdns2915888:0crwdne2915888:0

To reassemble your device, follow these instructions in reverse order.

crwdns2935221:0crwdne2935221:0

crwdns2935229:017crwdne2935229:0

mwbisson

crwdns2935283:011/05/09crwdne2935283:0

1 176 crwdns2915208:0crwdne2915208:0

crwdns2935297:03crwdne2935297:0

crwdns2935287:0crwdne2935287:0

Cal Poly, Team 6-2, Maness Fall 2009 crwdns2935289:0Cal Poly, Team 6-2, Maness Fall 2009crwdne2935289:0

CPSU-MANESS-F09S6G2

crwdns2931471:04crwdne2931471:0

crwdns2935297:096crwdne2935297:0

crwdns2947412:03crwdne2947412:0

What happens if you disconnect that cable (localizated on Step 4)?

Santi12008 - crwdns2934203:0crwdne2934203:0 crwdns2950251:0crwdne2950251:0

Its soldered to the front-board and the connector is on the main-board under the disc assembly, trying to remove it will break it.

Joseph Lalone - crwdns2934203:0crwdne2934203:0 crwdns2950251:0crwdne2950251:0
I have been having trouble with my cube shorting out when I insert a memory card into slot A. What is the best way to get at it see if this is the case, and what should I be looking for?

Many thanks

farrell dann - crwdns2934203:0crwdne2934203:0 crwdns2950251:0crwdne2950251:0

crwdns2917038:0crwdne2917038:0

crwdns2936625:0crwdne2936625:0:

crwdns2936751:024crwdne2936751:0 7

crwdns2936753:07crwdne2936753:0 67

crwdns2936753:030crwdne2936753:0 2,984

crwdns2942667:0crwdne2942667:0 39,799