crwdns2915892:0crwdne2915892:0
This guide will demonstrate proper removal of the D-Pad. This is necessary in order to clean or replace it.
crwdns2942213:0crwdne2942213:0
-
-
Place the controller (buttons down) on a solid surface.
-
Remove the six 9.2mm Tri-wing Y0 screws that hold the back panel in place.
-
-
-
Gently lift the back panel up, separating it from the front panel.
-
-
-
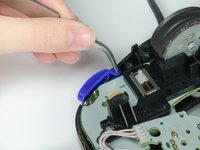
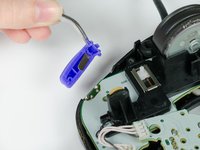
Grab the Z-button by the peg with tweezers and lift it out of the controller.
-
-
-
-
Carefully unhook the cable that is looped around the peg.
-
-
-
Lift the circuit board out of the controller.
-
-
crwdns2935267:0crwdne2935267:0Tweezers$4.99
-
Remove the rubber backing with tweezers.
-
-
-
Use tweezers to grab the center peg of the directional pad and lift it out of its socket.
-


To reassemble your device, follow these instructions in reverse order.
crwdns2935221:0crwdne2935221:0
crwdns2935229:05crwdne2935229:0
crwdns2935287:0crwdne2935287:0

Cal Poly, Team 19-44, Regan Winter 2013 crwdns2935289:0Cal Poly, Team 19-44, Regan Winter 2013crwdne2935289:0
CPSU-REGAN-W13S19G44
crwdns2931471:04crwdne2931471:0
crwdns2935297:031crwdne2935297:0