crwdns2915892:0crwdne2915892:0
The brightness switch is the circular button with a sun symbol engraved into it. The brightness switch is located at the top of the button panel.
crwdns2942213:0crwdne2942213:0
-
-
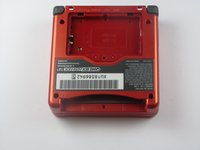
Use a standard Phillips #00 screwdriver to loosen the 4 mm screw that keeps the battery cover attached to the device.
-
-
-
Lift the battery cover up and remove it from the device.
-
-
-
Use your fingers or a plastic opening tool to remove the battery from the device.
-
-
-
-
Remove four 6.5 mm screws from the corners of the back cover using a tri-point Y00 screwdriver.
-
Remove two 4.6mm screws from the top-center and bottom-center of the device using a tri-point Y00 screwdriver.
-
-
-
Lift the back cover off of the device.
-
-
-
Using a Phillips #00 screwdriver, remove the three Phillips #00 4 mm long screws that hold the motherboard to the button panel.
-
-
-
Flip the motherboard up and rest it on the other half of the device, so that the back of the buttons are visible as seen in the picture.
-
-
-
With your fingers, lift the track pad out off the brightness switch.
-
-
crwdns2935267:0crwdne2935267:0Tweezers$4.99
-
Using tweezers, lift the brightness switch out of the Game Boy Advance SP.
-


To reassemble your device, follow these instructions in reverse order.
To reassemble your device, follow these instructions in reverse order.
crwdns2935221:0crwdne2935221:0
crwdns2935229:016crwdne2935229:0
crwdns2915084:0crwdne2915084:0

Cal Poly, Team 17-22, Forte Winter 2013 crwdns2935289:0Cal Poly, Team 17-22, Forte Winter 2013crwdne2935289:0
CPSU-FORTE-W13S17G22
crwdns2931471:04crwdne2931471:0
crwdns2935297:041crwdne2935297:0