crwdns2933423:0crwdne2933423:0
crwdns2947577:0crwdnd2947577:0crwdne2947577:0

Nintendo DS Lite Lower Screen Replacement

crwdns2942213:0crwdne2942213:0

  1. Nintendo DS Lite Lower Screen Replacement, Nintendo DS Lite Battery Disconnect: crwdns2935265:01crwdnd2935265:01crwdnd2935265:01crwdne2935265:0
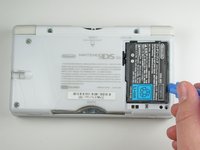
    • Place your device upside down and locate the battery compartment.

    • Find the Phillips head screw securing the battery cover in the bottom right hand corner of the device.

    • Loosen the screw enough to remove the battery cover but leave the screw in the cover for reassembly.

    • Use only a Phillips screwdriver to remove screw.

    crwdns2952109:0crwdne2952109:0
  2. Nintendo DS Lite Lower Screen Replacement: crwdns2935265:02crwdnd2935265:01crwdnd2935265:01crwdne2935265:0
    • Slowly remove the battery cover with the iFixit opening tool.

    • Make sure to remove the cover carefully to keep from losing Phillips screw in the cover. It will be needed for reassembly.

    crwdns2952109:0crwdne2952109:0
  3. Nintendo DS Lite Lower Screen Replacement: crwdns2935265:03crwdnd2935265:01crwdnd2935265:02crwdne2935265:0 Nintendo DS Lite Lower Screen Replacement: crwdns2935265:03crwdnd2935265:02crwdnd2935265:02crwdne2935265:0
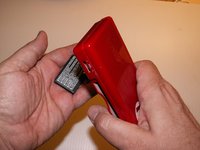
    • Use the iFixit opening tool to carefully pry the battery out of the case.

    • After the old battery is removed replace it with a new battery facing the same direction as when the cover was opened.

    • For some devices, you may be able to remove the battery by flipping the DS over and letting the battery fall into your hand.

    crwdns2952109:0crwdne2952109:0
  4. Nintendo DS Lite Lower Screen Replacement, Disassembling Nintendo DS Lite Bottom Case: crwdns2935265:04crwdnd2935265:01crwdnd2935265:01crwdne2935265:0
    • Remove the following seven screws that secure the lower case to the DS Lite:

    • Three silver tri-point screws (5mm long)

    • One black tri-point screw (4mm)

    • Two gold Phillips screws (4mm)

    • One silver Phillips screw (3mm)

    • Do not remove the silver PH screw (3mm) in the battery compartment yet. It holds the main PCB in place.

    crwdns2952109:0crwdne2952109:0
  5. Nintendo DS Lite Lower Screen Replacement: crwdns2935265:05crwdnd2935265:01crwdnd2935265:01crwdne2935265:0
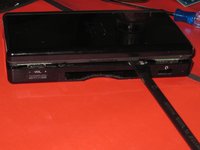
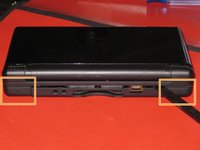
    • On the front edge of the Nintendo DS between the headphone jack plug and volume controls remove the plastic insert (or cartridge) from the lower slot (Slot 2).

    crwdns2952109:0crwdne2952109:0
  6. Nintendo DS Lite Lower Screen Replacement: crwdns2935265:06crwdnd2935265:01crwdnd2935265:02crwdne2935265:0 Nintendo DS Lite Lower Screen Replacement: crwdns2935265:06crwdnd2935265:02crwdnd2935265:02crwdne2935265:0
    • Flip the unit over so that it is facing right-side up.

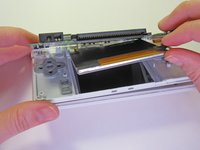
    • Use a spudger to pry open the gap between the bottom case and the front panel. Work all the way around the case until the panel is free.

    • Avoid touching the L and R shoulder buttons, because they easily detach and are difficult to reassemble. Keep the bottom case flat against your workbench to help hold the shoulder buttons in place.

    crwdns2952109:0crwdne2952109:0
  7. Nintendo DS Lite Lower Screen Replacement: crwdns2935265:07crwdnd2935265:01crwdnd2935265:03crwdne2935265:0 Nintendo DS Lite Lower Screen Replacement: crwdns2935265:07crwdnd2935265:02crwdnd2935265:03crwdne2935265:0 Nintendo DS Lite Lower Screen Replacement: crwdns2935265:07crwdnd2935265:03crwdnd2935265:03crwdne2935265:0
    • Carefully separate the two pieces by hand.

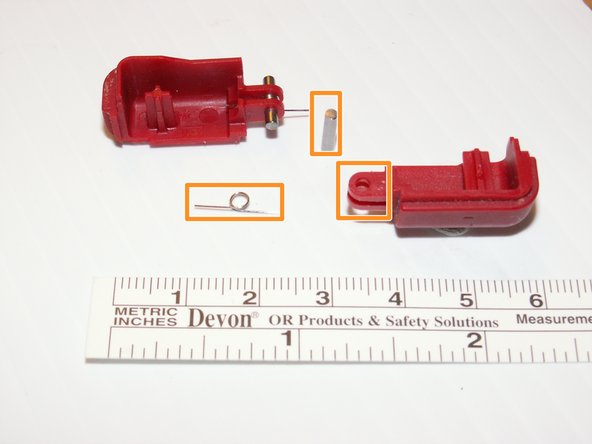
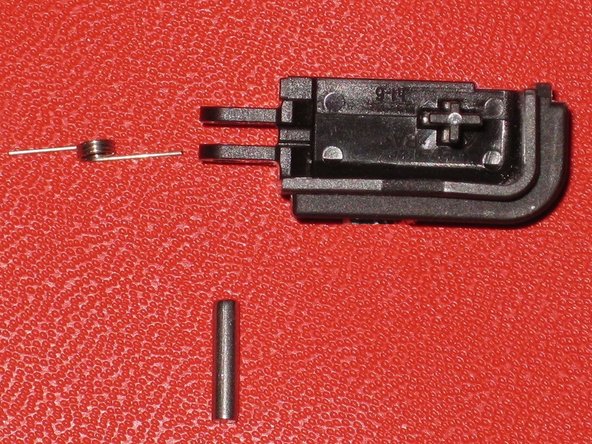
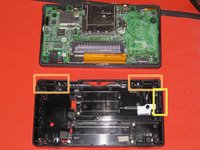
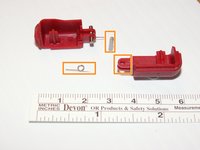
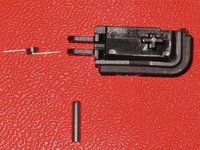
    • The two shoulder buttons are made up of three pieces -- the plastic button, a pin, and a spring. If they accidentally pop out while you are working, study the picture and make sure you put the spring in the correct position.

    • When reassembling the cover, make sure that the power and volume switch covers on the bottom case are aligned with the switches on the board to avoid breakage.

    crwdns2952109:0crwdne2952109:0
  8. Nintendo DS Lite Lower Screen Replacement, Lower Screen: crwdns2935265:08crwdnd2935265:01crwdnd2935265:01crwdne2935265:0
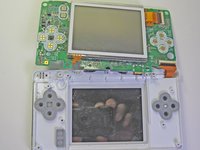
    • Remove the two screws holding the motherboard to the rest of the device using a Phillips #00 screwdriver.

    crwdns2952109:0crwdne2952109:0
  9. Nintendo DS Lite Lower Screen Replacement: crwdns2935265:09crwdnd2935265:01crwdnd2935265:02crwdne2935265:0 Nintendo DS Lite Lower Screen Replacement: crwdns2935265:09crwdnd2935265:02crwdnd2935265:02crwdne2935265:0
    • Locate the small ribbon cable that connects the touch screen to the motherboard. Do not pull on this cable.

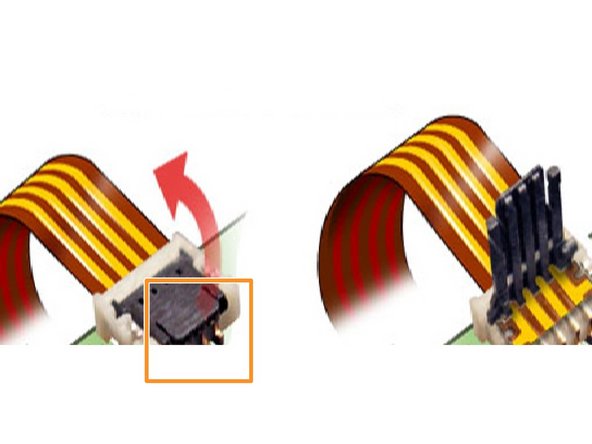
    • Gently lift the hinged black cover on the connector.

    • The hinges are near where the ribbon is inserted.

    • After lifting the black cover, the ribbon cable will disconnect easily.

    crwdns2952109:0crwdne2952109:0
  10. Nintendo DS Lite Lower Screen Replacement: crwdns2935265:010crwdnd2935265:01crwdnd2935265:01crwdne2935265:0
    • With a plastic opening tool, gently begin to separate the motherboard from the rest of the device.

    • The ribbon cable and two wires are still connected to the motherboard and the buttons tend to fall out.

    crwdns2952109:0crwdne2952109:0
  11. Nintendo DS Lite Lower Screen Replacement: crwdns2935265:011crwdnd2935265:01crwdnd2935265:02crwdne2935265:0 Nintendo DS Lite Lower Screen Replacement: crwdns2935265:011crwdnd2935265:02crwdnd2935265:02crwdne2935265:0
    • Flip the motherboard over so the touch screen is facing up.

    crwdns2952109:0crwdne2952109:0
  12. Nintendo DS Lite Lower Screen Replacement: crwdns2935265:012crwdnd2935265:01crwdnd2935265:01crwdne2935265:0
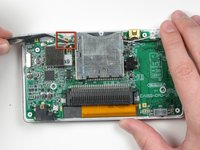
    • Do not pull on the main ribbon cable.

    • Carefully lift the tiny hinged cover on the connector.

    • The ribbon cable will easily disconnect.

    • Remove the third ribbon cable the same way.

    crwdns2952109:0crwdne2952109:0
  13. Nintendo DS Lite Lower Screen Replacement: crwdns2935265:013crwdnd2935265:01crwdnd2935265:01crwdne2935265:0
    • There is nothing else connecting the touch screen. Just pick up and set aside.

    crwdns2952109:0crwdne2952109:0
crwdns2935217:0crwdne2935217:0

crwdns2935229:013crwdne2935229:0

justin chadwick

crwdns2935283:001/21/10crwdne2935283:0

512 crwdns2915208:0crwdne2915208:0

crwdns2935297:02crwdne2935297:0

crwdns2935287:0crwdne2935287:0

Cal Poly, Team 16-30, Maness Winter 2010 crwdns2935289:0Cal Poly, Team 16-30, Maness Winter 2010crwdne2935289:0

CPSU-MANESS-W10S16G30

crwdns2931471:04crwdne2931471:0

crwdns2935297:029crwdne2935297:0

crwdns2947412:00crwdne2947412:0

crwdns2917038:0crwdne2917038:0

crwdns2936625:0crwdne2936625:0:

crwdns2936751:024crwdne2936751:0 27

crwdns2936753:07crwdne2936753:0 186

crwdns2936753:030crwdne2936753:0 918

crwdns2942667:0crwdne2942667:0 29,332