crwdns2933423:0crwdne2933423:0

crwdns2931315:0crwdnd2931315:0crwdne2931315:0

crwdns2942213:0crwdne2942213:0

  1. crwdns2935201:0crwdne2935201:0 crwdns2935203:0crwdne2935203:0

    : crwdns2935265:01crwdnd2935265:01crwdnd2935265:02crwdne2935265:0 : crwdns2935265:01crwdnd2935265:02crwdnd2935265:02crwdne2935265:0
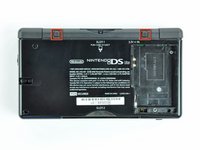
    • Unscrew the Phillips screw securing the battery cover to the lower case.

    • The screw remains captive to the battery cover.

    • Pry the battery cover upward with a spudger or fingernail, and lift out of the lower case.

  2. crwdns2935201:0crwdne2935201:0 crwdns2935203:0crwdne2935203:0

    : crwdns2935265:02crwdnd2935265:01crwdnd2935265:01crwdne2935265:0
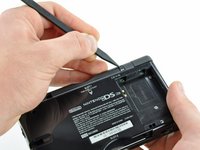
    • Wedge the edge of a spudger in between the side of the battery and the lower case housing and pry upward to dislodge the battery.

    • Remove the battery from the DS Lite.

  3. crwdns2935201:0crwdne2935201:0 crwdns2935203:0crwdne2935203:0

    : crwdns2935265:03crwdnd2935265:01crwdnd2935265:02crwdne2935265:0 : crwdns2935265:03crwdnd2935265:02crwdnd2935265:02crwdne2935265:0
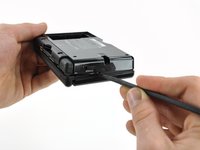
    • Use the tip of a spudger to pry both rubber feet off the DS Lite.

  4. crwdns2935201:0crwdne2935201:0 crwdns2935203:0crwdne2935203:0

    : crwdns2935265:04crwdnd2935265:01crwdnd2935265:01crwdne2935265:0
    • Remove the following screws securing the lower case to the body of the DS Lite:

    • Two 4.3 mm gold Phillips screws

    • One 3.9 mm black Tri-Wing screw

    • One 3.3 mm silver Phillips screw

    • Three 5.5 mm silver Tri-Wing screws

  5. crwdns2935201:0crwdne2935201:0 crwdns2935203:0crwdne2935203:0

    : crwdns2935265:05crwdnd2935265:01crwdnd2935265:03crwdne2935265:0 : crwdns2935265:05crwdnd2935265:02crwdnd2935265:03crwdne2935265:0 : crwdns2935265:05crwdnd2935265:03crwdnd2935265:03crwdne2935265:0
    • Remove the cover from the Game Pak slot before continuing.

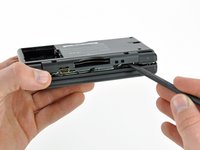
    • Insert the edge of a spudger in between the lower and upper case near the top right corner of the DS Lite.

    • Carefully run the spudger along the right edge of the DS Lite, creating an opening in the process.

    • Continue running the spudger along the backside of the DS Lite until the majority of the lower case has been separated from the upper case.

  6. crwdns2935201:0crwdne2935201:0 crwdns2935203:0crwdne2935203:0

    : crwdns2935265:06crwdnd2935265:01crwdnd2935265:01crwdne2935265:0
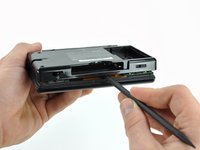
    • Lift the lower case away from the rest of the DS Lite.

    • Pull carefully. Some units are sealed with adhesive, and pulling too hard can damage the power switch.

    • When re-assembling, make sure that power switch and volume sliders are properly aligned with the switches on the motherboard.

crwdns2935217:0crwdne2935217:0

crwdns2935229:033crwdne2935229:0

Matthew Newsom

crwdns2935283:001/05/10crwdne2935283:0

39 500 crwdns2915208:0crwdne2915208:0

crwdns2935297:067crwdne2935297:0

crwdns2944067:00crwdne2944067:0

crwdns2917038:0crwdne2917038:0

crwdns2936625:0crwdne2936625:0:

crwdns2936751:024crwdne2936751:0 3

crwdns2936753:07crwdne2936753:0 36

crwdns2936753:030crwdne2936753:0 203

crwdns2942667:0crwdne2942667:0 27,287