crwdns2915892:0crwdne2915892:0
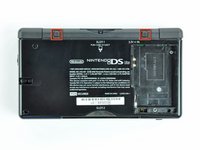
Replace the buttons in your DS Lite for whatever reason you may need to replace the buttons!
crwdns2942213:0crwdne2942213:0
-
-
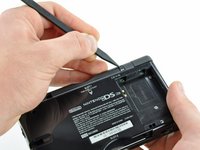
Unscrew the Phillips screw securing the battery cover to the lower case.
-
Pry the battery cover upward with a spudger or fingernail, and lift out of the lower case.
-
-
-
Wedge the edge of a spudger in between the side of the battery and the lower case housing and pry upward to dislodge the battery.
-
Remove the battery from the DS Lite.
-
-
-
Use the tip of a spudger to pry both rubber feet off the DS Lite.
-
-
-
Remove the following screws securing the lower case to the body of the DS Lite:
-
Two 4.3 mm gold Phillips screws
-
One 3.9 mm black Tri-point screw
-
One 3.3 mm silver Phillips screw
-
Three 5.5 mm silver Tri-point screws
-
-
-
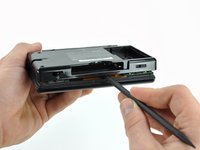
Insert the edge of a spudger in between the lower and upper case near the top right corner of the DS Lite.
-
Carefully run the spudger along the right edge of the DS Lite, creating an opening in the process.
-
Continue running the spudger along the backside of the DS Lite until the majority of the lower case has been separated from the upper case.
-
-
-
Lift the lower case away from the rest of the DS Lite.
-
-
-
-
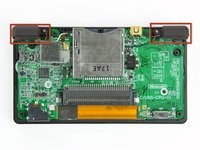
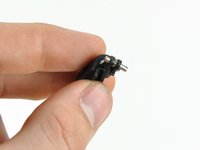
Lift both trigger buttons out of the DS Lite.
-
-
-
Use the flat edge of a spudger to pry the Wi-Fi antenna connector straight up from its socket on the Wi-Fi board.
-
-
-
Use the flat edge of a spudger to pry the Wi-Fi board connector straight up from its socket on the motherboard.
-
-
-
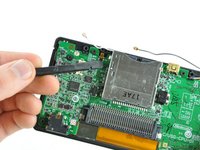
Use the flat edge of a spudger to separate the right edge of the Wi-Fi board from the motherboard.
-
Remove the Wi-Fi board from the DS Lite.
-
-
-
Use the flat edge of a spudger to pry the microphone connector straight up from its socket on the motherboard.
-
-
-
Position the antenna cable with its connector facing up and away from the motherboard using a spudger to hold it down lightly in the gap between chips on the motherboard.
-
Slowly and carefully pull the antenna cable until the cable connector is under the DS Lite game cartridge reader.
-
Continue pulling the cable until the cable connector comes out from under the game cartridge reader on the right side.
-
-
-
Use your fingernail or the edge of a spudger to carefully flip up the touchscreen ribbon cable retaining flap.
-
Use the tip of a spudger to pull the touchscreen ribbon cable straight out of its socket.
-
-
-
Remove the two 3.4 mm Phillips screws securing the motherboard to the upper case.
-
-
-
Open the display enough to use your finger to push the front edge of the motherboard up and away from the upper case.
-
-
-
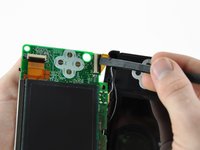
Use your fingernail or the flat edge of a spudger to carefully flip up the upper LCD ribbon cable retaining flap.
-
Pull the motherboard away from the DS Lite to separate the upper LCD ribbon cable from its socket on the motherboard.
-
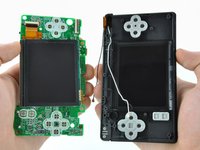
Remove the motherboard from the DS Lite.
-
Now you may open the retaining flap for the lower LCD screen in the same way and separate the lower LCD screen from the motherboard.
-


To reassemble your device, follow these instructions in reverse order.
To reassemble your device, follow these instructions in reverse order.
crwdns2935221:0crwdne2935221:0
crwdns2935229:047crwdne2935229:0

crwdns2947412:012crwdne2947412:0
Your stupid tutorial stuffed up my ds
Hello! Sorry to hear that. What were you trying to do and what are the symptoms? Maybe we can identify the problem.
Mine is stuffed up too, the lower screen is flashing once and then its turning back off... I did all just as the tutorial said :(
U havent connected the upper screen ribbon cable correctly, I had the same problem and reinserting it making sure it went in all the way fixed the issue
Hello! I bought a white ds lite from a flea market and it came with the lower screen damaged and the buttons were not working correctly. I bought a couple of broken ds lites and used your guide, to clean the motherboard, change the membranes and the lower screen. Thank you very much! I was able to completely restore the device functionality. As an added bonus, I was able to clean some of the dirt that gathered under the transparent sides.