crwdns2933423:0crwdne2933423:0

Nintendo 3DS XL Microphone Replacement

crwdns2942213:0crwdne2942213:0

  1. Nintendo 3DS XL Microphone Replacement, Battery: crwdns2935265:01crwdnd2935265:01crwdnd2935265:02crwdne2935265:0 Nintendo 3DS XL Microphone Replacement, Battery: crwdns2935265:01crwdnd2935265:02crwdnd2935265:02crwdne2935265:0
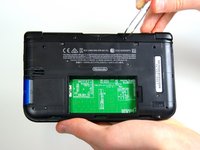
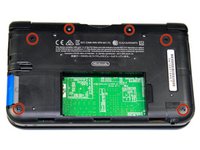
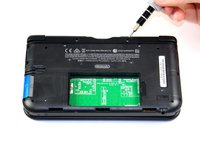
    • Loosen the two #0 Phillips 4.2 mm-length screws located at the top of the back cover.

    • The screws have locking washers that prevent the screws from falling off of the back cover. Leave these locking washers on the screws; it is not necessary to remove the washers for this repair guide.

  2. Nintendo 3DS XL Microphone Replacement: crwdns2935265:02crwdnd2935265:01crwdnd2935265:02crwdne2935265:0 Nintendo 3DS XL Microphone Replacement: crwdns2935265:02crwdnd2935265:02crwdnd2935265:02crwdne2935265:0
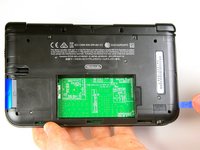
    • Hold the device so that the cover is facing up.

    • Using a plastic opening tool, pry off the cover starting at the top right corner.

    • Hold the edge of the cover to ensure it does not reattach.

    • Look for the small section below the stylus compartment. Pry off the cover at that point if it is still attached.

    • Take off the cover of the device and set it aside.

  3. Nintendo 3DS XL Microphone Replacement: crwdns2935265:03crwdnd2935265:01crwdnd2935265:03crwdne2935265:0 Nintendo 3DS XL Microphone Replacement: crwdns2935265:03crwdnd2935265:02crwdnd2935265:03crwdne2935265:0 Nintendo 3DS XL Microphone Replacement: crwdns2935265:03crwdnd2935265:03crwdnd2935265:03crwdne2935265:0
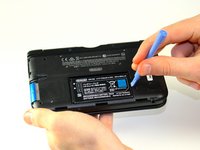
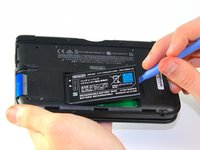
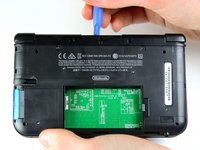
    • Insert the plastic opening tool into the opening located on the right side of the battery.

    • Pry off the battery from the lower casing.

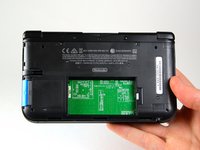
    • Lift the battery out of the case and set aside.

  4. Nintendo 3DS XL Microphone Replacement, Microphone: crwdns2935265:04crwdnd2935265:01crwdnd2935265:02crwdne2935265:0 Nintendo 3DS XL Microphone Replacement, Microphone: crwdns2935265:04crwdnd2935265:02crwdnd2935265:02crwdne2935265:0
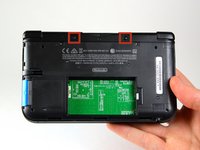
    • Using tweezers pull out the rubber bumpers that are located at the top of the device on either side of the game cartridge compartment.

  5. Nintendo 3DS XL Microphone Replacement: crwdns2935265:05crwdnd2935265:01crwdnd2935265:02crwdne2935265:0 Nintendo 3DS XL Microphone Replacement: crwdns2935265:05crwdnd2935265:02crwdnd2935265:02crwdne2935265:0
    • Remove the six 6.2 mm screws using a Phillips #000 screwdriver.

  6. Nintendo 3DS XL Microphone Replacement: crwdns2935265:06crwdnd2935265:01crwdnd2935265:01crwdne2935265:0
    • Remove the 2.3 mm screw located above the game cartridge slot with a Phillips #000 screwdriver.

  7. Nintendo 3DS XL Microphone Replacement: crwdns2935265:07crwdnd2935265:01crwdnd2935265:03crwdne2935265:0 Nintendo 3DS XL Microphone Replacement: crwdns2935265:07crwdnd2935265:02crwdnd2935265:03crwdne2935265:0 Nintendo 3DS XL Microphone Replacement: crwdns2935265:07crwdnd2935265:03crwdnd2935265:03crwdne2935265:0
    • With a plastic opening tool pry off the lower case starting at the bottom edge and working around the perimeter.

    • Two ribbon cables connect the case to the circuit board. Be careful to not pull the case too hard and rip the ribbon cables.

  8. Nintendo 3DS XL Microphone Replacement: crwdns2935265:08crwdnd2935265:01crwdnd2935265:03crwdne2935265:0 Nintendo 3DS XL Microphone Replacement: crwdns2935265:08crwdnd2935265:02crwdnd2935265:03crwdne2935265:0 Nintendo 3DS XL Microphone Replacement: crwdns2935265:08crwdnd2935265:03crwdnd2935265:03crwdne2935265:0
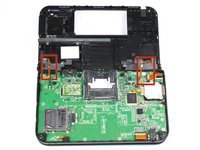
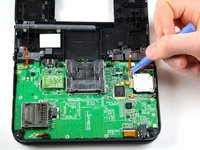
    • Remove the ribbon cables located underneath the left and right bumpers by prying up the base of the cables with a plastic opening tool.

    • Completely remove the lower case from the rest of the device and set aside.

  9. Nintendo 3DS XL Microphone Replacement: crwdns2935265:09crwdnd2935265:01crwdnd2935265:03crwdne2935265:0 Nintendo 3DS XL Microphone Replacement: crwdns2935265:09crwdnd2935265:02crwdnd2935265:03crwdne2935265:0 Nintendo 3DS XL Microphone Replacement: crwdns2935265:09crwdnd2935265:03crwdnd2935265:03crwdne2935265:0
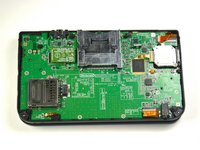
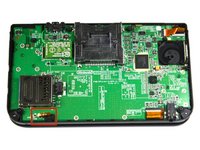
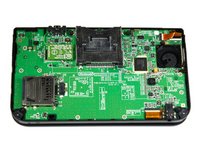
    • Position the device such that the game cartridge slot is located at the top.

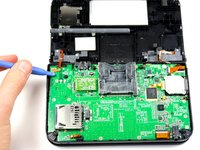
    • Locate the microphone in the bottom left corner.

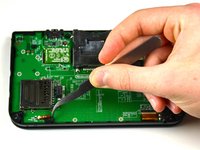
    • Using tweezers remove the microphone.

    • There will be a ribbon that connects the microphone to the motherboard.

  10. Nintendo 3DS XL Microphone Replacement: crwdns2935265:010crwdnd2935265:01crwdnd2935265:02crwdne2935265:0 Nintendo 3DS XL Microphone Replacement: crwdns2935265:010crwdnd2935265:02crwdnd2935265:02crwdne2935265:0
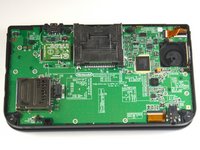
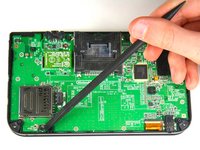
    • Using the flat head side of the spudger carefully lift up the flap and remove the ribbon.

    • The attached microphone can now be removed.

crwdns2915888:0crwdne2915888:0

To reassemble your device, follow these instructions in reverse order.

crwdns2935229:04crwdne2935229:0

Charlene Donlon

crwdns2935283:004/08/14crwdne2935283:0

10.215 crwdns2915208:0crwdne2915208:0

crwdns2935297:08crwdne2935297:0

crwdns2915084:0crwdne2915084:0

Cal Poly, Team 9-13, Regan Spring 2014 crwdns2935289:0Cal Poly, Team 9-13, Regan Spring 2014crwdne2935289:0

CPSU-REGAN-S14S9G13

crwdns2931471:05crwdne2931471:0

crwdns2935297:044crwdne2935297:0

crwdns2944067:02crwdne2944067:0

Hello! Do these instructions apply to the New 3DS XL as well? I followed steps from 1-8, but when I get to step 9, the layout is different and I can’t find the mic. Any help would be greatly appreciated!

Melissa Cardenas - crwdns2934203:0crwdne2934203:0

please learn to repair the mic of new 3ds xl

andrew.hws - crwdns2934203:0crwdne2934203:0

crwdns2917038:0crwdne2917038:0

crwdns2936625:0crwdne2936625:0:

crwdns2936751:024crwdne2936751:0 7

crwdns2936753:07crwdne2936753:0 33

crwdns2936753:030crwdne2936753:0 104

crwdns2942667:0crwdne2942667:0 10,839