crwdns2933423:0crwdne2933423:0

Nintendo 3DS XL 2015 Lower LCD and Touchscreen Replacement

crwdns2942213:0crwdne2942213:0

  1. Nintendo 3DS XL 2015 Lower LCD and Touchscreen Replacement, Battery: crwdns2935265:01crwdnd2935265:01crwdnd2935265:01crwdne2935265:0
    • Ensure your device is powered off before proceeding. Failure to do so may result in electrical shock or damage to the device.

    • Place the 3DS upside down. Remove the game card, headphones, charging cable, stylus, or anything else that may be connected to the device.

  2. Nintendo 3DS XL 2015 Lower LCD and Touchscreen Replacement: crwdns2935265:02crwdnd2935265:01crwdnd2935265:01crwdne2935265:0
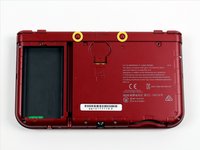
    • Using a JIS #0 screwdriver, loosen the two black screws on the back.

    • The screws are held in place by captive washers and should not be completely removed.

  3. Nintendo 3DS XL 2015 Lower LCD and Touchscreen Replacement: crwdns2935265:03crwdnd2935265:01crwdnd2935265:01crwdne2935265:0
    • Once the screws are loosened, pry open the back cover.

  4. Nintendo 3DS XL 2015 Lower LCD and Touchscreen Replacement: crwdns2935265:04crwdnd2935265:01crwdnd2935265:01crwdne2935265:0
    • The battery is located on the left hand side of the 3DS - to remove, use the small gap located at the top-middle and pull up with a non metal pointed tool.

  5. Nintendo 3DS XL 2015 Lower LCD and Touchscreen Replacement, Motherboard: crwdns2935265:05crwdnd2935265:01crwdnd2935265:01crwdne2935265:0
    • Using a JIS #00 screwdriver, remove the six 6mm screws around the edges of the secondary cover.

  6. Nintendo 3DS XL 2015 Lower LCD and Touchscreen Replacement: crwdns2935265:06crwdnd2935265:01crwdnd2935265:02crwdne2935265:0 Nintendo 3DS XL 2015 Lower LCD and Touchscreen Replacement: crwdns2935265:06crwdnd2935265:02crwdnd2935265:02crwdne2935265:0
    crwdns2935267:0crwdne2935267:0
    Tweezers
    $4.99
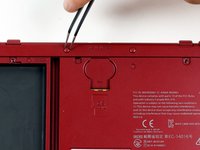
    • Using tweezers, carefully pop out the rubber bumpers located at the top side of the 3DS. Removing them will reveal another two 6mm screws. Remove these screws using a JIS #000 as well.

  7. Nintendo 3DS XL 2015 Lower LCD and Touchscreen Replacement: crwdns2935265:07crwdnd2935265:01crwdnd2935265:03crwdne2935265:0 Nintendo 3DS XL 2015 Lower LCD and Touchscreen Replacement: crwdns2935265:07crwdnd2935265:02crwdnd2935265:03crwdne2935265:0 Nintendo 3DS XL 2015 Lower LCD and Touchscreen Replacement: crwdns2935265:07crwdnd2935265:03crwdnd2935265:03crwdne2935265:0
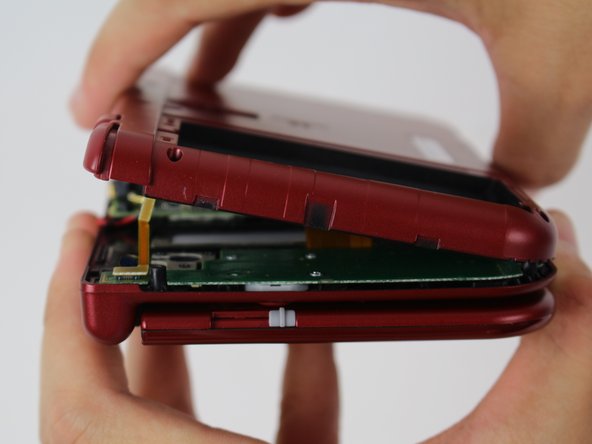
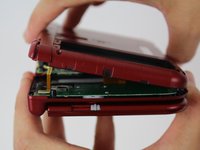
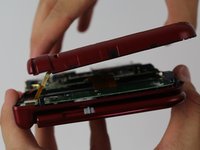
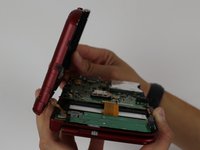
    • To separate the cover, carefully lift it up and away from the hinges (in order to clear the headphone port), then pivot it towards the hinges to expose the circuit boards.

    • Don't fully remove the cover yet, or you may damage the delicate ribbon cable that still connects it to the motherboard.

  8. Nintendo 3DS XL 2015 Lower LCD and Touchscreen Replacement: crwdns2935265:08crwdnd2935265:01crwdnd2935265:01crwdne2935265:0
    • Use a pair of tweezers to lift away the two plugs that latch the L/R/ZL/ZR button ribbons to the motherboard. You can now remove the back cover completely and set it aside.

  9. Nintendo 3DS XL 2015 Lower LCD and Touchscreen Replacement: crwdns2935265:09crwdnd2935265:01crwdnd2935265:01crwdne2935265:0
    • Use tweezers to flip up the small, hinged locking flap in order to unlock the ZIF connector securing the Circle Pad ribbon.

    • The cable folds over itself and enters the ZIF connector from the left side, but the connector's locking flap flips up from the right side. A common error here is to try pulling up on the same side as the cable is on, when that could break the connector.

    • Slide the ribbon out of the ZIF connector.

    • It may be easier to unscrew and remove the Circle Pad first, then try disconnecting the cable. Similarly, when reinstalling the Circle Pad, you can reconnect the cable first and then put the unit back into place.

  10. Nintendo 3DS XL 2015 Lower LCD and Touchscreen Replacement: crwdns2935265:010crwdnd2935265:01crwdnd2935265:01crwdne2935265:0
    • Using a JIS #000 screwdriver, remove the two 8 mm screws securing the circle pad.

  11. Nintendo 3DS XL 2015 Lower LCD and Touchscreen Replacement: crwdns2935265:011crwdnd2935265:01crwdnd2935265:01crwdne2935265:0
    • Lift the circle pad casing upward to remove it. There will be some friction, but it should not require excessive force.

  12. Nintendo 3DS XL 2015 Lower LCD and Touchscreen Replacement: crwdns2935265:012crwdnd2935265:01crwdnd2935265:01crwdne2935265:0
    • Locate the gold terminal plug with a red cable at the top left of the motherboard. Using your fingers, carefully pull the plug straight upward to remove.

    • Use a pair of tweezers to disconnect the single ribbon connector.

    • Don't do what we did -- be very careful not to pull on the red cable.

  13. Nintendo 3DS XL 2015 Lower LCD and Touchscreen Replacement: crwdns2935265:013crwdnd2935265:01crwdnd2935265:03crwdne2935265:0 Nintendo 3DS XL 2015 Lower LCD and Touchscreen Replacement: crwdns2935265:013crwdnd2935265:02crwdnd2935265:03crwdne2935265:0 Nintendo 3DS XL 2015 Lower LCD and Touchscreen Replacement: crwdns2935265:013crwdnd2935265:03crwdnd2935265:03crwdne2935265:0
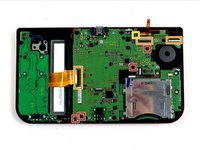
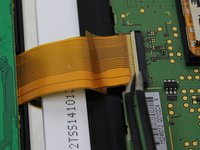
    • Using tweezers, gently pull the four marked ribbons out of the ZIF connectors along the sides of the motherboard.

    • These ZIF connectors are held in place by friction and do not have locks—lifting the flaps on these connectors will break them!

    • Three of the ribbon connectors have plastic clamping flaps that cover the ribbon to prevent slippage. Use the tweezers to flip them up before ribbon removal.

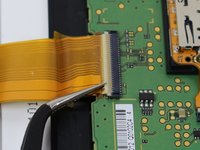
    • This one ribbon connector may also have a plastic clamping flap, but it's not like the others, rather it's similar to the one used for the Circle Pad. Gently flip up the flap on the side opposite the ribbon cable to remove the cable.

    • This connector was previously listed among the ones that do not have locks, however on most if not all systems, it actually does have one. Trying to remove or reinsert this cable without unlocking it will damage the cable, requiring a replacement of the Touch Screen's digitizer. Fortunately, the LCD uses other ZIF connectors, so that should still be fine.

    • If, on your system, this connector does not have a lock after all, do not pull up on the flap! It should come up easily; if it doesn't, it probably isn't meant to lock, but instead just hold the cable in with friction. In that case, try gently pulling the cable out of the connector.

    • When reassembling the device, be sure to flip the ZIF clamps back down.

    • While the SD card reader is shown as removed in this photo, it is optional for the removal of the motherboard.

  14. Nintendo 3DS XL 2015 Lower LCD and Touchscreen Replacement: crwdns2935265:014crwdnd2935265:01crwdnd2935265:01crwdne2935265:0
    • Using a JIS #000 screwdriver, remove six 4mm screws along the edges of the motherboard.

  15. Nintendo 3DS XL 2015 Lower LCD and Touchscreen Replacement: crwdns2935265:015crwdnd2935265:01crwdnd2935265:02crwdne2935265:0 Nintendo 3DS XL 2015 Lower LCD and Touchscreen Replacement: crwdns2935265:015crwdnd2935265:02crwdnd2935265:02crwdne2935265:0
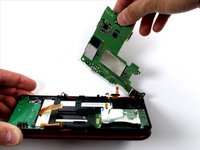
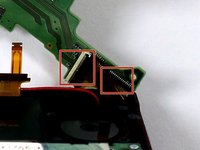
    • Carefully pivot the motherboard 90 degrees toward the hinges to reveal two more ZIF connectors on the underside of the motherboard.

    • Both have latches that must be flipped up. The left, longer latch is black; the right, shorter one is white. Flip up the flaps, slide the ribbons out and remove the motherboard.

    • Note which way the ribbons slide into their connectors carefully, as they are different.

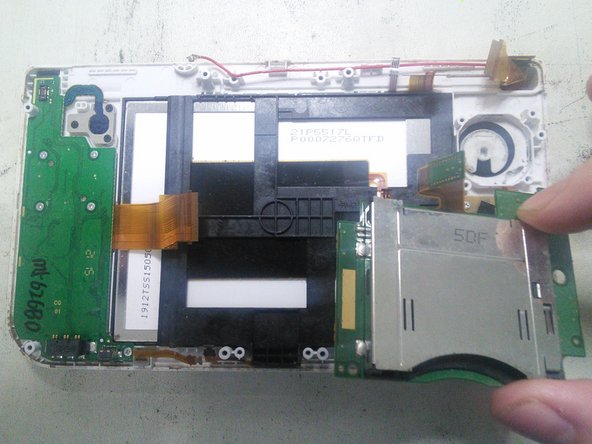
  16. Nintendo 3DS XL 2015 Lower LCD and Touchscreen Replacement, Game card reader: crwdns2935265:016crwdnd2935265:01crwdnd2935265:02crwdne2935265:0 Nintendo 3DS XL 2015 Lower LCD and Touchscreen Replacement, Game card reader: crwdns2935265:016crwdnd2935265:02crwdnd2935265:02crwdne2935265:0
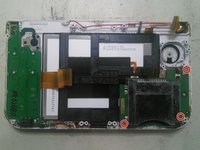
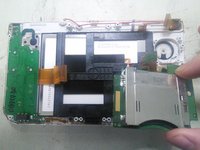
    • Using a JIS #000 screwdriver, remove the three screws.

    • Next, remove the game card reader by lifting it up.

  17. Nintendo 3DS XL 2015 Lower LCD and Touchscreen Replacement, NFC Antenna Support Bracket: crwdns2935265:017crwdnd2935265:01crwdnd2935265:02crwdne2935265:0 Nintendo 3DS XL 2015 Lower LCD and Touchscreen Replacement, NFC Antenna Support Bracket: crwdns2935265:017crwdnd2935265:02crwdnd2935265:02crwdne2935265:0
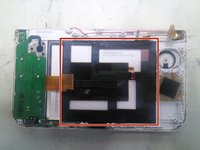
    • The part marked in red is the support bracket for the NFC antenna. You must remove this before proceeding with the LCD/digitizer assembly.

    • Release the plastic support clips of the NFC antenna using a thin tool on the top and bottom. Then, detach it.

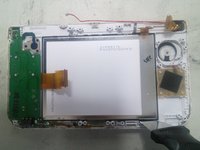
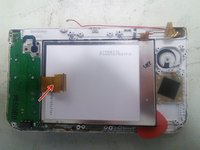
  18. Nintendo 3DS XL 2015 Lower LCD and Touchscreen Replacement, LCD/digitizer assembly: crwdns2935265:018crwdnd2935265:01crwdnd2935265:03crwdne2935265:0 Nintendo 3DS XL 2015 Lower LCD and Touchscreen Replacement, LCD/digitizer assembly: crwdns2935265:018crwdnd2935265:02crwdnd2935265:03crwdne2935265:0 Nintendo 3DS XL 2015 Lower LCD and Touchscreen Replacement, LCD/digitizer assembly: crwdns2935265:018crwdnd2935265:03crwdnd2935265:03crwdne2935265:0
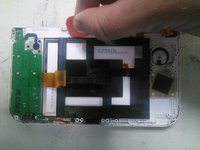
    • Slide a flat tool between the LCD/digitizer's black support and the console casing, then lift it gently. Next, slide an opening pick underneath to hold it.

    • The ribbon cable indicated by the red arrow is not really a nuisance, but it's nevertheless necessary to pay attention so that you do not damage it during this step.

    • Next, you can either lift the whole thing from underneath by pushing it up or continue to make your way around, unclipping the whole assembly and extracting it.

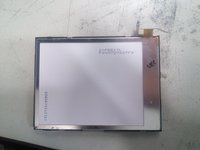
  19. Nintendo 3DS XL 2015 Lower LCD and Touchscreen Replacement, LCD: crwdns2935265:019crwdnd2935265:01crwdnd2935265:01crwdne2935265:0
    • Slide a thin pry tool between the LCD and the black casing of the whole display, then lift it gently. The LCD comes out without forcing it.

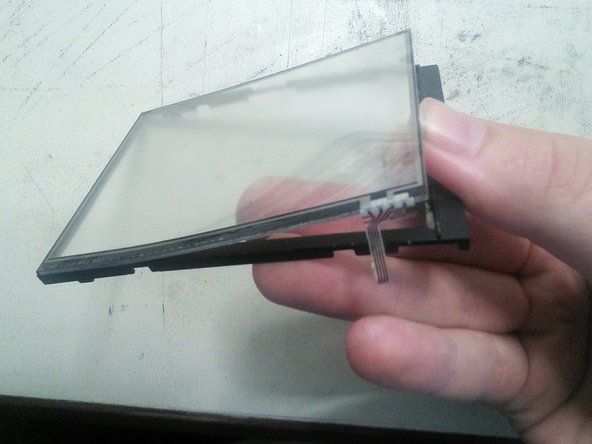
  20. Nintendo 3DS XL 2015 Lower LCD and Touchscreen Replacement, Touchscreen: crwdns2935265:020crwdnd2935265:01crwdnd2935265:02crwdne2935265:0 Nintendo 3DS XL 2015 Lower LCD and Touchscreen Replacement, Touchscreen: crwdns2935265:020crwdnd2935265:02crwdnd2935265:02crwdne2935265:0
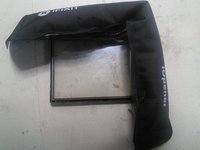
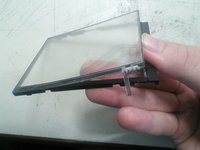
    • Warm the edges of the touchscreen to peel it off more easily, then push it gently from underneath with your fingers to remove it.

crwdns2915888:0crwdne2915888:0

To reassemble your device, follow these instructions in reverse order.

crwdns2935229:018crwdne2935229:0

crwdns2934873:0crwdne2934873:0

fr en

100%

crwdns2934885:0crwdne2934885:0 crwdns2934875:0crwdne2934875:0
crwdns2934877:0crwdne2934877:0 ›

Guillaume Blas

crwdns2935283:012/20/16crwdne2935283:0

1,258 crwdns2915208:0crwdne2915208:0

crwdns2935295:0crwdne2935295:0

crwdns2915084:0crwdne2915084:0

Francophones crwdns2935289:0Francophonescrwdne2935289:0

Community

crwdns2931471:047crwdne2931471:0

crwdns2935297:025crwdne2935297:0

crwdns2947412:016crwdne2947412:0

I followed this guide to the letter last night on my hyrule gold new 3ds XL (from hence forth I will refer to this unit as my “old n3dsXL”) before attempting the same repair on my new unit. It worked fine on my old n3dsXL. So I went ahead with doing the same repair on my new unit.

Well it went fine till I tried to turn it on. The blue light comes on then after a few seconds there’s a “pop” sound and the unit turns back off. Can anyone tell me what just happened here?

Also tried putting the original touch screen back in the new unit and it still does the same pop sound and shuts off

Rachel Bell - crwdns2934203:0crwdne2934203:0

You might need to reseat the cables i had this issue on my old ds lite and my old n3ds all i had to do was that and it fixed it for me also if that doesn’t work get a cotton swab and dip it in rubbing alcohol and clean the end of the ribbon cables then re insert them.

Joseph Federico -

Same thing happened to me my first time—brief blue light but would not power on. Tore it down and re-connected all the cables more carefully the second time. That fixed it.

BBW -

I have the same problem try (Dont push that hard) to push down on the small connector under the bottom screen (the touchscreen cable i think)

Daniel Czetwertynski -

I just disassembled my new 3ds xl to clean my lower screen and touch sensor following this guide, it went smoothly but now everything works except the touch sensor, why??

Francesco Baldacchini - crwdns2934203:0crwdne2934203:0

crwdns2917038:0crwdne2917038:0

crwdns2936625:0crwdne2936625:0:

crwdns2936751:024crwdne2936751:0 40

crwdns2936753:07crwdne2936753:0 321

crwdns2936753:030crwdne2936753:0 1,351

crwdns2942667:0crwdne2942667:0 41,716