crwdns2933423:0crwdne2933423:0

Nintendo 3DS SD Board Replacement

crwdns2862623:0crwdne2862623:0
crwdns2942641:0crwdne2942641:0

crwdns2942213:0crwdne2942213:0

  1. Nintendo 3DS SD Board Replacement, SD Board: crwdns2935265:01crwdnd2935265:01crwdnd2935265:01crwdne2935265:0
    • Remove the two 4.5 mm Phillips screws securing the SD board to the motherboard.

  2. Nintendo 3DS SD Board Replacement: crwdns2935265:02crwdnd2935265:01crwdnd2935265:02crwdne2935265:0 Nintendo 3DS SD Board Replacement: crwdns2935265:02crwdnd2935265:02crwdnd2935265:02crwdne2935265:0
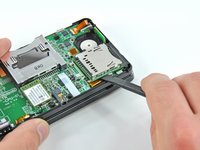
    • Use the flat end of a spudger to pry the SD board ribbon cable connector off its socket on the motherboard.

  3. Nintendo 3DS SD Board Replacement: crwdns2935265:03crwdnd2935265:01crwdnd2935265:03crwdne2935265:0 Nintendo 3DS SD Board Replacement: crwdns2935265:03crwdnd2935265:02crwdnd2935265:03crwdne2935265:0 Nintendo 3DS SD Board Replacement: crwdns2935265:03crwdnd2935265:03crwdnd2935265:03crwdne2935265:0
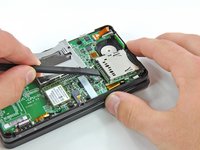
    • Insert the flat end of a spudger between the SD board and the motherboard.

    • Pry up slowly to loosen the SD board from the RF shield underneath it. If you pry too quickly, you may tear the shield or break its solder points.

    • Run the spudger along the sides of the SD board to free it from the adhesive holding it in place.

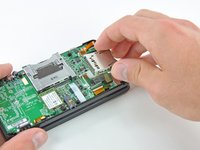
    • Once completely freed, lift the SD board straight off the motherboard.

crwdns2915888:0crwdne2915888:0

To reassemble your device, follow these instructions in reverse order.

David Hodson

crwdns2935283:004/13/10crwdne2935283:0

150,476 crwdns2915208:0crwdne2915208:0

crwdns2935297:0127crwdne2935297:0

crwdns2944067:00crwdne2944067:0

crwdns2917038:0crwdne2917038:0

crwdns2936625:0crwdne2936625:0:

crwdns2936751:024crwdne2936751:0 0

crwdns2936753:07crwdne2936753:0 0

crwdns2936753:030crwdne2936753:0 0

crwdns2942667:0crwdne2942667:0 232