crwdns2915892:0crwdne2915892:0
Replacing the SD board in your 3DS may help resolve issues you're having loading and saving content.
crwdns2942213:0crwdne2942213:0
-
crwdns2935267:0crwdne2935267:0Phillips #00 Screwdriver$5.49
-
Use a Phillips PH00 screwdriver to loosen the four screws along the top of the back cover.
-
-
-
Grab the top edge of the back cover with your opposite hand so that the cover does not fall back into place.
-
Pull the back cover up and away from the rest of the device to remove it.
-
-
-
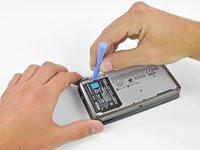
Insert a plastic opening tool into the notch in the lower case above the battery.
-
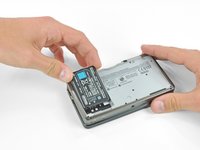
Pry the battery up with the plastic opening tool.
-
Grab the top edge of the battery and lift it out of the lower case.
-
-
-
-
Use a JIS #00 screwdriver to remove the nine 6.3 mm black screws from the lower case.
-
Use a JIS #00 screwdriver to remove the 2.4 mm silver screw above the game cartridge slot.
-
-
-
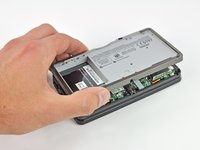
Lift the bottom edge of the lower case off the rest of the 3DS.
-
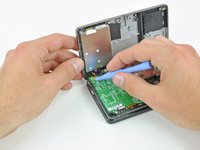
Use a plastic opening tool to pry the shoulder button ribbon cables off their sockets on the motherboard.
-
Remove the lower case from the device.
-
-
-
Remove the two 4.5 mm Phillips screws securing the SD board to the motherboard.
-
-
-
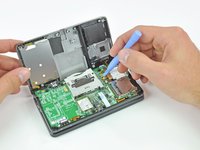
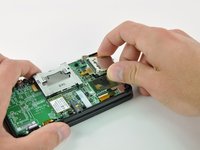
Use the flat end of a spudger to pry the SD board ribbon cable connector off its socket on the motherboard.
-
-
-
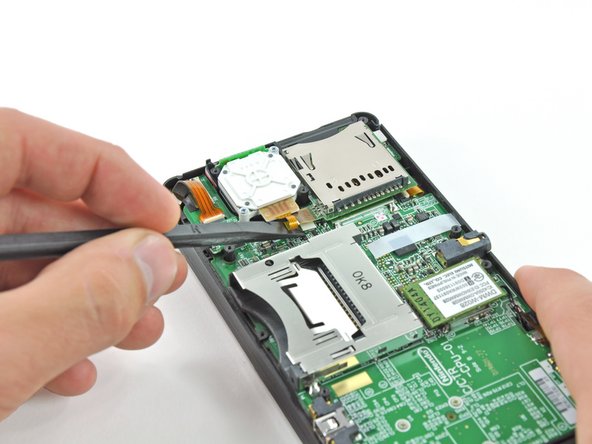
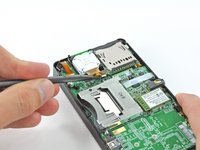
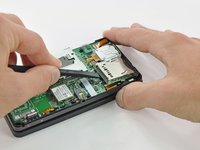
Insert the flat end of a spudger between the SD board and the motherboard.
-
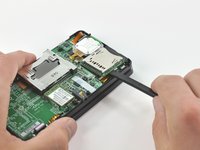
Run the spudger along the sides of the SD board to free it from the adhesive pad holding it in place.
-
Once completely freed, lift the SD board straight off the motherboard.
At this point it's a lot harder to get the SD card split from the heat shield under it. The epoxy is pretty adhesive. Because of this I bent the heat shield and it broke from the solder joints on the internal side of the SD reader. I'm hoping a quick retouch of the solder will adhere the shield back above the processor without any additional damage. However, that won't be until tomorrow when I check / test it. I'm also awaiting the part to arrive which should be within the week.
I finally received my SD Card Reader (which was mis-routed twice by USPS). I the SD Card sits on top of the head guard fine, but without the adhesive it will come up slightly. This was minimized when putting the 2 screws back in.
The assembly was simple and unlike many others, I had 0 stripped screws.
I am happy to report that after putting it all back together the issue was resolved by the $7 replacement part.
Where can I buy the SD card reader? Is it a special kind of will any SD card reader work?
Would this work for my problem? My problem isn't that it can't read the SD card it's just that the thing the pops out the SD card when you push on it is broken and thus I can't take out my SD card which I want to do to move data from it to my PC. Would this method still work? I don't want to have to pay Nintendo to fix it.
Yes this would resolve your problem as well. The spring mechanism is part of the metal can of the sd card reader.
Marco -
What kind of adhesive tape is under the SD card? Does it need replacing?
-


To reassemble your device, follow these instructions in reverse order.
To reassemble your device, follow these instructions in reverse order.
crwdns2935221:0crwdne2935221:0
crwdns2935229:022crwdne2935229:0

crwdns2947412:012crwdne2947412:0
Where can i purchase the sd card board replacement part? Does amazon carry them?
You can usually find them on ebay to around $3 to $6 dollars (non oem and oem)
Is there a way to do this with the older 3ds xl version? I didn't see any screws holding the sd board in when I opened it up.
Would this work for my problem? My problem is that the SD Card won't stay in, it just pops back out. Would this method still work? I'm not that experienced or knowledgeable about fixing these sort of things, so I'm not sure if the spring is part of it or not, lol. Also, where could I buy an SD Card board replacement part for cheap in Canada?
Usually that is the locking mechanism, you can replace the SD card slot for around $6 or $3 if you buy the non oem part.
Be careful when removing the SD Card Assembly, as lifting too hard will bend the metal plate it sits upon.
Could this cause bads reads. My 3ds wont detect my sd cards any more.
The silver shielding plate beneath will lift with the board itself, don't panic. Just separate the adhesive and you're on your way.
I'm currently wondering if a new SD card slot come with the adhesive foam or if I have to buy the adhesive foam separately. If I do have to buy the foam separately (which is most likely), then is it just normal isulating foam or if its electrically bonded to the metal shield through the foam
do i have to desolder anything?
no soldering necessary.
this is great. but how do you know if the card reader is good or bad?