crwdns2942213:0crwdne2942213:0
-
crwdns2935201:0crwdne2935201:0 crwdns2935203:0crwdne2935203:0
crwdns2935267:0crwdne2935267:0Tweezers$4.99-
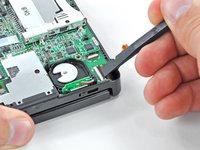
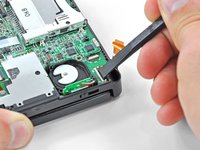
Grasp the microphone ribbon cable near the microphone with a pair of tweezers.
-
Pull the microphone straight up out of the upper case.
-
-
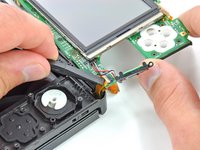
crwdns2935201:0crwdne2935201:0 crwdns2935203:0crwdne2935203:0
-
Use the flat end of a spudger or your fingernail to flip up the retaining flap on the speaker assembly ribbon cable ZIF socket.
-
Disconnect the speaker assembly ribbon cable with a pair of tweezers.
-
-
-
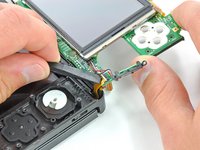
crwdns2935201:0crwdne2935201:0 crwdns2935203:0crwdne2935203:0
-
Use the flat end of a spudger or your fingernail to flip up the retaining flap on the camera ribbon cable ZIF socket.
-
-
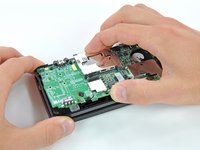
crwdns2935201:0crwdne2935201:0 crwdns2935203:0crwdne2935203:0
-
Remove seven Phillips screws securing the motherboard to the upper case:
-
Four 2.5 mm gold screws
-
Two 3.5 mm black screws
-
One 2.5 mm silver screw
-
Lift the side of the motherboard that sits along the bottom edge of the 3DS.
-
-
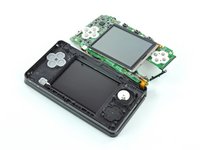
crwdns2935201:0crwdne2935201:0 crwdns2935203:0crwdne2935203:0
-
Use the flat end of a spudger or your fingernail to flip up the retaining flap on the LCD ribbon cable ZIF socket.
-
-
crwdns2935201:0crwdne2935201:0 crwdns2935203:0crwdne2935203:0
-
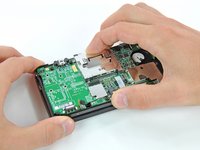
Remove the motherboard assembly from the rest of the device.
-