crwdns2915892:0crwdne2915892:0
This guide shows how to access the Nintendo 2DS screen for repair and cleaning purposes.
crwdns2942213:0crwdne2942213:0
-
-
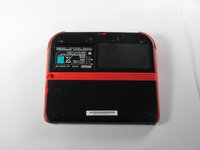
Remove the two Phillips captive screws securing the upper rear panel.
 crwdns2952109:0crwdne2952109:0
-
-
-
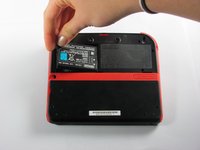
Hinge the upper rear panel upwards and outwards to remove it.
-
-
-
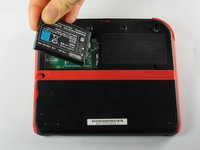
Remove the battery from its housing by lifting it up from the side closest to the outside edge.
-
-
-
Remove the ten Phillips screws attaching the rear panel.
-
-
-
-
Carefully pull the rear panel straight up from the device.
-
-
-
Use your fingernail or the flat end of a spudger to flip up the connector securing the ribbon cable to the motherboard
-
Remove the cable from the connector
-
-
-
Hold the side panels of the device's case with your fingers and pull outward to remove them.
-
There are three ribbon cables which have already been unplugged in this picture, disconnect these before disassembling the device further.
-
-
-
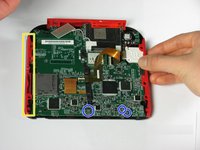
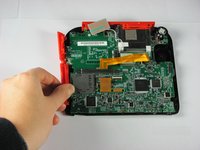
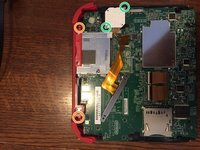
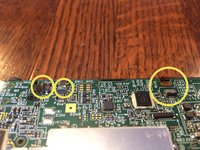
Remove the 12 brass-colored Phillips screws securing the main board.
-
-
-
There are two additional screws located on the top rail. Remove these to fully remove the buttons and top rail.
-
There are two screws holding down the joystick base that must be removed. (Be careful of the ribbon cable—it stays connected!)
-
Hold the top panel with your fingers and pull away from the device to remove it.
-
-
-
Detach the 2 ribbon cables by lifting the black flip connectors that hold them.
-
Lift out the rectangular board seated in the face and lift out the white square which is the joystick motor (takes a little effort). Both stay attached to the motherboard.
-
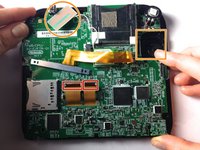
On some models, you'll need to remove three more tiny ribbon cables at the bottom of the screen. They are secured by flip up connectors. BE GENTLE!
-
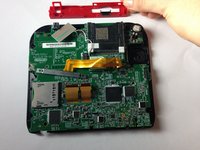
Holding the motherboard on either side, lift to remove it.
-
-
-
Grasp the screen firmly by a corner and lift it off of the front panel of the Nintendo 2DS.
-


To reassemble your device, follow these instructions in reverse order.
crwdns2935221:0crwdne2935221:0
crwdns2935229:087crwdne2935229:0
crwdns2935287:0crwdne2935287:0

Cal Poly, Team 70-1, Forte Winter 2015 crwdns2935289:0Cal Poly, Team 70-1, Forte Winter 2015crwdne2935289:0
CPSU-FORTE-W15S70G1
crwdns2931471:04crwdne2931471:0
crwdns2935297:036crwdne2935297:0
crwdns2947412:031crwdne2947412:0
Camera ribbon cable is very brittle, be careful.
Logan Pena - crwdns2934203:0crwdne2934203:0 crwdns2950251:0crwdne2950251:0
Thank you so much, Fina! You have done a fantastic job explaining each step incredibly well! I very much appreciate all of your efforts into skillfully describing the process of disassembling the 2DS. I was able to understand your instructions and thus was able to make a lucky kiddo super happy! Thanks again!
-Skye
Skye Leah - crwdns2934203:0crwdne2934203:0 crwdns2950251:0crwdne2950251:0
P.S. To those out there who don't have a super, ridiculously tiny (#000 screwdriver or 1.587 mm Phillips head) and don't want to have to purchase one just to complete this already daunting task, I found that using a screwdriver from a glasses repair kit worked PERFECTLY! :)
Skye Leah - crwdns2934203:0crwdne2934203:0 crwdns2950251:0crwdne2950251:0
what about a new screen?
Lord Hohenheim (Sans) - crwdns2934203:0crwdne2934203:0 crwdns2950251:0crwdne2950251:0
Once you've removed your screen, what are you supposed to do with it to clean and/or repair?
Danielle Chester - crwdns2934203:0crwdne2934203:0 crwdns2950251:0crwdne2950251:0