crwdns2931315:0crwdnd2931315:0crwdne2931315:0
crwdns2942213:0crwdne2942213:0
-
crwdns2935201:0crwdne2935201:0 crwdns2935203:0crwdne2935203:0
-
Remove the five screws (13mm long, 6mm head) attaching the Base Cover using a Phillips screwdriver (Ph2).
-
Remove the two screws (13 mm long, 6mm head) attaching the Base Cover using a T10 screwdriver.
-
-
crwdns2935201:0crwdne2935201:0 crwdns2935203:0crwdne2935203:0
-
Carefully remove the second layer from the base. You will not need a screwdriver for this step.
-
-
-
crwdns2935201:0crwdne2935201:0 crwdns2935203:0crwdne2935203:0
-
Remove the 2 screws (13mm, 6mm head) connected to the plastic piece holding down the power cord.
-
Then remove the additional 4 screws (13mm, 6mm head) and 2 screws (11mm, 5mm head) securing the base.
-
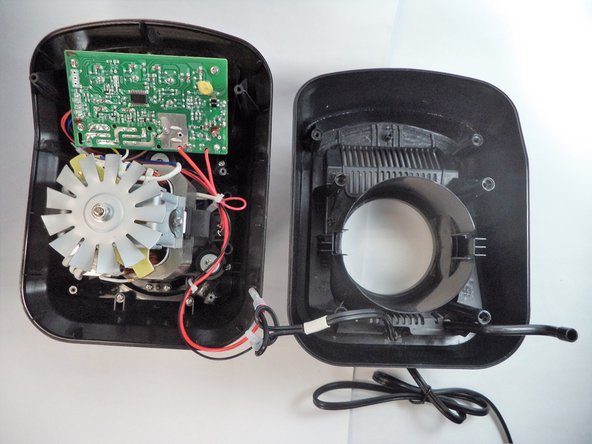
Carefully lift the base up from the rest of the blender.
-
-
crwdns2935201:0crwdne2935201:0 crwdns2935203:0crwdne2935203:0
-
Remove 4 screws (11mm, 4mm head) connecting the circuit board to the base.
-
-
crwdns2935201:0crwdne2935201:0 crwdns2935203:0crwdne2935203:0
-
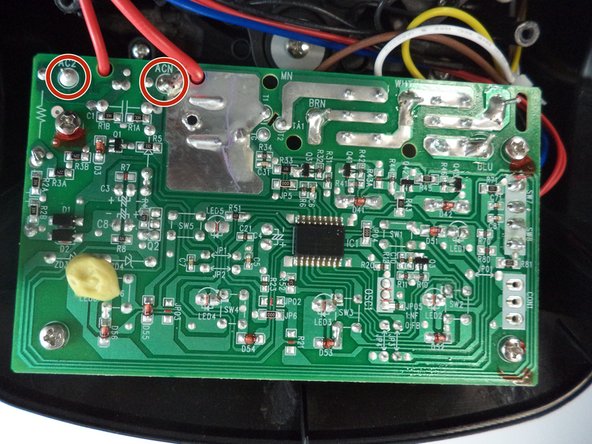
Check that the two red wires shown in the photos are properly soldered to the circuit board.
-
If they seem damaged, resolder the wires to the board.
-
If this doesn't solve the issue, proceed to step 6.
-
-
crwdns2935201:0crwdne2935201:0 crwdns2935203:0crwdne2935203:0
-
If the 2 wires in the previous step are connected, it's time to check the 2nd area.
-
Remove the plastic covers and check that the wires are soldered correctly.
-


crwdns2935221:0crwdne2935221:0
crwdns2935227:0crwdne2935227:0

crwdns2915084:0crwdne2915084:0

Arkansas State University, Team S1-G4, Chamberlain Fall 2017 crwdns2935289:0Arkansas State University, Team S1-G4, Chamberlain Fall 2017crwdne2935289:0
ARSU-CHAMBERLAIN-F17S1G4
crwdns2931471:02crwdne2931471:0
crwdns2935297:08crwdne2935297:0