crwdns2915892:0crwdne2915892:0
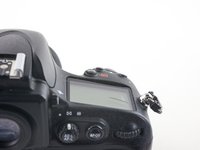
Follow this guide to replace a cracked top LCD cover glass on your Nikon D800. This procedure will fix a broken top cover glass, but not a cracked display.
crwdns2942213:0crwdne2942213:0
-
-
Place the iOpener in the center of the microwave.
-
-
-
Heat the iOpener for thirty seconds.
-
Throughout the repair procedure, as the iOpener cools, reheat it in the microwave for an additional thirty seconds at a time.
-
-
-
Remove the iOpener from the microwave, holding it by one of the two flat ends to avoid the hot center.
-
-
-
Fill a pot or pan with enough water to fully submerge an iOpener.
-
Heat the water to a boil. Turn off the heat.
-
Place an iOpener into the hot water for 2-3 minutes. Make sure the iOpener is fully submerged in the water.
-
Use tongs to extract the heated iOpener from the hot water.
-
Thoroughly dry the iOpener with a towel.
-
Your iOpener is ready for use! If you need to reheat the iOpener, heat the water to a boil, turn off the heat, and place the iOpener in the water for 2-3 minutes.
-
-
-
Lay a warm iOpener over the LCD glass to soften the adhesive holding it in place.
-
-
-
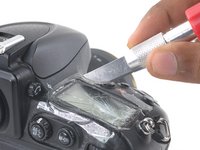
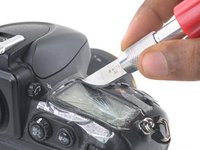
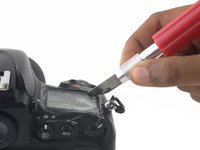
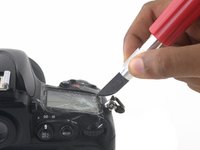
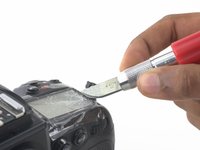
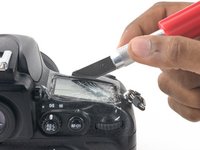
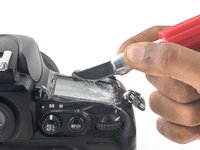
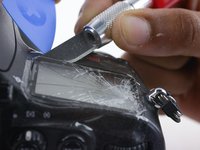
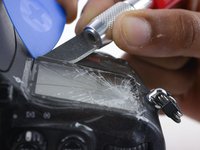
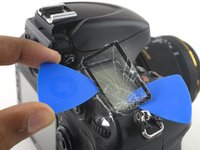
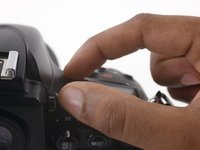
Insert a curved razor blade between the LCD glass cover and the body of D800.
-
-
-
Slide the curved razor blade along the front edge of the LCD.
-
-
-
-
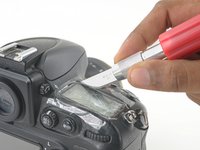
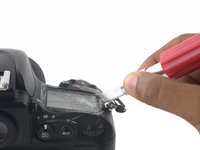
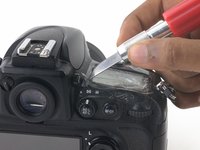
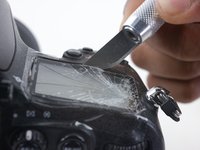
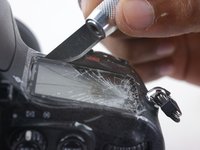
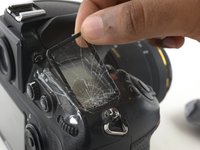
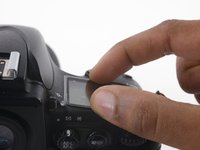
Bring the blade around the corner of the LCD closest to the shutter button.
-
-
-
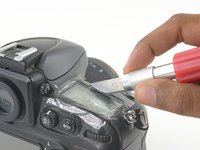
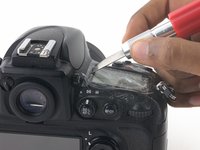
Cut along the right edge of the display.
-
-
-
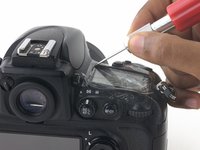
Cut along the left edge of the display.
-
-
-
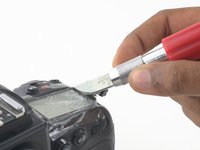
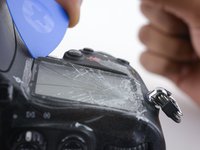
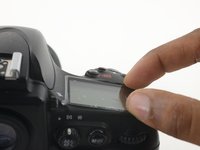
Insert the curved razor blade between the long edge of the LCD and the body of the D800.
-
Use the blade to pry the edge of the glass off the LCD.
-
-
-
Work your blade towards the corner nearest the lens.
-
Again, use the blade to separate the glass from the LCD panel.
-
-
-
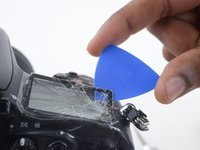
While lifting up with the razor blade, insert a plastic opening pick underneath the LCD glass.
-
Remove the razor blade.
-
-
-
Slide the pick along the top edge of the glass, prying up on the glass against the plastic body as you go.
-
-
-
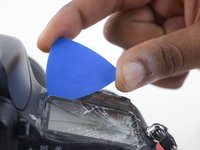
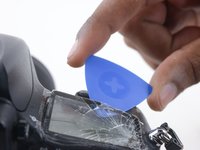
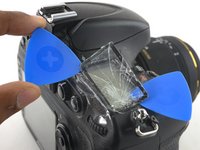
Leave the first opening pick underneath the front-right corner of the glass.
-
Insert a second opening pick underneath the panel from the back-left side of the display.
-
Slide the pick right, prying up the glass panel as you go.
-
-
-
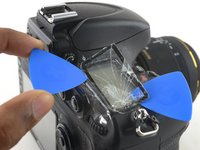
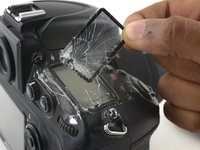
Once the glass is mostly separated from the camera, peel the panel completely off the LCD screen.
-
At this point there may be some adhesive tape connecting the glass to the camera. If so, simply pull the glass up until it's free.
-
-
-
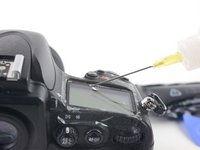
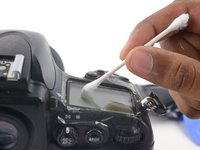
Using rubbing alcohol and a q-tip, clean the old adhesive strips and any residue off the LCD screen.
-
-
-
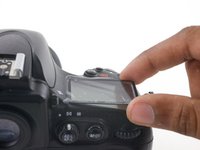
Carefully align the new LCD protective glass over the display.
-
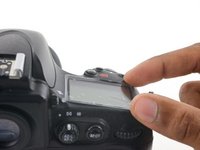
Lower the left edge of the glass onto the display and press it firmly against the edge of the LCD window.
-
Ease the right edge into place.
-
-
-
Press down on the edges of the display to ensure that the glass is strongly-adhered to the LCD.
-


crwdns2935221:0crwdne2935221:0
crwdns2935229:011crwdne2935229:0

crwdns2947410:01crwdne2947410:0
Unfortunately in cases when top screen glass is shuttering, top screen is shuttering to. So for almost everyone only glass replacing is not that case