crwdns2915892:0crwdne2915892:0
Potential damage could occur to the rear LCD screen which could affect performance. For safety purposes, please remove the battery before working with any electronic components.
crwdns2942213:0crwdne2942213:0
-
-
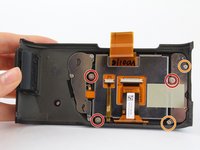
Using a Philips #00 screwdriver, remove the four 6.2mm from the left and right sides of the outer cover.
-
-
crwdns2935267:0crwdne2935267:0Tweezers$4.99
-
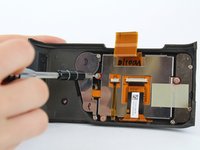
Use tweezers to gently flip the small locking flap of the zero force insertion connector up.
-
Pull the orange connector cable away from the main body of the camera using the tweezers.
-
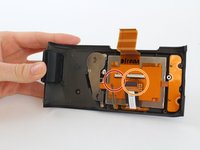
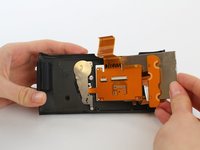
Remove the back cover.
-
-
-
-
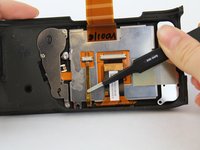
Using a Philips #00 screwdriver, remove the three 4.3 mm screws by rotating screwdriver to the left.
-
Use the Phillips #00 screwdriver to remove the two 3.4 mm screws.
-
-
-
Using blunt tweezers, gently flip the small locking flap of the zero force insertion connector up for both connectors.
-
Use blunt tweezers to pull the left ribbon connector out of the zero insertion force connector.
-
Using the same tweezers, pull the right ribbon connector out of the zero insertion force connector.
-
-
-
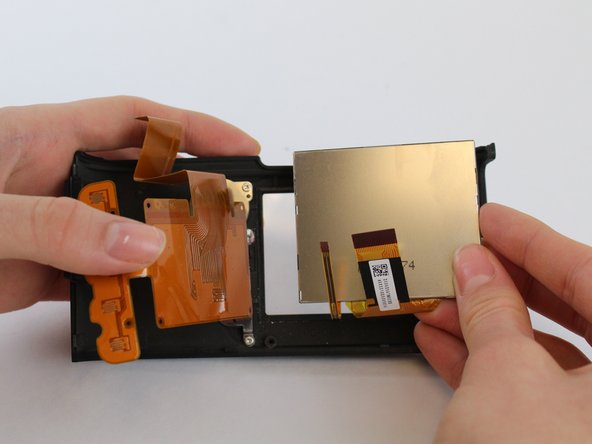
Slide out the LCD screen by pulling towards the right.
-
Remove the LCD screen.
-


To reassemble your device, follow these instructions in reverse order.
To reassemble your device, follow these instructions in reverse order.
crwdns2935221:0crwdne2935221:0
crwdns2935227:0crwdne2935227:0

crwdns2915084:0crwdne2915084:0

USF Tampa, Team S1-G1, Leahy Fall 2017 crwdns2935289:0USF Tampa, Team S1-G1, Leahy Fall 2017crwdne2935289:0
USFT-LEAHY-F17S1G1
crwdns2931471:04crwdne2931471:0
crwdns2935297:05crwdne2935297:0