crwdns2933423:0crwdne2933423:0
crwdns2947577:0crwdnd2947577:0crwdne2947577:0

Nikon D80 Motherboard Replacement

crwdns2942213:0crwdne2942213:0

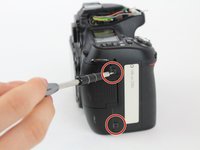
    1. Nikon D80 Motherboard Replacement, Main Board: crwdns2935265:01crwdnd2935265:01crwdnd2935265:02crwdne2935265:0 Nikon D80 Motherboard Replacement, Main Board: crwdns2935265:01crwdnd2935265:02crwdnd2935265:02crwdne2935265:0
      • Using a Phillips #00 screwdriver, remove the four 6.2 mm screws from the left and right sides of the outer cover.

      crwdns2952109:0crwdne2952109:0

      crwdns2917038:0crwdne2917038:0

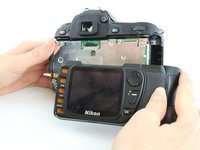
    2. Nikon D80 Motherboard Replacement: crwdns2935265:02crwdnd2935265:01crwdnd2935265:03crwdne2935265:0 Nikon D80 Motherboard Replacement: crwdns2935265:02crwdnd2935265:02crwdnd2935265:03crwdne2935265:0 Nikon D80 Motherboard Replacement: crwdns2935265:02crwdnd2935265:03crwdnd2935265:03crwdne2935265:0
      crwdns2935267:0crwdne2935267:0
      Tweezers
      $4.99
      • Use tweezers to gently flip the small locking flap of the zero force insertion connector up.

      • Pull the orange connector cable out of the zero force insertion connector using the tweezers.

      • Remove the back cover.

      crwdns2952109:0crwdne2952109:0

      crwdns2917038:0crwdne2917038:0

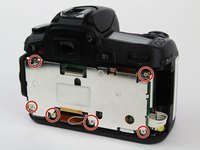
    3. Nikon D80 Motherboard Replacement: crwdns2935265:03crwdnd2935265:01crwdnd2935265:03crwdne2935265:0 Nikon D80 Motherboard Replacement: crwdns2935265:03crwdnd2935265:02crwdnd2935265:03crwdne2935265:0 Nikon D80 Motherboard Replacement: crwdns2935265:03crwdnd2935265:03crwdnd2935265:03crwdne2935265:0
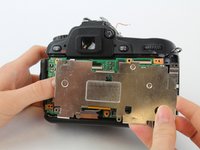
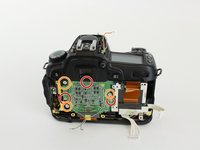
      • Use a Phillips #00 screwdriver to remove the six 3.7 mm screws.

      • Remove the back plate that covers the main board.

      crwdns2952109:0crwdne2952109:0

      crwdns2917038:0crwdne2917038:0

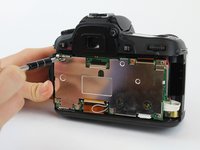
    4. Nikon D80 Motherboard Replacement: crwdns2935265:04crwdnd2935265:01crwdnd2935265:02crwdne2935265:0 Nikon D80 Motherboard Replacement: crwdns2935265:04crwdnd2935265:02crwdnd2935265:02crwdne2935265:0
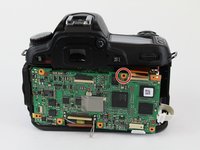
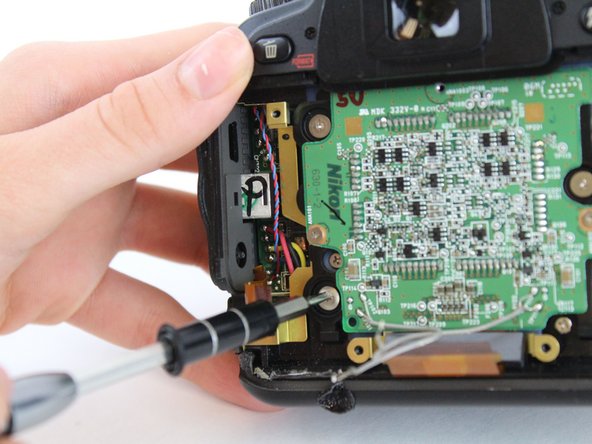
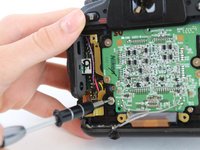
      • Use a Phillips #00 screwdriver to unscrew the 2.3 mm screw.

      crwdns2952109:0crwdne2952109:0

      crwdns2917038:0crwdne2917038:0

    5. Nikon D80 Motherboard Replacement: crwdns2935265:05crwdnd2935265:01crwdnd2935265:01crwdne2935265:0
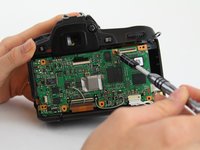
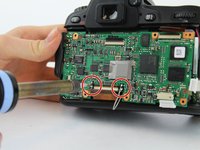
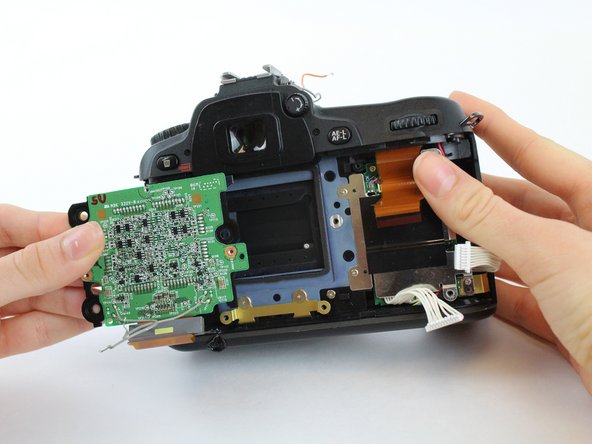
      • Use tweezers to gently flip the small locking flaps of the zero force insertion connectors up.

      • Pull the bottom orange connector cable out of the zero force insertion connector using the tweezers.

      • Pull the top orange connector cable out of the zero force insertion connector using the tweezers.

      • Remove the ribbon cables by gently pulling them away from the no-fuss ribbon cable connectors.

      • Remove the ribbon cables by gently pulling them away from the no-fuss ribbon cable connectors.

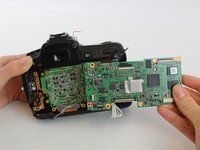
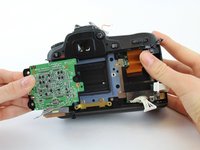
      • Disconnect the main board from the two ports on the left by pulling the main board to the right.

      crwdns2952109:0crwdne2952109:0

      crwdns2917038:0crwdne2917038:0

    6. Nikon D80 Motherboard Replacement: crwdns2935265:06crwdnd2935265:01crwdnd2935265:03crwdne2935265:0 Nikon D80 Motherboard Replacement: crwdns2935265:06crwdnd2935265:02crwdnd2935265:03crwdne2935265:0 Nikon D80 Motherboard Replacement: crwdns2935265:06crwdnd2935265:03crwdnd2935265:03crwdne2935265:0
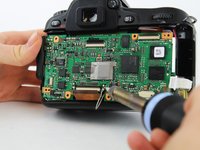
      • Using the soldering iron, disconnect the four wires soldered to the main board.

      • For more information on how to solder and desolder connections, please visit this guide.

      • Be careful when using the hot soldering iron. Move the ribbon cable out of the way as well; it is easy to burn it or yourself when using the iron.

      • Remove the main board.

      crwdns2952109:0crwdne2952109:0

      crwdns2917038:0crwdne2917038:0

    1. Nikon D80 Motherboard Replacement, Motherboard: crwdns2935265:07crwdnd2935265:01crwdnd2935265:03crwdne2935265:0 Nikon D80 Motherboard Replacement, Motherboard: crwdns2935265:07crwdnd2935265:02crwdnd2935265:03crwdne2935265:0 Nikon D80 Motherboard Replacement, Motherboard: crwdns2935265:07crwdnd2935265:03crwdnd2935265:03crwdne2935265:0
      • Unscrew the three 2.3 mm screws using a Phillips #00 screwdriver.

      • Use the Phillips #00 screwdriver to unscrew the three 4.7 mm screws.

      • Gently remove the motherboard.

      crwdns2952109:0crwdne2952109:0

      crwdns2917038:0crwdne2917038:0

crwdns2915888:0crwdne2915888:0

To reassemble your device, follow these instructions in reverse order.

crwdns2935221:0crwdne2935221:0

crwdns2935229:03crwdne2935229:0

Sara Martin

crwdns2935283:010/09/17crwdne2935283:0

610 crwdns2915208:0crwdne2915208:0

crwdns2935297:04crwdne2935297:0

crwdns2935287:0crwdne2935287:0

USF Tampa, Team S1-G1, Leahy Fall 2017 crwdns2935289:0USF Tampa, Team S1-G1, Leahy Fall 2017crwdne2935289:0

USFT-LEAHY-F17S1G1

crwdns2931471:04crwdne2931471:0

crwdns2935297:05crwdne2935297:0

crwdns2947412:00crwdne2947412:0

crwdns2917038:0crwdne2917038:0

crwdns2936625:0crwdne2936625:0:

crwdns2936751:024crwdne2936751:0 1

crwdns2936753:07crwdne2936753:0 11

crwdns2936753:030crwdne2936753:0 56

crwdns2942667:0crwdne2942667:0 4,759