crwdns2915892:0crwdne2915892:0
Use this guide to replace the LCD board, which also houses the physical switches for the buttons on the rear cover.
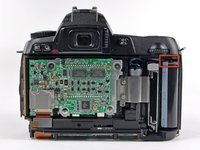
crwdns2942213:0crwdne2942213:0
-
-
Use your finger tip to pull the battery release tab toward the center of the D70.
-
Open the battery door and rotate it away from the bottom cover.
-
-
-
Remove the two 4.8 mm Phillips screws securing the battery side of the rear cover to the D70.
-
-
-
Remove the two 4.8 mm Phillips screws securing the port side of the rear cover to the D70.
-
-
-
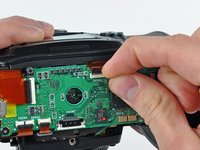
Use your fingernail to flip up the ZIF locking flap on the LCD ribbon cable socket.
-
Pull the LCD board ribbon cable out of its socket.
-
-
-
-
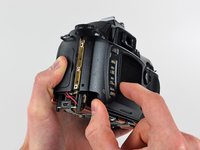
Carefully pull the sides of the rear cover away from the body of the D70.
-
-
-
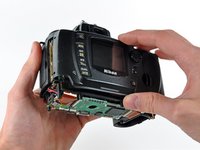
Pull the rear cover off the body of the D70, minding the LCD board ribbon cable that may get caught.
-
-
-
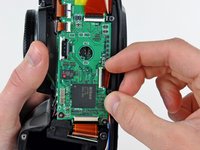
Use your thumbnails to push the ZIF cable lock toward the LCD.
-
Pull the LCD ribbon cable out of its socket.
-
-
crwdns2935267:0crwdne2935267:0Tweezers$4.99
-
Use a pair of tweezers to pull the LCD backlight connector away from its socket.
-
-
-
Remove the two 4.8 mm Phillips screws securing the LCD bracket to the rear cover.
-
Lift the LCD bracket out of the rear cover.
-
-
-
Remove the LCD assembly from the rear cover.
-
-
-
Remove the three 3.1 mm Phillips screws securing the LCD board to the rear cover.
-
-
-
Remove the LCD board from the rear cover.
-


To reassemble your device, follow these instructions in reverse order.
To reassemble your device, follow these instructions in reverse order.
crwdns2935221:0crwdne2935221:0
crwdns2935229:04crwdne2935229:0
