crwdns2915892:0crwdne2915892:0
Make sure to have your soldering iron ready prior to replacing the screen. This will make the process go faster as the time it takes to heat the soldering iron varies.
crwdns2942213:0crwdne2942213:0
-
-
Fully open the LCD panel so that its screws are easily accessible.
-
Remove the two 2.5 mm screws from the outside edge of the screen casing, and the two 3.5 mm screws from the inside edge.
-
-
-
Pry open the plastic casing using the opening tool or by hand.
-
-
-
-
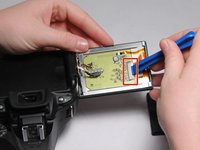
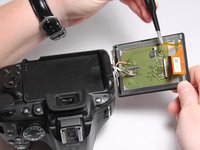
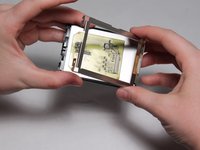
Use the plastic opening tool to pop up the latch holding the ribbon cable on the right side of the circuit board, and remove it.
-
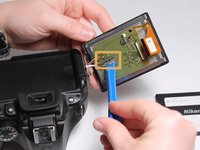
Use the plastic opening tool to pry the ribbon cable on the left side of the circuit board up and off of its socket.
-
-
crwdns2935267:0crwdne2935267:0Tweezers$4.99
-
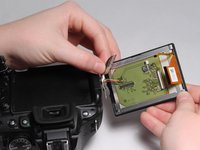
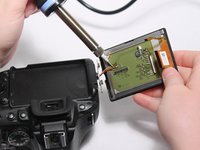
Using tweezers, unplug the smaller cable.
-
-
-
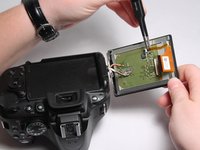
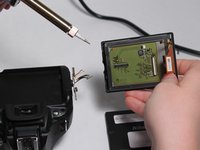
Desolder the three small wires on the left side of the circuit board.
-
-
-
Using a spudger, remove the display from its casing.
-


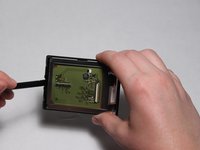
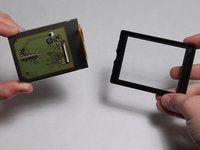
To reassemble your device, follow these instructions in reverse order.
crwdns2935221:0crwdne2935221:0
crwdns2935229:015crwdne2935229:0

crwdns2935287:0crwdne2935287:0

USF Tampa, Team 3-1, Eyestone Fall 2015 crwdns2935289:0USF Tampa, Team 3-1, Eyestone Fall 2015crwdne2935289:0
USFT-EYESTONE-F15S3G1
crwdns2931471:04crwdne2931471:0
crwdns2935297:05crwdne2935297:0
crwdns2947412:011crwdne2947412:0
Do I need to de-solder if I'm just replacing the window glass?
To isaac: no. The exterior glass is separate from the LCD.
Do you recommend the replacent for LCD sold on Ebay?
Where did you find the replacement screen? The one I ordered that says it's for the d5200 is not the same as the one in it or in your pictures.
How do you disconnect the multi-plug that is shown connected in image 4 and disconnected in image five? Does it unclip or slide out?