crwdns2915892:0crwdne2915892:0
The mainboard controls all of the software on the Nikon D40. A faulty mainboard can cause problems that will require a new board. This guide will show you how to replace the camera's mainboard.
crwdns2942213:0crwdne2942213:0
-
-
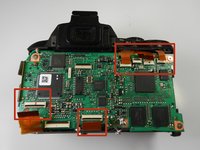
Remove the two visible 6.0 mm Philips #0 screws on the left and right sides of the viewfinder. These screws are highlighted in red.
 crwdns2952109:0crwdne2952109:0
-
-
-
Remove the four 6.0 mm Philips #0 screws on the left and right sides of the camera.
-
-
-
Remove the four highlighted 3.0 mm Philips #0 screws on the bottom of the camera.
-
-
-
-
While pulling the bottom down, remove the back of the camera.
-
-
-
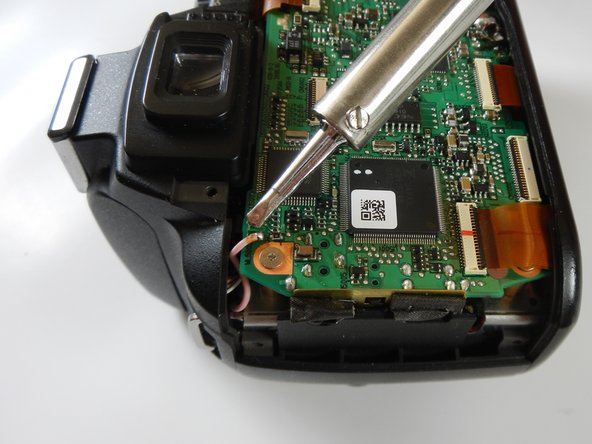
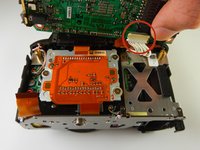
Remove the solder connecting the red wire to the mainboard.
-
-
-
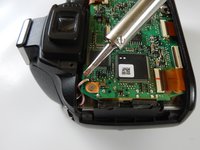
Desolder the 4 smaller wires near the bottom of the mainboard.
-
-
-
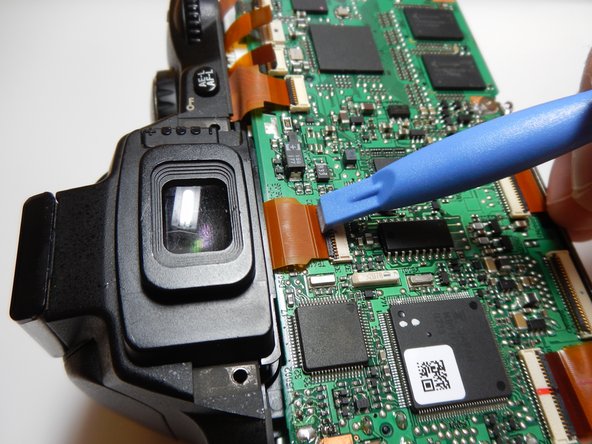
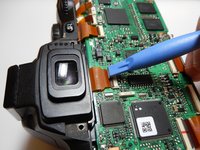
Use the plastic opening tool to release the ribbon cables attached to the mainboard.
-
-
-
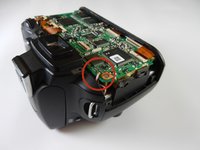
Remove the five 3.0mm Philips #1 screws holding the mainboard down.
-
-
-
Lift the mainboard up to reveal the final connection.
-


To reassemble your device, follow these instructions in reverse order.
crwdns2935221:0crwdne2935221:0
crwdns2935229:07crwdne2935229:0
crwdns2935287:0crwdne2935287:0

Cal Poly, Team 6-19, Maness Winter 2014 crwdns2935289:0Cal Poly, Team 6-19, Maness Winter 2014crwdne2935289:0
CPSU-MANESS-W14S6G19
crwdns2931471:04crwdne2931471:0
crwdns2935297:07crwdne2935297:0
crwdns2947412:03crwdne2947412:0
What is the ordering of the small wires on the bottom? It is hard to put back together from the photos. Thanks!
Joseph Ruskiewicz - crwdns2934203:0crwdne2934203:0 crwdns2950251:0crwdne2950251:0
wheres the power source? i mean the fuse
Gringo Maputi - crwdns2934203:0crwdne2934203:0 crwdns2950251:0crwdne2950251:0
in the main board located kindly put markings on it
Gringo Maputi - crwdns2934203:0crwdne2934203:0 crwdns2950251:0crwdne2950251:0