crwdns2915892:0crwdne2915892:0
This guide will allow the reader to understand how to disassemble the Nikon Coolpix S5300 and get to its image sensor.
crwdns2942213:0crwdne2942213:0
-
-
Turn the camera upside down and locate the battery compartment.
-
Slide the compartment open following the direction of the arrow.
-
-
-
Press the orange release button to release and remove the battery.
-
Replace or insert battery in it's respective terminals
-
-
-
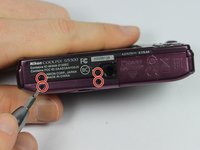
Remove the four 0.1mm screws from the bottom of the camera using the phillips head screwdriver
-
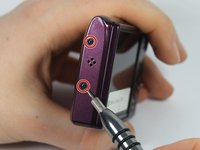
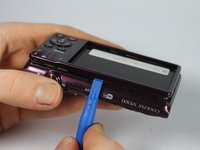
Using the same screwdriver, remove the 2 screws on the side of the camera.
-
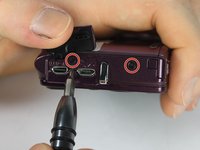
Remove the 2 screws from the other side of the camera.
-
-
-
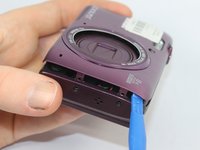
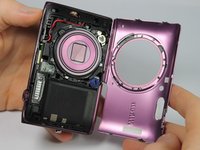
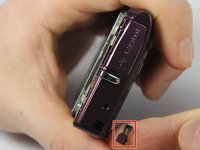
Use the plastic opening tool to carefully separate the cover from the camera.
-
Work the plastic opening tool around all the edges of the front plate.
-
Pull the purple plastic cover off gently from the screen.
-
-
-
Turn the camera over so the LCD screen is facing you.
-
Carefully remove the front shell by gently prying around the corners with the plastic opening tool until it releases.
-
-
-
-
Be careful to keep track of little pieces of the outside casing.
-
-
-
Carefully remove the top button casing by pulling it away from main camera.
-
-
-
Remove the 2 screws on the silver plate
-
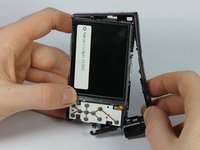
Gently lift the screen and silver plate away from the internal components.
-
-
-
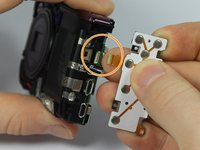
Carefully move the button panel away from the silver plate.
-
To disconnect the ribbon cable, use the tip of a plastic opening tool or your fingernail to flip up the small retaining flap.
-
Safely pull the ribbon cable out and then remove the button panel.
-
-
-
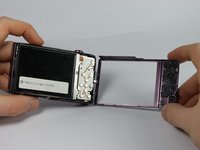
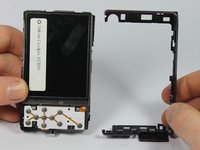
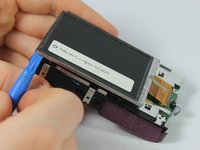
Carefully remove the screen away from the silver plate.
-
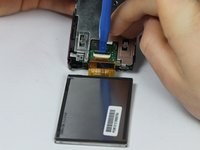
Carefully fold the screen over exposing the latch for the ribbon cable.
-
-
-
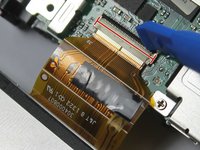
To disconnect the ribbon cable, use the tip of a plastic opening tool or your fingernail to flip up the small retaining flap. Then, you can safely pull the ribbon cable out.
-
-
-
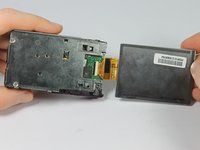
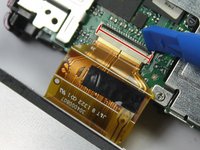
Once the ribbon cable is disconnected, remove the LCD screen.
-
-
-
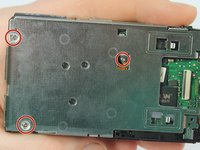
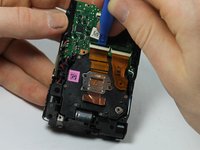
Using the phillips head screwdriver, remove the three 0.1mm screws on the metal plate.
-
Carefully remove metal plate from the camera.
-
-
-
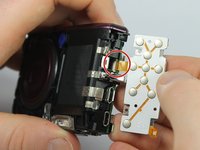
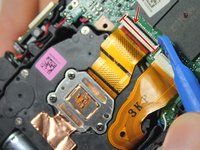
Use the plastic opening tool or your finger nail to carefully flip up the ribbon cable retaining flap.
-
Use the same screwdriver to remove the three 3mm screws that were revealed after removing the metal plate.
-
-
-
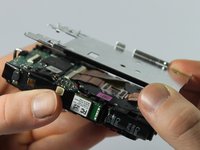
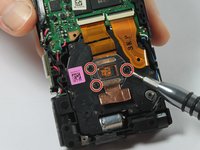
Gently pull the ribbon cable to remove the image sensor.
-


To reassemble your device, follow these instructions in reverse order.
To reassemble your device, follow these instructions in reverse order.

crwdns2915084:0crwdne2915084:0

UMass Dartmouth, Team 6-1, Bhusal Spring 2016 crwdns2935289:0UMass Dartmouth, Team 6-1, Bhusal Spring 2016crwdne2935289:0
UMASSD-BHUSAL-S16S6G1
crwdns2931471:03crwdne2931471:0
crwdns2935297:012crwdne2935297:0