crwdns2915892:0crwdne2915892:0
For this guide you will need a new LCD screen. If you are using iFixit tools, you will need a PH000 head and a T5 star head.
crwdns2942213:0crwdne2942213:0
-
-
Slide the battery cover to the right.
-
-
-
Slide the second cover (yellow) to the right (similar to the outer cover). This will allow the batteries to be exposed.
-
-
-
Remove the batteries by gently tipping the camera.
-
-
-
FIRST: remove the batteries.
-
Unscrew the four screws around the corners of the camera. This can be done using the iFixit kit's T5 (star tip screwdriver)
-
-
-
-
Unscrew the screw on the left (silver) first. It can be removed with the same tip (T5)
-
Change screwdriver tip to iFixit kit's PH000. This removes the screw on the right (black) It is a small Phillips head.
-
-
-
Gently separate the back panel from the rest of the camera.
-
-
-
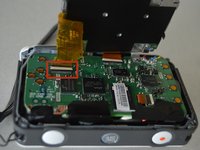
Remove screw connecting the top right of the screen to the mother board.
-
-
-
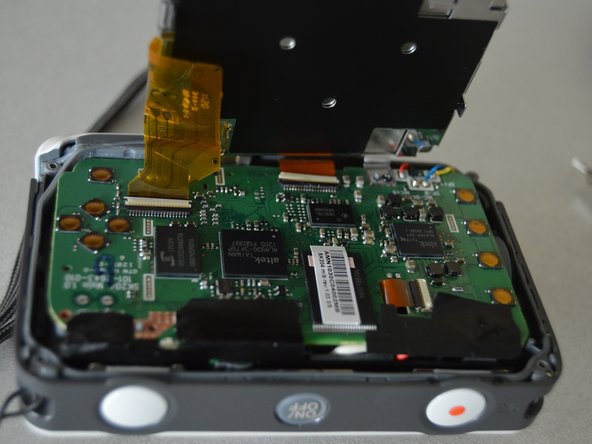
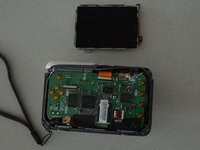
Spin the camera around and gently pull the screen towards you. This will allow easy access to components on the motherboard.
-
-
crwdns2935267:0crwdne2935267:0Tweezers$4.99
-
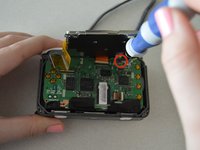
Remove connected strip by flipping up the small off-white plastic strip with tweezers.
-
Gently pull out the strip from the motherboard.
-
-
-
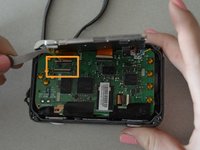
Remove screw that is now in the top right corner. This will detach the screen entirely.
-


To reassemble your device, follow these instructions in reverse order.
crwdns2935221:0crwdne2935221:0
crwdns2935227:0crwdne2935227:0
crwdns2935287:0crwdne2935287:0

Penn State, Team 2-4, Kaschak Winter 2015 crwdns2935289:0Penn State, Team 2-4, Kaschak Winter 2015crwdne2935289:0
PSU-KASCHAK-W15S2G4
crwdns2931471:04crwdne2931471:0
crwdns2935297:05crwdne2935297:0