crwdns2915892:0crwdne2915892:0
This guide will take some time and is very hard to do. Once the camera is apart you have to unsolder several wires and post on the motherboard to get it off. Putting it back together will be even more of a challenge, as it uses micro soldering to reconnect the wires. Only experienced solders should do this.
crwdns2942213:0crwdne2942213:0
-
-
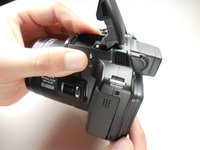
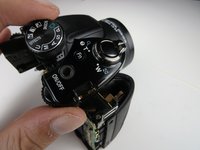
Flip the camera over and push the tab on the battery cover to open the battery compartment.
-
-
-
Push the little yellow tab to allow the battery to slide out.
-
With the tab pushed out, pull the battery out.
-
-
-
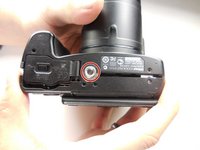
Flip the camera upside down and remove six 3mm PH00 Philips screws with a Philips screwdriver.
-
On the thumb grip, remove the one 4mm PH00 Philips screw.
-
-
-
With the camera upside down, remove the three 3mm PH00 Philips screws on the left side.
-
-
-
On the opposite side of the camera, remove the two 3mm PH00 Philips screws.
-
-
-
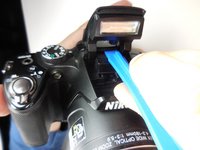
Open the flash and use a plastic opening tool to pop the tab under it as shown.
-
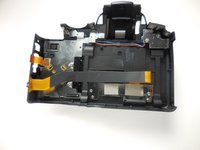
Now pull the casing apart.
-
The tripod attachment may fall out on its own, or you will need to pull it out.
-
-
-
-
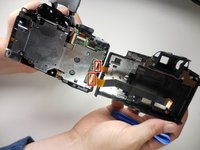
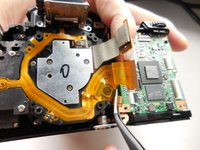
Unplug the two ribbon cables to completely detach the back.
-
-
-
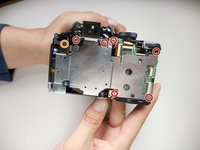
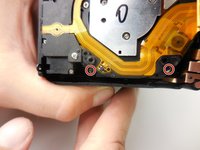
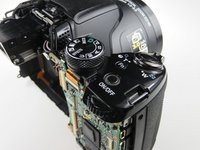
With the back separated, you need to remove six 3mm PH000 Philips screws with a Philips screwdriver.
-
Remove one 5mm PH00 Philips screw
-
With all the screws out, the metal plate should simply lift off.
-
-
-
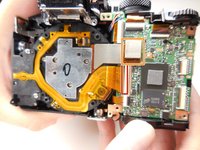
With the metal plate off, unplug this ribbon cable from the motherboard.
-
To remove the flat-topped connector, you simply lift it up to unplug it.
-
-
-
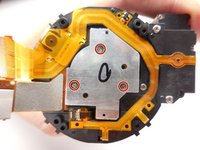
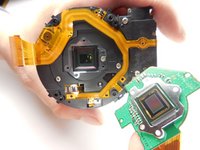
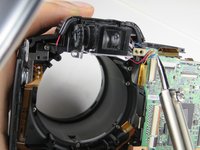
To get the lens assembly out, you need to remove four 6mm PH00 Philips screws
-
-
-
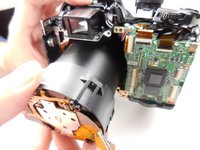
With the support screws out, you can simply slide the assembly out of the casing.
-
-
-
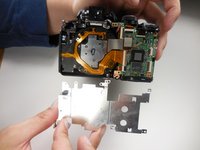
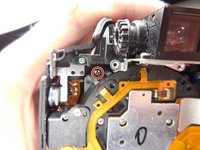
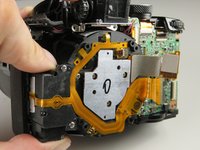
With the assembly out we need to take of this last piece by removing the three 3mm PH000 Philips screws.
-
-
-
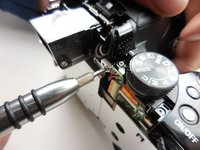
Looking from the top of the camera, remove the 3mm PH00 Philips screw.
-
-
-
Now grab the top panel of the thumb grip and pop it off.
-
-
-
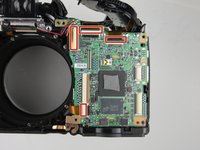
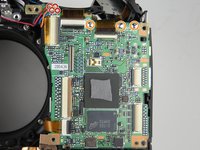
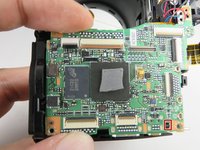
Now looking at the motherboard, unplug all four ribbon cables on it.
-
-
-
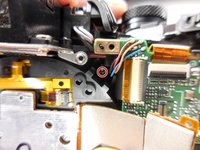
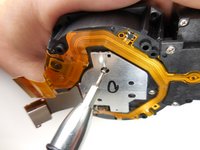
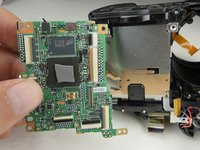
There are four wires that need to unsoldered.
-
There are also three post that need to be unsoldered.
-
-
-
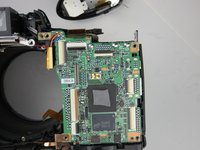
before you can pull the board off, there is a tab that must be pushed back.
-


To reassemble your device, follow these instructions in reverse order.
crwdns2935221:0crwdne2935221:0
crwdns2935229:016crwdne2935229:0
crwdns2935287:0crwdne2935287:0

Colorado Springs, Team 2-2, Panko Spring 2015 crwdns2935289:0Colorado Springs, Team 2-2, Panko Spring 2015crwdne2935289:0
UCCS-PANKO-S15S2G2
crwdns2931471:03crwdne2931471:0
crwdns2935297:015crwdne2935297:0
crwdns2947412:04crwdne2947412:0
This is a wonderful presentation! My P510 got in saltwater; worked erratically; I disassembled and cleaned with alcohol and blew out sand and dried and reassembled and it worked! The copper thingy in pic 17B was left over. I mostly disassembled and reassembled and again, it worked! I found the dial on the back upper right was catchy so I partly disassembled again to blow out that dial. After assembly, the dial was free, but it would not power on! I’ve checked all my cable connections and still can’t get it to power on. Anybody have something for me to check? This presentation is still wonderful.
Excellent guide - it gave me the courage and knowledge to partially strip my P510 and sort out an intermittent shutter release. Thank you!
not worth a bother. motherboard costs as much as a camera itself. many have the issue with motherboard, so as far as I am concerned, I have no trust in any Nikon product
my advice: if you have one still functioning, ge rid of it asap. no spare parts from Nikon and on eBay and other outlets, can not get it cheaper than $150 a piece. Always respected Nikon but since I got dissapinted with this one, no Nikon for me