crwdns2915892:0crwdne2915892:0
This guide takes a little time to get to the lens assembly. However, it is fairly easy and only requires vary minimal amount of tools to do so.
crwdns2942213:0crwdne2942213:0
-
-
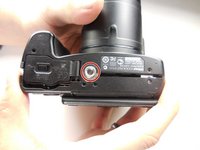
Flip the camera upside down and remove six 3mm PH00 Philips screws with a Philips screwdriver.
-
On the thumb grip, remove the one 4mm PH00 Philips screw.
-
-
-
With the camera upside down, remove the three 3mm PH00 Philips screws on the left side.
-
-
-
On the opposite side of the camera, remove the two 3mm PH00 Philips screws.
-
-
-
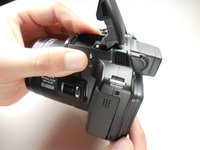
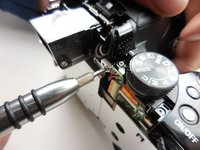
Open the flash and use a plastic opening tool to pop the tab under it as shown.
-
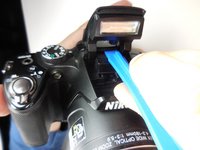
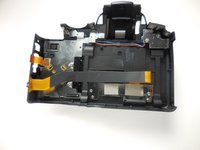
Now pull the casing apart.
-
The tripod attachment may fall out on its own, or you will need to pull it out.
-
-
-
-
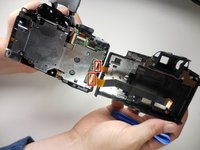
Unplug the two ribbon cables to completely detach the back.
-
-
-
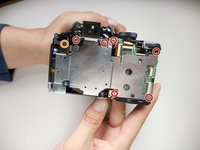
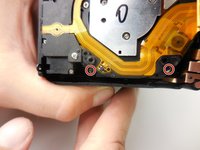
With the back separated, you need to remove six 3mm PH000 Philips screws with a Philips screwdriver.
-
Remove one 5mm PH00 Philips screw
-
With all the screws out, the metal plate should simply lift off.
-
-
-
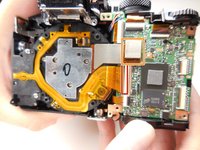
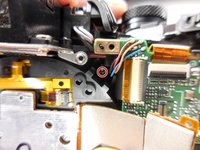
With the metal plate off, unplug this ribbon cable from the motherboard.
-
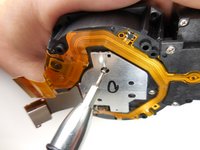
To remove the flat-topped connector, you simply lift it up to unplug it.
-
-
-
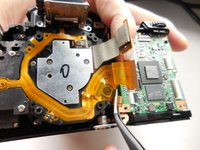
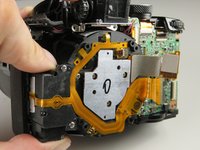
To get the lens assembly out, you need to remove four 6mm PH00 Philips screws
-
-
-
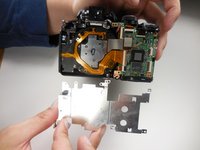
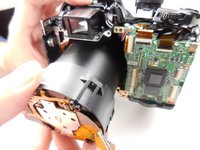
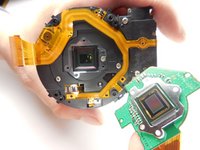
With the support screws out, you can simply slide the assembly out of the casing.
-
-
-
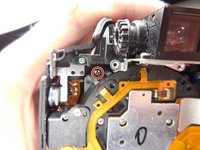
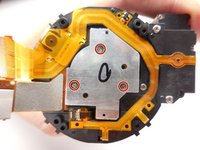
With the assembly out we need to take of this last piece by removing the three 3mm PH000 Philips screws.
-


To reassemble your device, follow these instructions in reverse order.
crwdns2935221:0crwdne2935221:0
crwdns2935229:09crwdne2935229:0
crwdns2935287:0crwdne2935287:0

Colorado Springs, Team 2-2, Panko Spring 2015 crwdns2935289:0Colorado Springs, Team 2-2, Panko Spring 2015crwdne2935289:0
UCCS-PANKO-S15S2G2
crwdns2931471:03crwdne2931471:0
crwdns2935297:015crwdne2935297:0